Bilješka
Pristup ovoj stranici zahtijeva provjeru vjerodostojnosti. Možete pokušati da se prijavite ili promijenite direktorije.
Pristup ovoj stranici zahtijeva provjeru vjerodostojnosti. Možete pokušati promijeniti direktorije.
This article describes how to create an Azure Arc site, upload an ownership voucher, and connect a provisioned machine to Azure.
Important
This feature is currently in PREVIEW. See the Supplemental Terms of Use for Microsoft Azure Previews for legal terms that apply to Azure features that are in beta, preview, or otherwise not yet released into general availability.
Prerequisites
Before you begin, make sure you complete the following prerequisites:
- Set up your subscription.
- Install the maintenance environment on your machine for small form factor deployments.
- Optionally, have a Windows PC with the Configurator App installed.
- Have an ownership voucher (
.pem) file for provisioning your small form factor machines.
Create and configure an Azure Arc site
Create the site
In the Azure portal, search for and select Azure Arc.
Go to Operations > Machine provisioning (preview).
On Get started, select Provision.
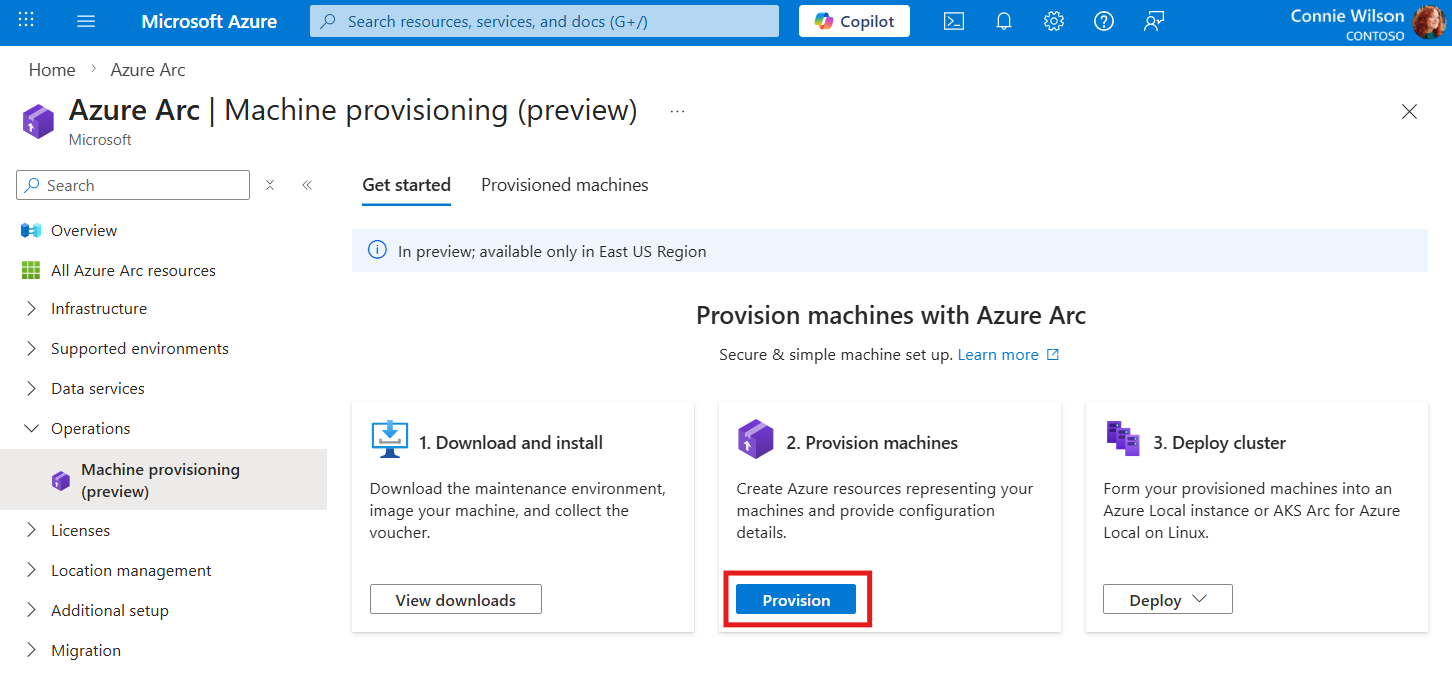
On the Basics tab, select Create new to create a new site, or choose an existing site.
Enter a site name, select your subscription, choose a resource group, and then select Create.
Note
By default, Azure creates a new resource group with the same name as the site. You can select an existing resource group instead.
Configure the site
On the Basics tab, select Configure under the selected site.
Configure the following settings on the Site Configuration pane.
Setting Value Use Azure Arc Gateway YesArc Gateway Select an existing gateway or create a new one Select Save.
SSH key for accessing your small form factor machine
Use SSH keys for secure remote access to the machine over SSH. During provisioning, the process generates a new SSH key pair. Azure creates both the public and private keys. Azure installs the public key on the small form factor machine, and you download the private key (.pem file) to your local computer. Use the downloaded private key later to connect to the machine over SSH.
Store the private SSH key securely. If you lose the private key and don't configure another authentication method like JIT, you might lose SSH access to the provisioned machine.
For example:
ssh -i mykey.pem clouduser@<ip-address>
Add the machine
To add your machine:
Under Provisioned machines, select Add.
In the Add machines using ownership vouchers pane, upload the ownership voucher that you created in Install the maintenance environment on your machine. Select Add.
In the Operating system dropdown list, select Azure Linux 2607.
Note
You must select Azure Linux 2607 to deploy Azure Local small form factor. Selecting a different option results in deployment failures later on.
Enter a name for the SSH key that you use later.
Select Review + create.
Wait for the machine to become ready
During provisioning, the machine moves through several lifecycle states. The following diagram shows the possible machine states and transitions during provisioning.
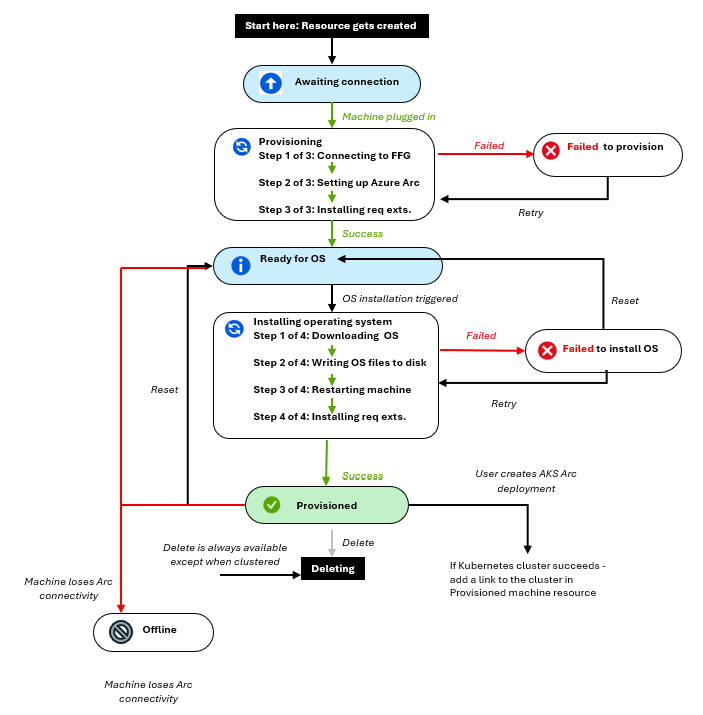
Provisioning can take 40-60 minutes to complete.
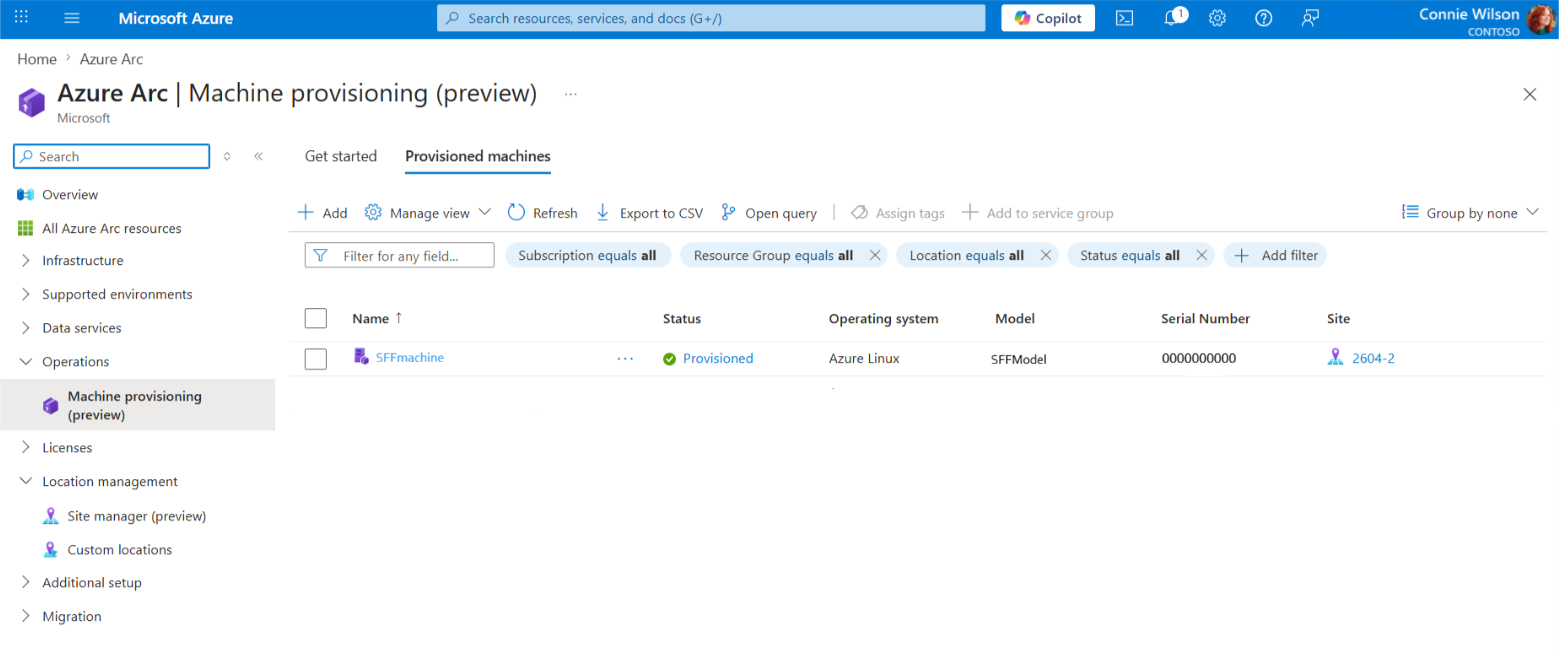
Open the Provisioned machines tab.
Wait until Status changes to Provisioned.
Optional: Configure devices with Configurator App
The Configurator App can help you configure static IP settings and advanced networking options and monitor installation progress.
To use the app:
- Install the Configurator App. Follow this link to download the Configurator App
- Reopen the app and run it as an administrator.
- Connect by using the device serial number or the IP address shown on the console.
- If the device is still running the maintenance environment (ROE), sign in with:
- Username:
edgeuser - Password:
Password1
- Username:
- After the target OS is installed, sign in by using your SSH key and configured username.