Bilješka
Pristup ovoj stranici zahtijeva provjeru vjerodostojnosti. Možete pokušati da se prijavite ili promijenite direktorije.
Pristup ovoj stranici zahtijeva provjeru vjerodostojnosti. Možete pokušati promijeniti direktorije.
This article describes how to run containerized workloads on a provisioned machine for small form factor deployments of Azure Local.
The image includes Docker by default. If you want a lightweight Kubernetes environment, you can also install the open-source K3s distribution.
To compare these options before you choose one, see Container orchestrators.
Important
This feature is currently in PREVIEW. See the Supplemental Terms of Use for Microsoft Azure Previews for legal terms that apply to Azure features that are in beta, preview, or otherwise not yet released into general availability.
Prerequisites
Before you begin, make sure that you have:
- Successfully created a provisioned machine that you can reach over SSH
- A Windows PC on the same local network as the provisioned machine
- Azure CLI installed and signed in
Choose your approach
- Use Docker if you want the fastest way to run a container on a single device.
- Use K3s if you want Kubernetes APIs,
kubectlworkflows, or a lightweight orchestration layer. - Use AKS if you want an end-to-end Microsoft stack with a Microsoft managed Kubernetes solution.
Use Docker on the provisioned device
Docker is already installed on the provisioned device image, so you can start immediately.
Docker is a good fit when you want:
- A simple runtime on a single device
- A fast way to validate a containerized application
- A lightweight workflow for troubleshooting or early testing
Verify that Docker is installed
Run the following command:
docker --version
Pull and run a container from Azure Container Registry
If you don't already have an Azure Container Registry, complete step 1. Otherwise, skip to step 2.
Create an Azure Container Registry by following Quickstart: Create a container registry in the portal.
Note
Use the same Location and Resource Group as your provisioned machine.
Sign in to your registry from the terminal:
docker login <YOUR_REGISTRY_NAME>.azurecr.ioReplace
YOUR_REGISTRY_NAMEwith your registry name. You can find the authentication server name on the Overview page of the registry in the Azure portal.When prompted for credentials, open the Azure portal and select Access keys under Settings for your container registry.
Enable Admin user if it isn't already enabled.
Copy the Username value and paste it into the terminal.
Select Show, copy the password, and paste it into the terminal.
After sign-in succeeds, Docker displays
Login Succeeded.Note
Docker stores credentials in
~/.docker/config.json. For production workloads, consider using an Azure Container Registry credential helper instead.Pull, tag, and push the public
hello-worldtest image. ReplaceYOUR_REGISTRY_NAMEwith your registry name.docker pull hello-world docker tag hello-world <YOUR_REGISTRY_NAME>.azurecr.io/hello-world:latest docker push <YOUR_REGISTRY_NAME>.azurecr.io/hello-world:latestNote
To confirm the push succeeded, open the registry in the Azure portal, select Services > Repositories, and verify that
hello-worldappears.On your provisioned machine, pull and run the image from Container Registry.
docker pull <YOUR_REGISTRY_NAME>.azurecr.io/hello-world:latest
docker run <YOUR_REGISTRY_NAME>.azurecr.io/hello-world:latest
If the container runs successfully, you see the standard
Hello from Docker!output.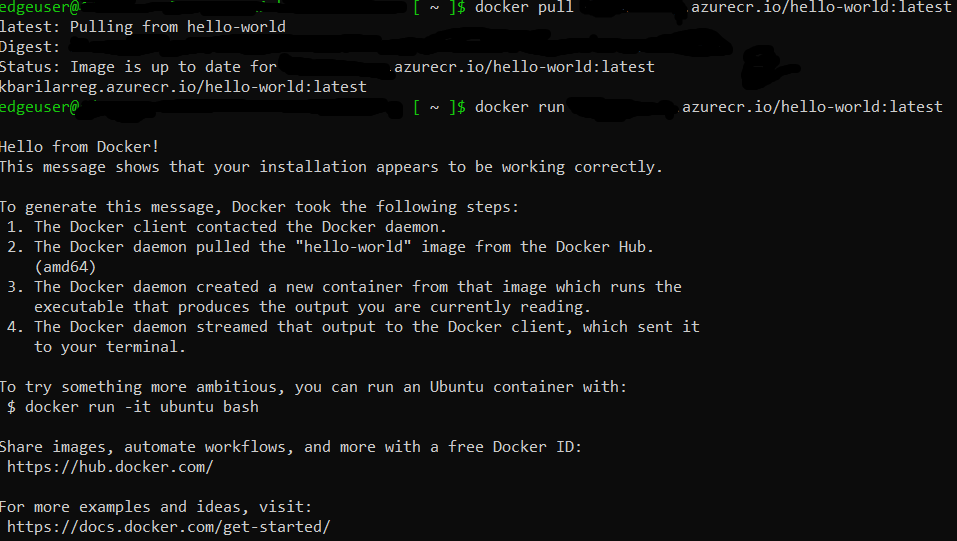
To list all containers, run:
docker ps -a
Review the Docker deployment
Confirm that:
- Docker is installed on the provisioned device.
- Docker sign-in to Container Registry succeeds.
- The
hello-worldimage is pushed to your registry. - The provisioned machine pulls the image from Container Registry successfully.
- The container runs and displays
Hello from Docker!.
Next steps
- Continue to Deploy applications.