Bilješka
Pristup ovoj stranici zahtijeva provjeru vjerodostojnosti. Možete pokušati da se prijavite ili promijenite direktorije.
Pristup ovoj stranici zahtijeva provjeru vjerodostojnosti. Možete pokušati promijeniti direktorije.
This article shows how to set up single sign-on (SSO) for the Defender for IoT sensor console. SSO uses Microsoft Entra ID so your users can sign in once. They don't need separate credentials for each sensor or site.
Microsoft Entra ID makes it easier to add or remove users, reduces admin work, and keeps access controls consistent across your organization.
Note
Signing in via SSO is currently in PREVIEW. The Azure Preview Supplemental Terms include other legal terms that apply to Azure features that are in beta, preview, or otherwise not yet released into general availability.
Prerequisites
Before you begin:
- Synchronize on-premises active directory with Microsoft Entra ID.
- Add outbound allow rules to your firewall, proxy server, and so on. You can access the list of required endpoints from the Sites and sensors page.
- If you don't have existing Microsoft Entra ID user groups to use for SSO authorization, work with your organization's identity manager to create relevant user groups.
- Verify that you have the following permissions:
- A Member user on Microsoft Entra ID.
- Admin, Contributor, or Security Admin permissions on the Defender for IoT subscription.
- Ensure that each user has a First name, Last name, and User principal name.
- If needed, set up Multifactor authentication (MFA).
Create an application ID in Microsoft Entra ID
To create an application ID in Microsoft Entra ID, perform the following steps:
In the Azure portal, open Microsoft Entra ID.
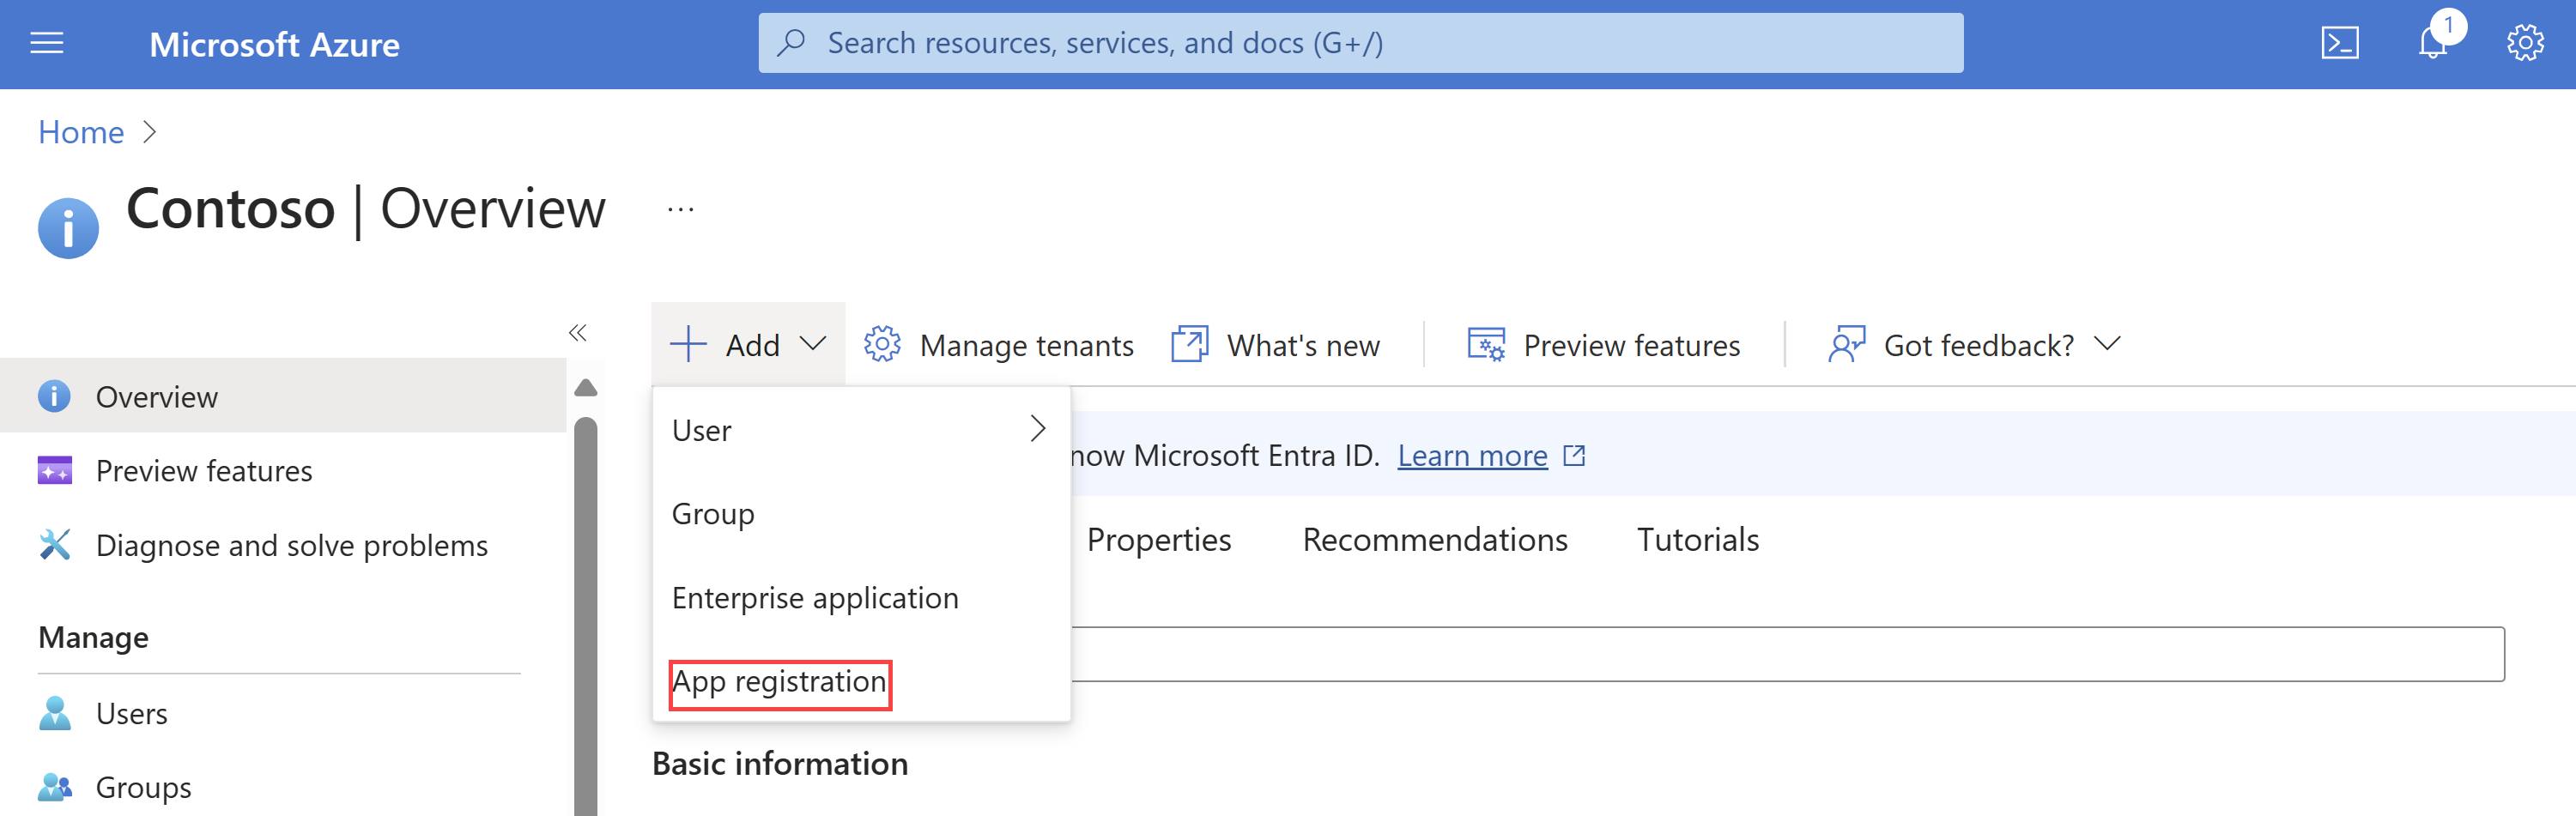
Select Add > App registration.
In the Register an application page:
- Under Name, type a name for your application.
- Under Supported account types, select Accounts in this organizational directory only (Microsoft only - single tenant).
- Under Redirect URI, add an IP or hostname for the first sensor on which you want to enable SSO. You continue to add URIs for the other sensors in the next step, Add your sensor URIs.
Note
Adding the URI at this stage is required for SSO to work.
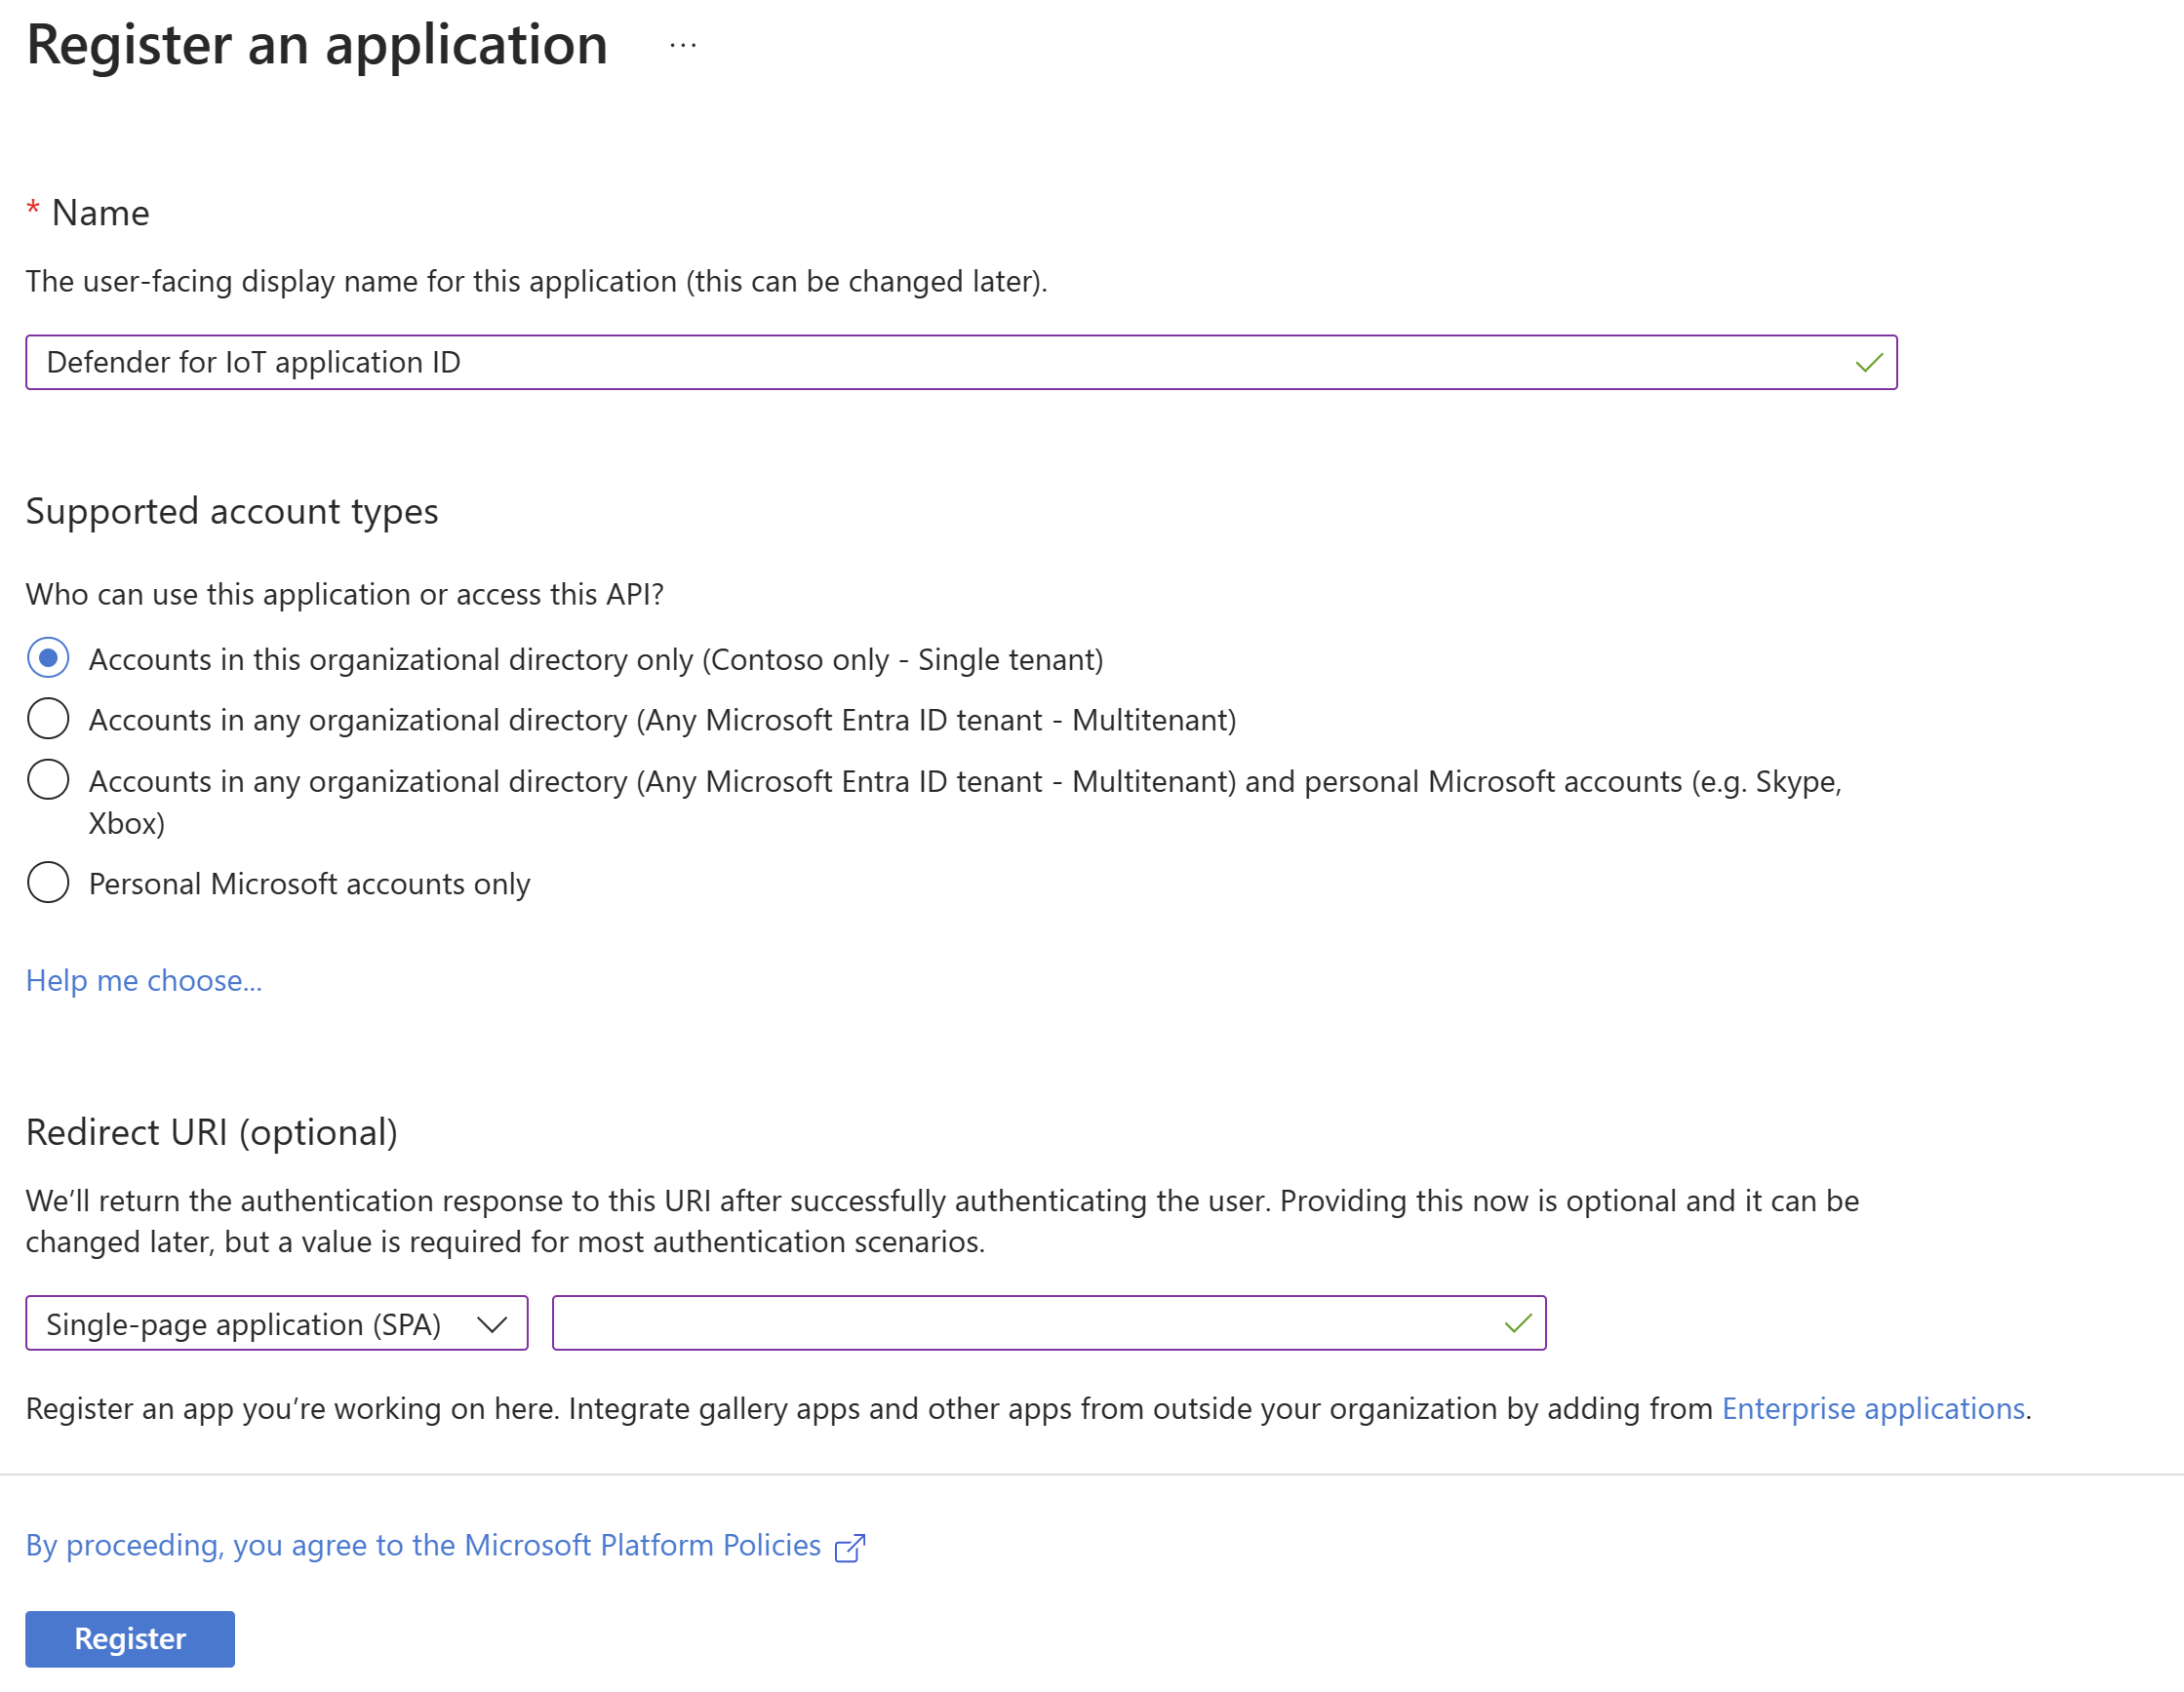
Select Register. Microsoft Entra ID displays your newly registered application.
Add your sensor URIs
Add the redirect URIs for each sensor to your registered application:
In your new application, select Authentication.
Under Redirect URIs, the URI for the first sensor, added in Create application ID on Microsoft Entra ID, is displayed under Redirect URIs. To add the rest of the URIs:
Select Add URI to add another row, and type an IP or hostname.
Repeat this step for the rest of the connected sensors.
When Microsoft Entra ID adds the URIs successfully, a "Your redirect URI is eligible for the Authorization Code Flow with PKCE" message is displayed.
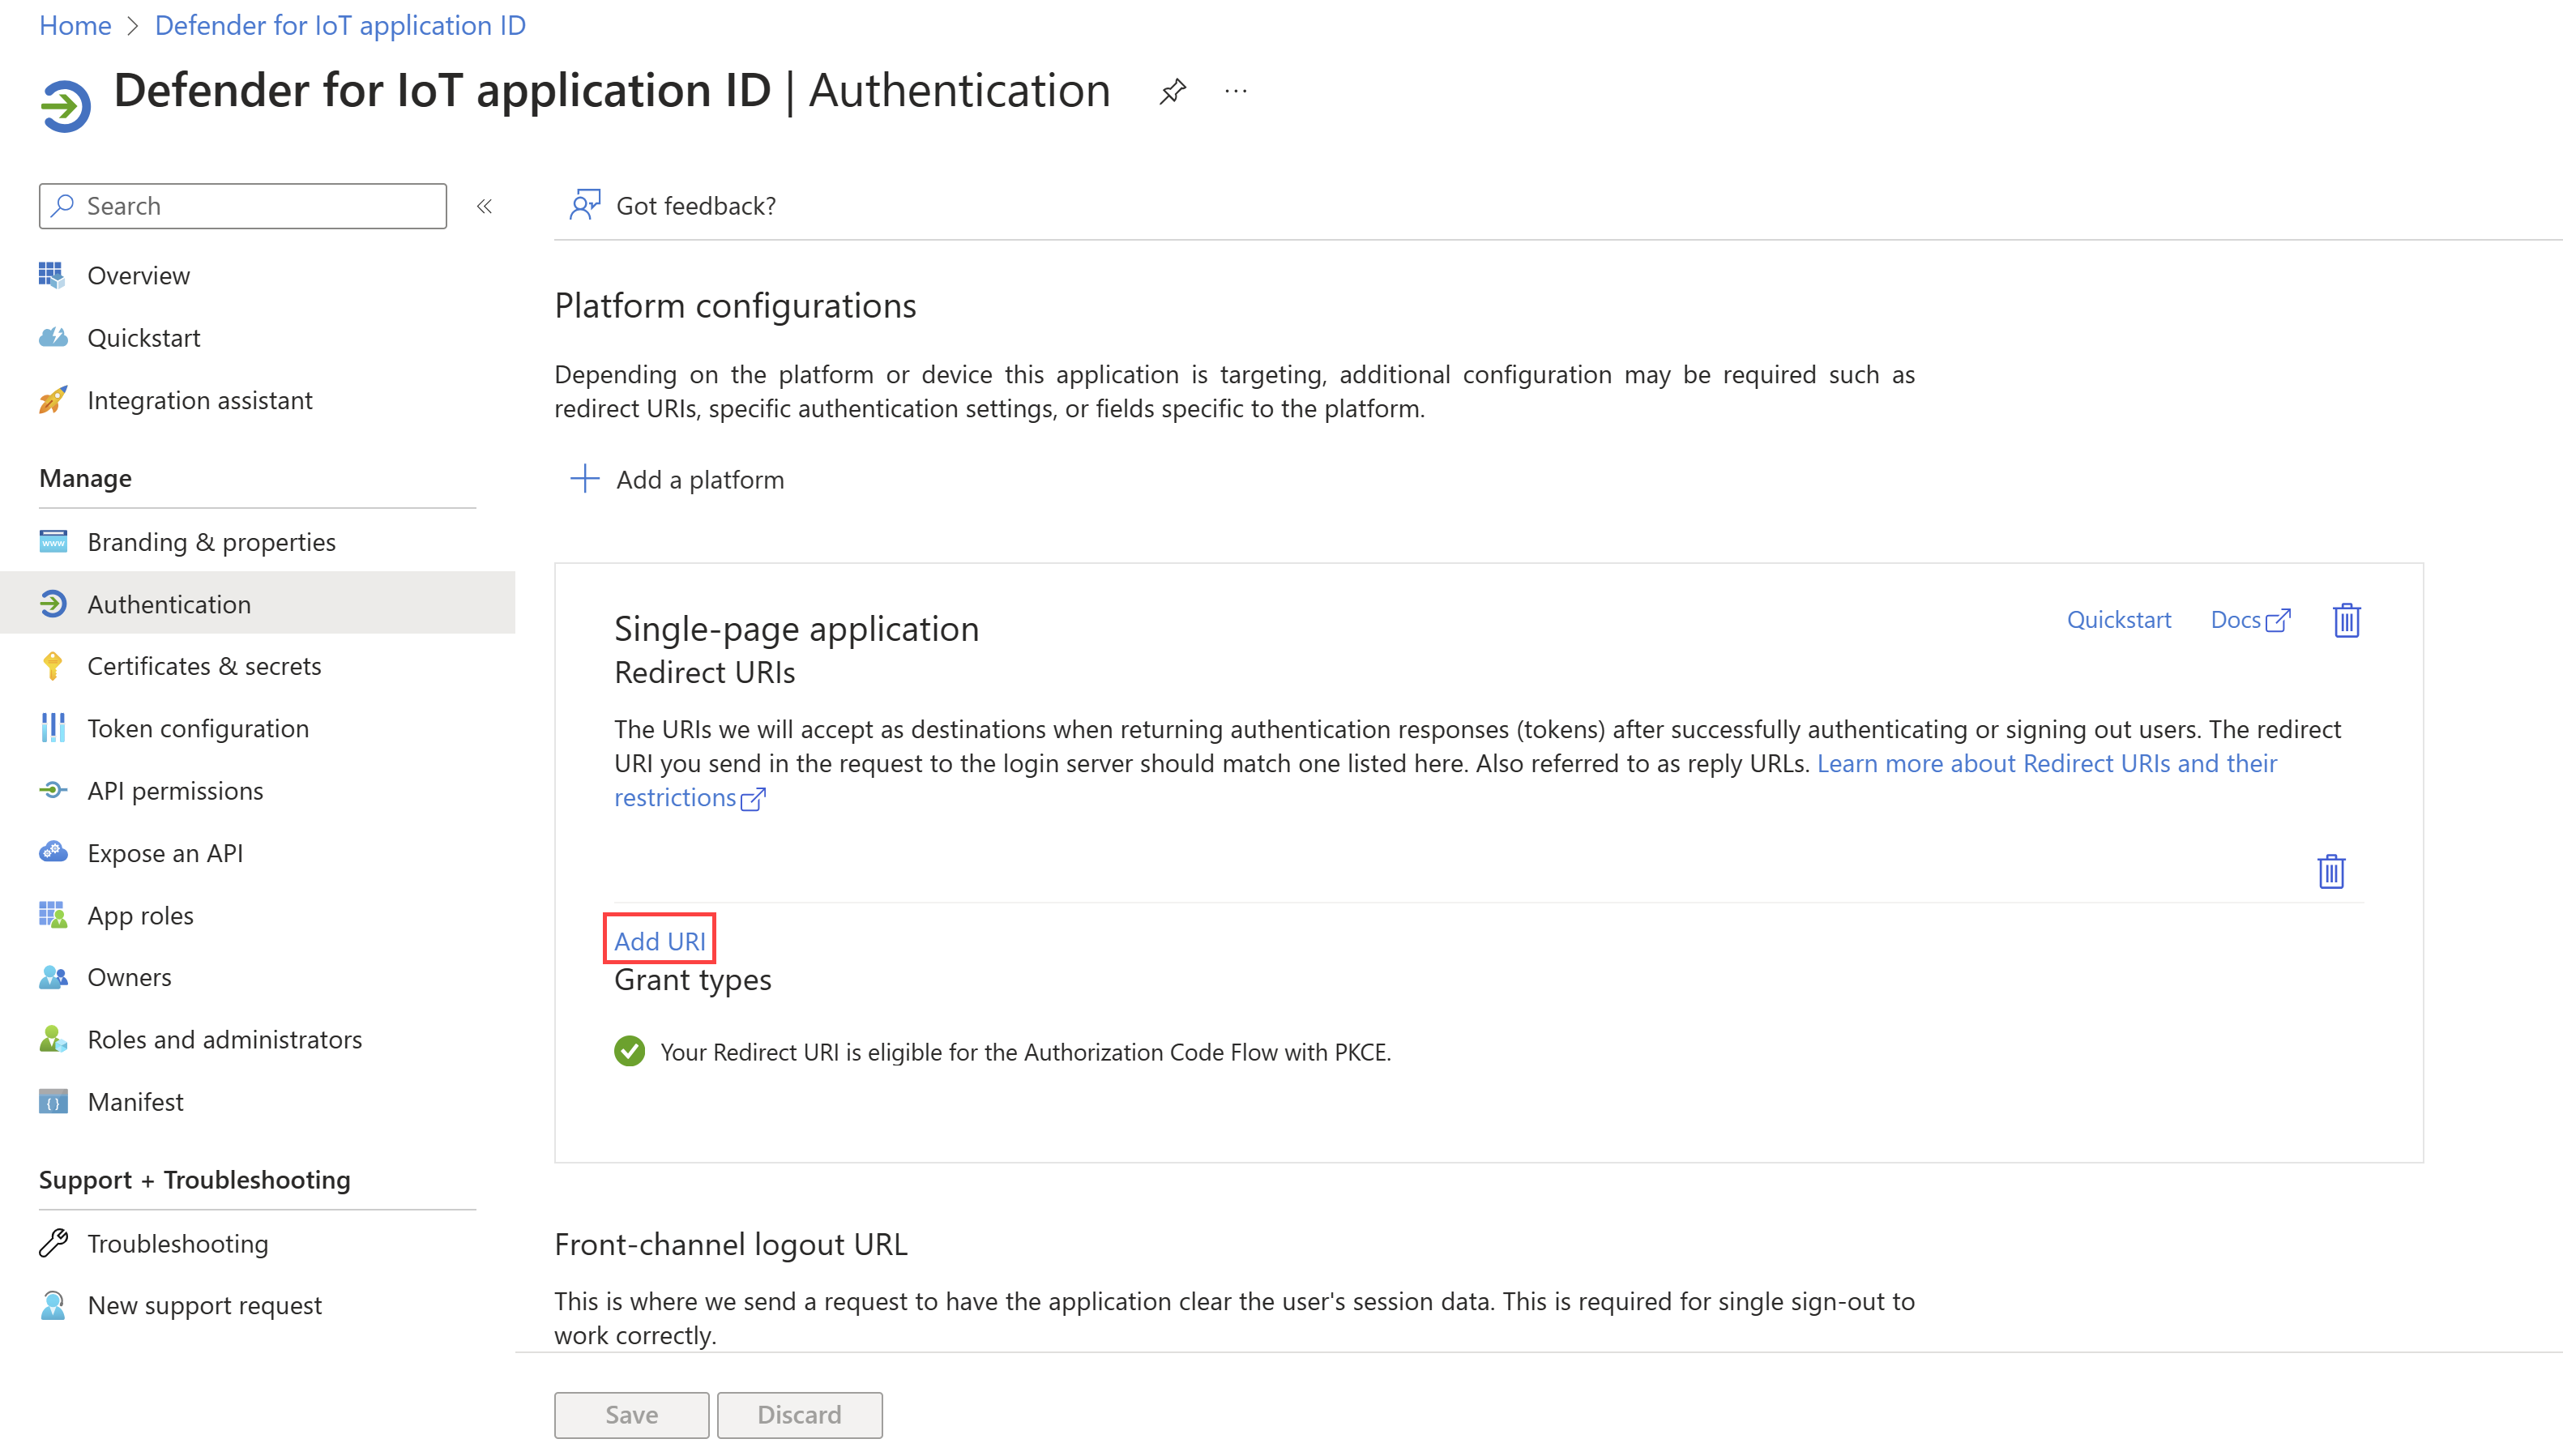
Select Save.
Grant API permissions
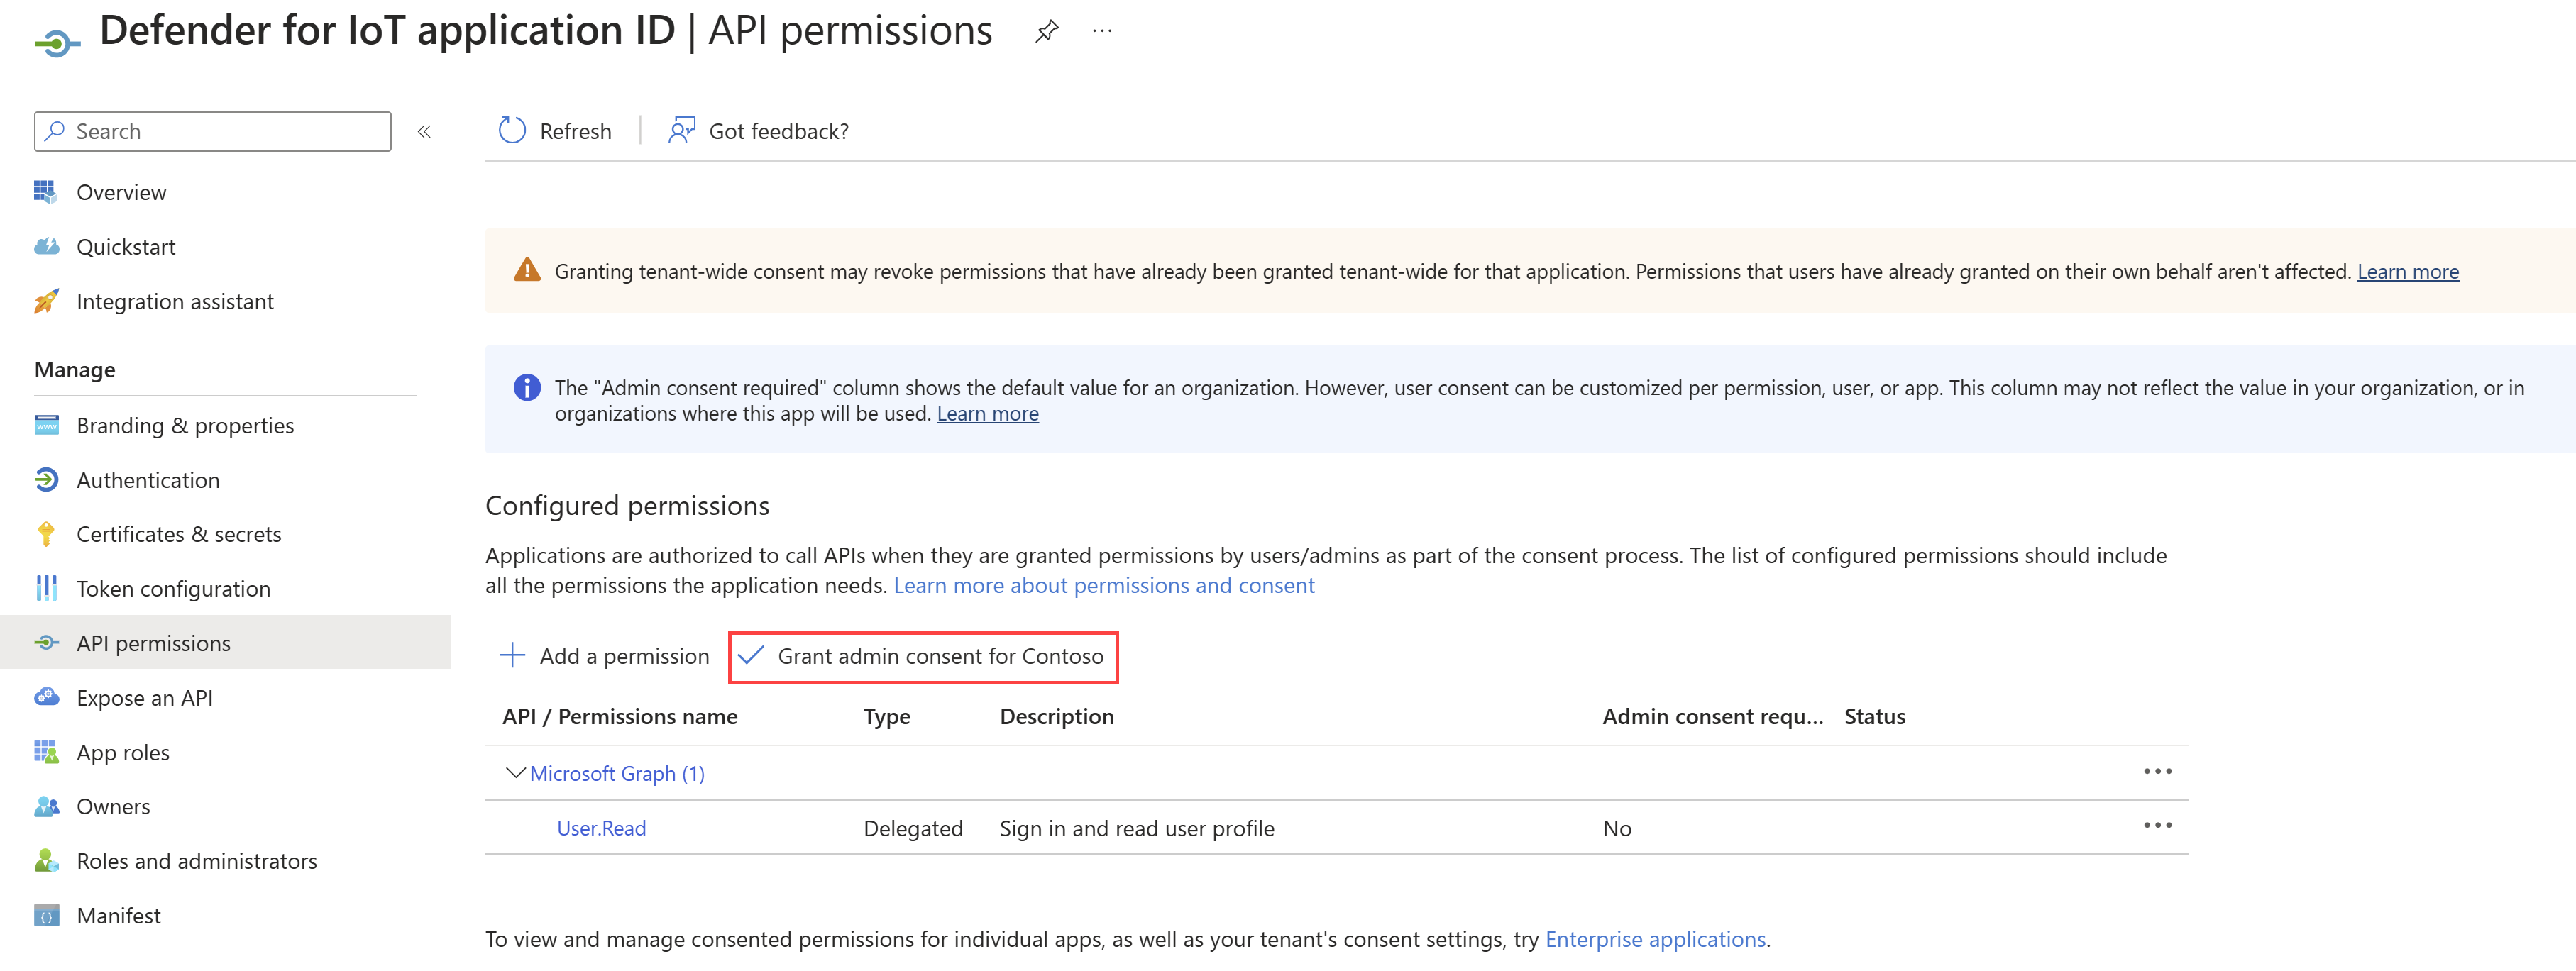
Your registered application needs the default Microsoft Graph User.Read permission to sign in users. An admin must grant tenant-wide consent so that all users can use SSO without individual approval prompts.
In your new application, select API permissions.
Select Grant admin consent for <Directory name>.
Configure single sign-on settings
Create the SSO configuration in Defender for IoT to enable single sign-on for your sensors:
In Defender for IoT on the Azure portal, select Sites and sensors > Sensor settings.
On the Sensor settings page, select + Add. In the Basics tab:
Select your subscription.
Next to Type, select Single sign-on.
Next to Name, type a name for the relevant site, and select Next.
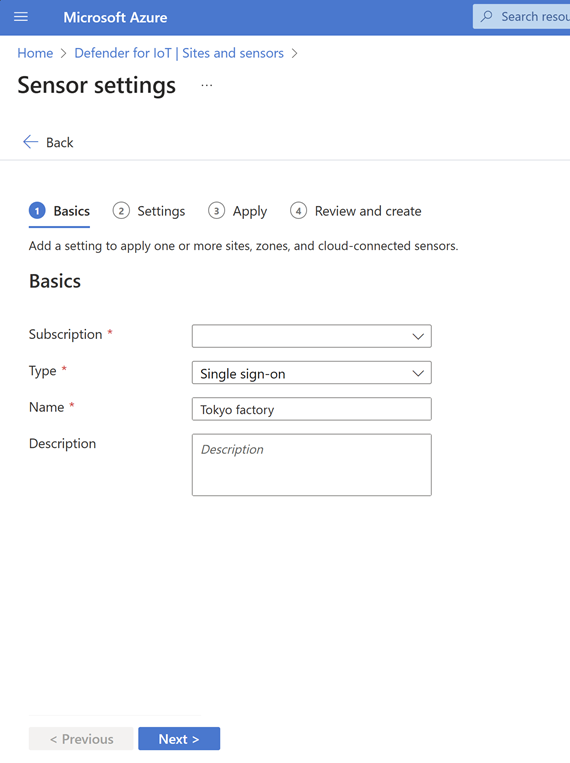
In the Settings tab:
Next to Application name, select the ID of the registered Microsoft Entra application.
Under Permissions management, assign the Admin, Security analyst, and Read only permissions to relevant user groups. You can select multiple user groups.
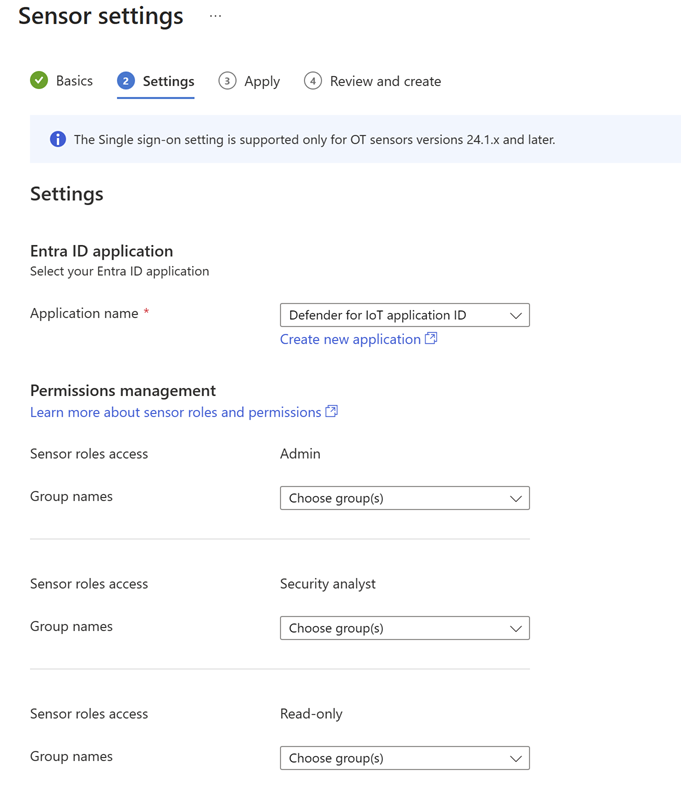
Select Next.
Note
Make sure you've added allow rules on your firewall/proxy for the specified endpoints. You can access the list of required endpoints from the Sites and sensors page.
In the Apply tab, select the relevant sites.
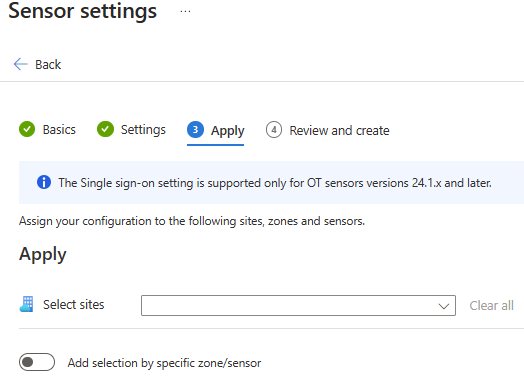
You can optionally toggle on Add selection by specific zone/sensor to apply your setting to specific zones and sensors.
Select Next, review your configuration, and select Create.
Test sign-in with SSO
To test signing in with SSO:
Open Defender for IoT on the Azure portal, and select SSO Sign-in.
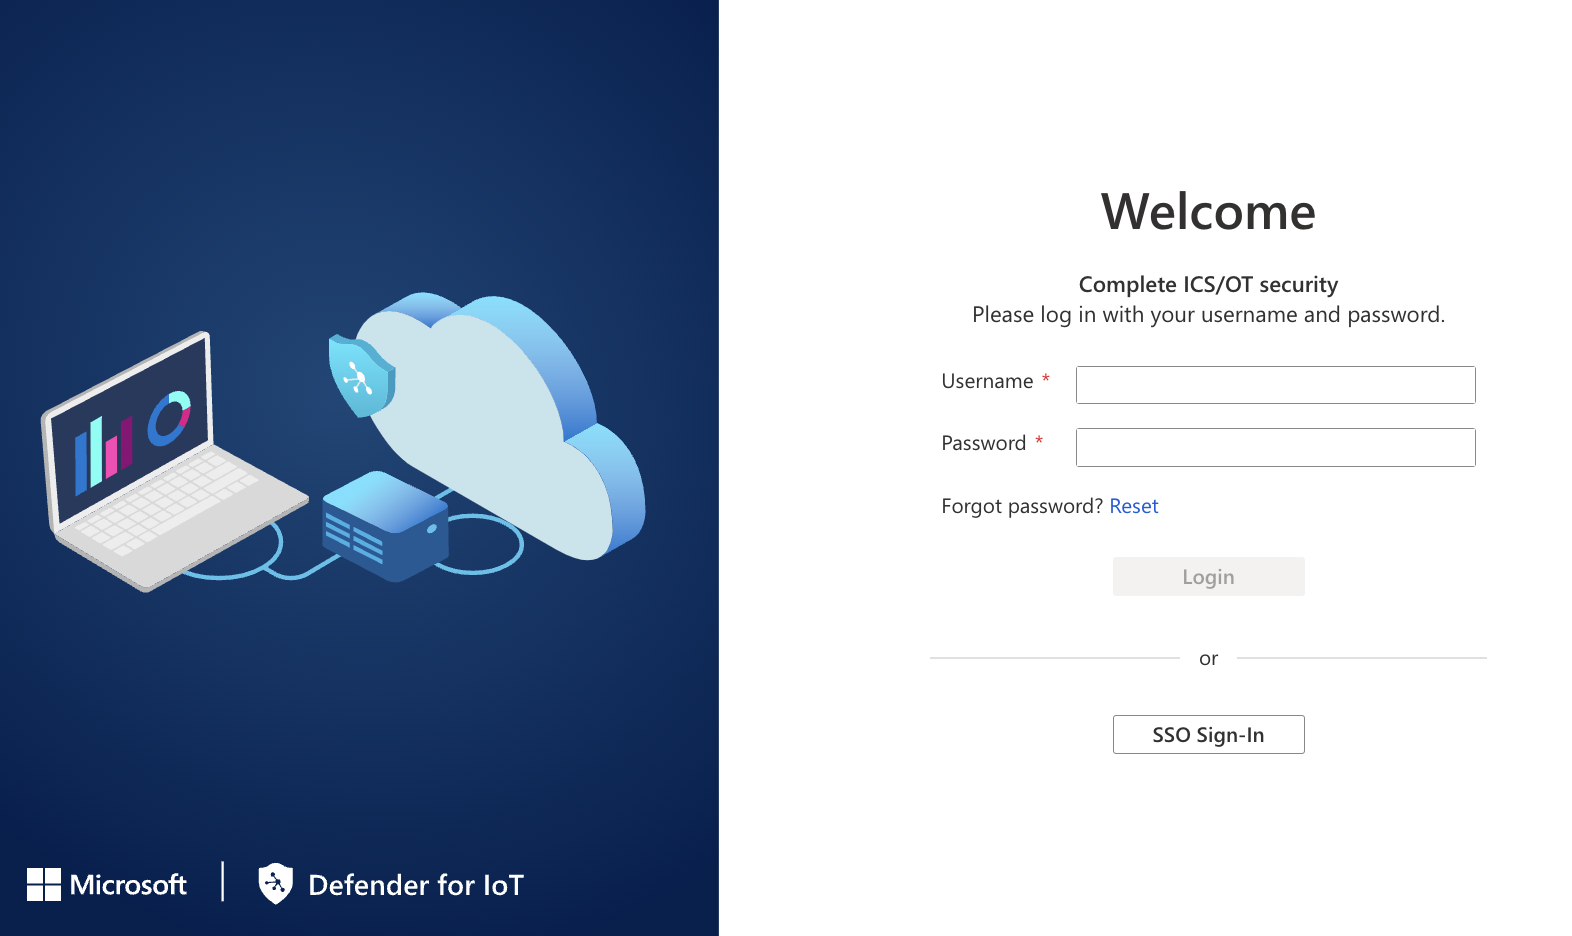
For the first sign in, in the Sign in page, type your personal credentials (your work email and password).
The Defender for IoT Overview page is displayed.