Bilješka
Pristup ovoj stranici zahtijeva provjeru vjerodostojnosti. Možete pokušati da se prijavite ili promijenite direktorije.
Pristup ovoj stranici zahtijeva provjeru vjerodostojnosti. Možete pokušati promijeniti direktorije.
In this quickstart, you create a Dedicated Azure Event Hubs cluster in the Azure portal, and then you create a namespace and an event hub within the cluster.
Event Hubs clusters offer single-tenant deployments for customers with the most demanding streaming needs. This offering has a guaranteed 99.99% service-level agreement (SLA), which is available only in the Dedicated pricing tier. An Event Hubs cluster can ingest millions of events per second with guaranteed capacity and subsecond latency. Namespaces and event hubs created within a cluster include all features of the Premium tier and more, but without any ingress limits. The Dedicated tier also includes the Event Hubs Capture feature at no extra cost, so you can automatically batch and log data streams to Azure Blob Storage or Azure Data Lake Storage Gen2.
Dedicated clusters are provisioned and billed by capacity units (CUs), a preallocated amount of CPU and memory resources. You can purchase up to 10 CUs for a cluster in the Azure portal. If you need a cluster larger than 10 CUs, submit an Azure support request to scale up your cluster after you create it. This quickstart walks you through creating a 1-CU Event Hubs cluster in the Azure portal.
Note
The Dedicated tier isn't available in all regions. To see supported regions, check the Location dropdown list on the Create Event Hubs Cluster page in the Azure portal. If you have questions about the Dedicated offering, contact the Event Hubs team.
Prerequisites
To complete this quickstart, you need:
- An Azure account with an active subscription. The Dedicated tier isn't supported with a free Azure account. If you don't have an account, create a pay-as-you-go account before you begin.
- A resource group.
Create an Event Hubs Dedicated Cluster
An Event Hubs cluster provides a unique scoping container in which you can create one or more namespaces.
Warning
You can't delete the cluster for at least four hours after you create it. Therefore, you're charged for a minimum of four hours of usage of the cluster. For more information on pricing, see Event Hubs - Pricing.
To create a cluster in your resource group using the Azure portal, complete the following steps:
Follow this link to create a cluster on Azure portal. Alternatively, select All services from the left navigation pane, then type Event Hubs Clusters in the search bar and select Event Hubs Clusters from the list of results.
On the Event Hubs Clusters page, select + Create on the toolbar.
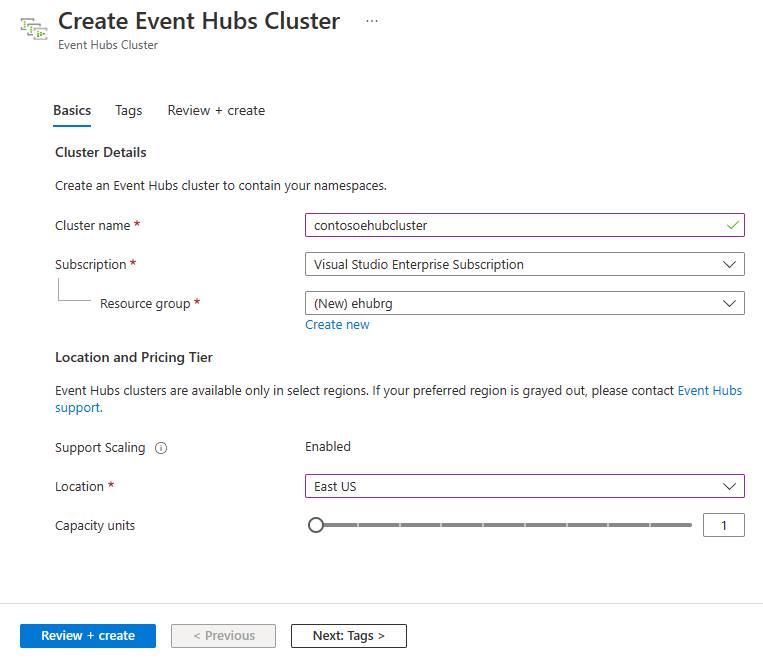
On the Create Cluster page, configure the following settings:
Enter a name for the cluster. The system immediately checks to see if the name is available.
Select the subscription in which you want to create the cluster.
Select the resource group in which you want to create the cluster.
Notice that the Support Scaling option is set to Enabled.
Select a location for the cluster. If your preferred region is grayed out or temporarily out of capacity, submit a support request to the Event Hubs team for further assistance.
For Capacity units, move the slider to set the number of CUs. The minimum value is 1 and the maximum value is 10.
Select the Next: Tags button at the bottom of the page. You might have to wait a few minutes for the system to fully provision the resources.
On the Tags page, configure the following settings:
- Enter a name and a value for the tag you want to add. This step is optional.
- Select the Review + Create button.
On the Review + Create page, review the details, and then select Create.
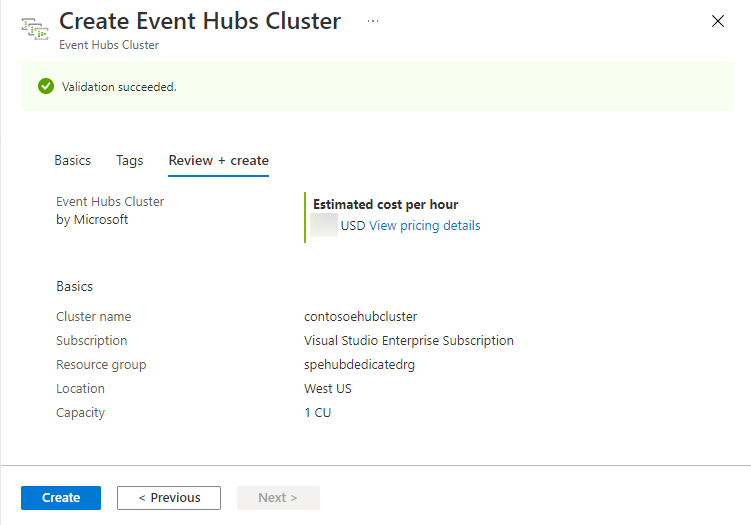
After the creation is successful, select Go to resource to navigate to the home page for your Event Hubs cluster.
Create a namespace and event hub within a cluster
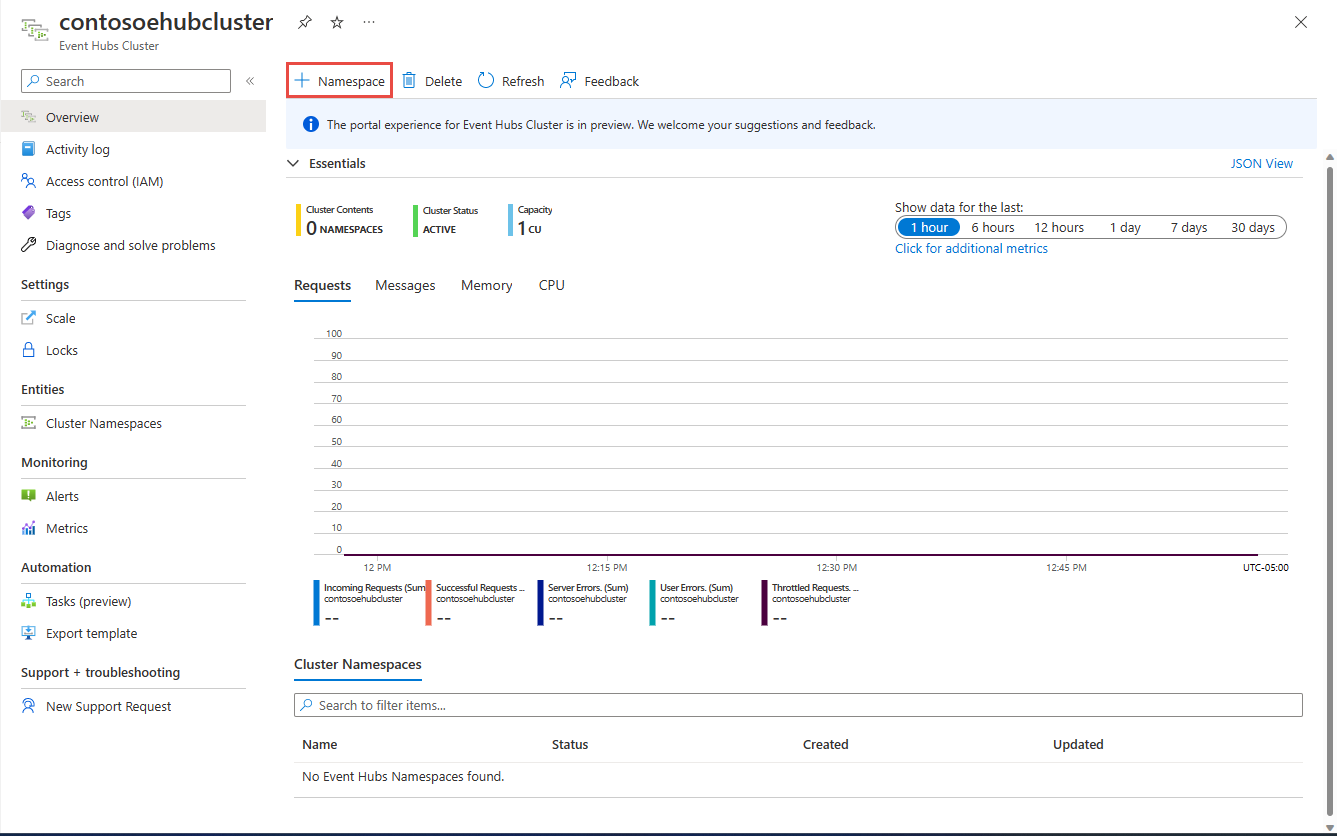
To create a namespace within a cluster, on the Event Hubs Cluster page for your cluster, select +Namespace from the top menu.
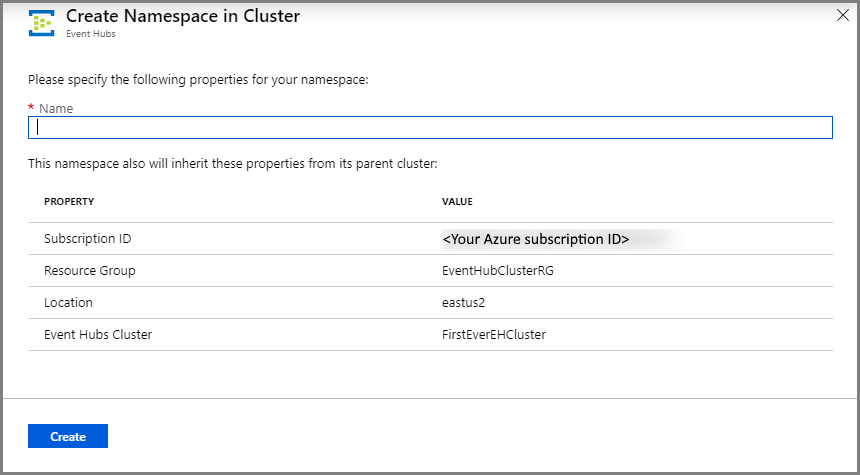
On the Create a namespace page, complete the following steps:
Enter a name for the namespace. The system checks to see if the name is available.
The namespace inherits the following properties:
- Subscription ID
- Resource Group
- Location
- Cluster Name
Select Create to create the namespace. Now you can manage your cluster.
After your namespace is created, you can create an event hub as you would normally create one within a namespace.
Scale a Dedicated cluster
Use the following steps to scale out or scale in your cluster.
On the Event Hubs Cluster page for your Dedicated cluster, select Scale on the left menu.
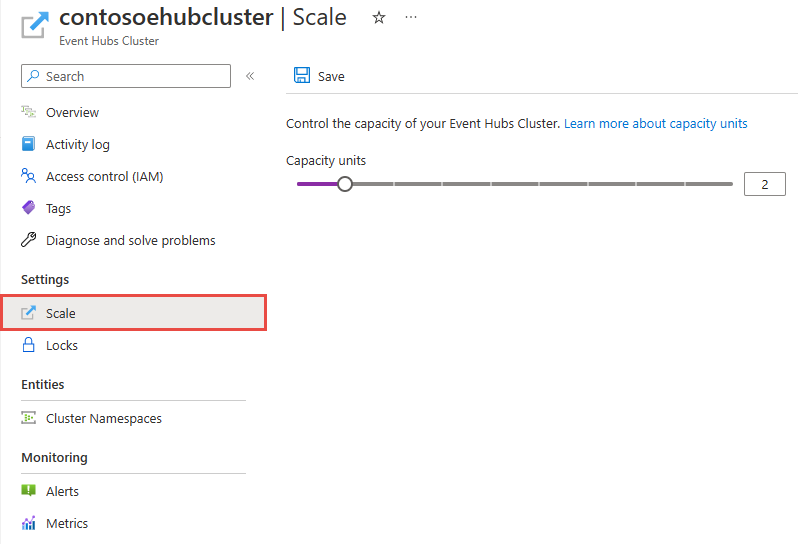
Use the slider to increase (scale out) or decrease (scale in) capacity units assigned to the cluster.
Then, select Save on the command bar.
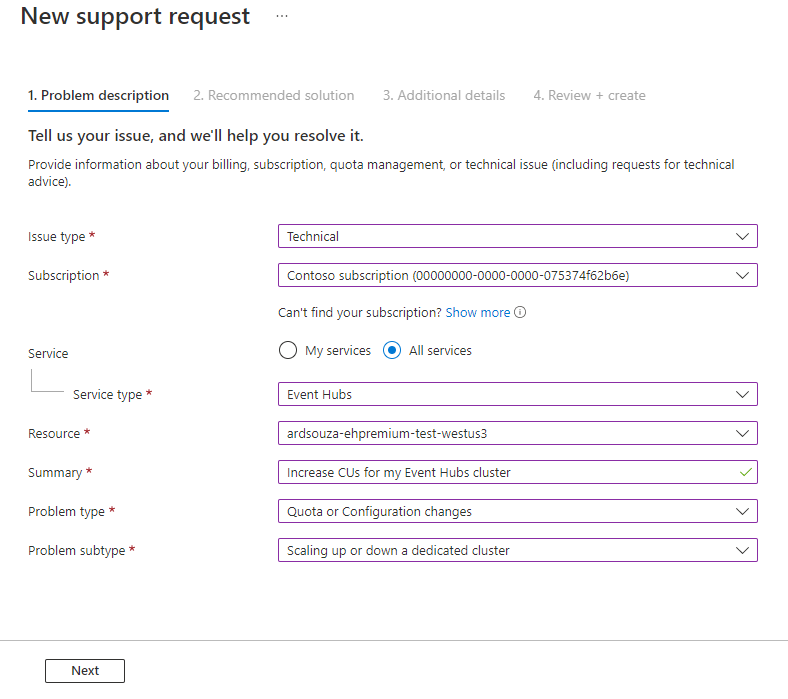
If you need a cluster larger than 10 CUs, or if your preferred region isn't available, submit a support request by using the following steps.
Submit a support request
- In Azure portal, select Help + support from the left menu.
- Select Create a support request on the toolbar.
- On the support page, follow these steps:
For Issue Type, select Technical from the drop-down list.
For Subscription, select your subscription.
For Service, select My services, and then select Event Hubs.
For Resource, select your cluster if it exists already, otherwise select General Question/Resource Not Available.
For Problem type, select Quota or Configuration changes.
For Problem subtype, select one of the following values from the drop-down list:
- Select Dedicated Cluster SKU requests to request that the feature be supported in your region.
- Select Scale up or down a Dedicated Cluster if you want to scale up or scale down your Dedicated cluster.
For Subject, describe the issue.
Delete a Dedicated cluster
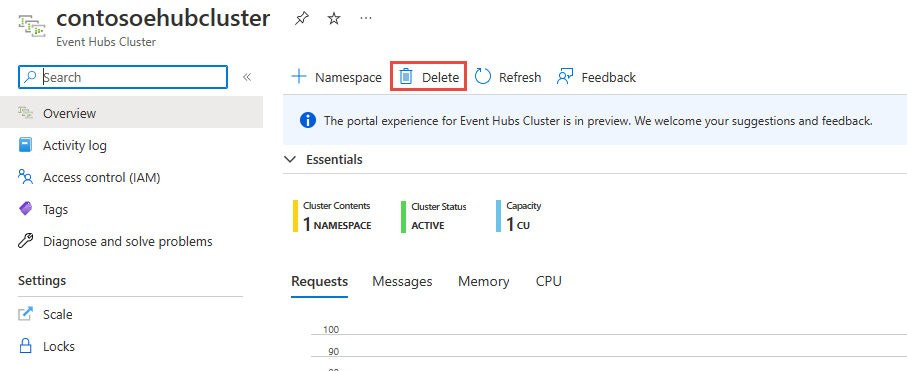
To delete the cluster, select Delete from the toolbar on the Event Hubs Cluster page for your cluster.
Important
You can't delete the cluster for at least four hours after you create it. Therefore, you're charged for a minimum of four hours of usage of the cluster. For more information on pricing, see Event Hubs - Pricing.
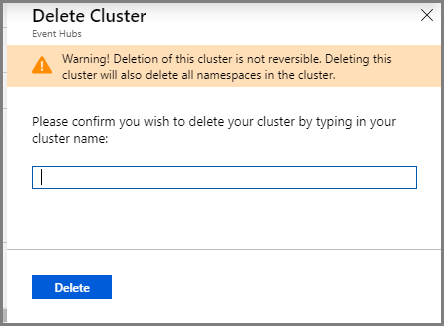
A message appears confirming your wish to delete the cluster.
Type the name of the cluster and select Delete to delete the cluster.
Related content
In this quickstart, you created an Event Hubs Dedicated cluster. For step-by-step instructions to send and receive events from an event hub, and to capture events to Azure Storage or Azure Data Lake Storage, see the following tutorials:
- Send and receive events:
- Use the Azure portal to enable Event Hubs Capture
- Use Azure Event Hubs for Apache Kafka