Bilješka
Pristup ovoj stranici zahtijeva provjeru vjerodostojnosti. Možete pokušati da se prijavite ili promijenite direktorije.
Pristup ovoj stranici zahtijeva provjeru vjerodostojnosti. Možete pokušati promijeniti direktorije.
Important
Managed HSM external key management is in preview. Preview features are made available to you on the condition that you agree to the supplemental terms of use. Some aspects of this feature might change before general availability.
In this quickstart, you use the Azure portal to register an EKM Proxy connection to your Managed HSM and create a key reference that points at a key in your customer-operated HSM.
If you prefer to use the Azure CLI, see Quickstart: Create your first external key using the Azure CLI.
Prerequisites
Before you begin, you need:
- An existing Managed HSM deployed in any Azure public region, with external key management enabled on the subscription by your Microsoft account team. Contact your account team to request enablement. To create a Managed HSM, see Quickstart: Provision and activate a Managed HSM using Azure CLI.
- An operational EKM Proxy reachable from Azure over the public internet on TCP port 443. For supported vendors, see What is Managed HSM external key management?.
- A key created in your external HSM with a known external key identifier. The external key identifier is the identifier your proxy uses to look up the key.
- The root CA certificate file that signed your proxy's TLS server certificate, in PEM format with a
.cerextension. - The
Managed HSM EKM Administratorrole to manage external key management connections, and theManaged HSM Crypto Userrole to create and use keys. For role assignment steps, see Managed HSM access control.
Sign in to Azure
Sign in to the Azure portal and navigate to your Managed HSM resource.
Show the Managed HSM client certificate
Managed HSM presents an X.509 client certificate to your EKM Proxy on every inbound mutual TLS (mTLS) connection. Before you create the proxy connection, retrieve the certificate details and configure your proxy to trust them.
In the left navigation under Settings, select External Key Management (Preview).
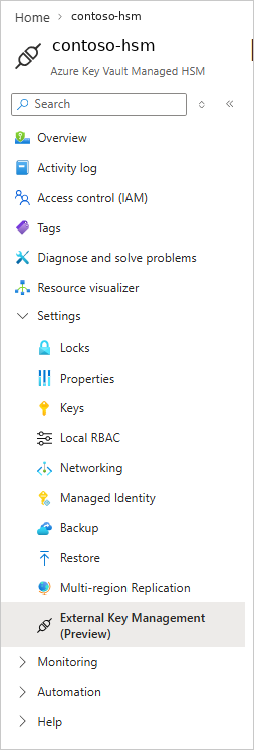
The Client Certificate section at the top of the blade shows the certificate details your proxy needs.

Copy the Subject Common Name value. Your proxy must add this value to its client certificate allow-list.
Select Download Root CA Certificates to download the root CA certificates that issued the Managed HSM client certificate. Your proxy must trust these CAs.
Configure your EKM Proxy to allow connections from clients presenting a certificate with this subject common name, issued by one of the downloaded CAs. The exact steps depend on your proxy vendor's configuration interface.
For details on certificate rotation, see Configure networking and mTLS for Managed HSM external key management.
Create the external key management connection
The Manage EKM Proxy Connection section registers your proxy's address and the CA certificate Managed HSM uses to validate the proxy's server certificate.
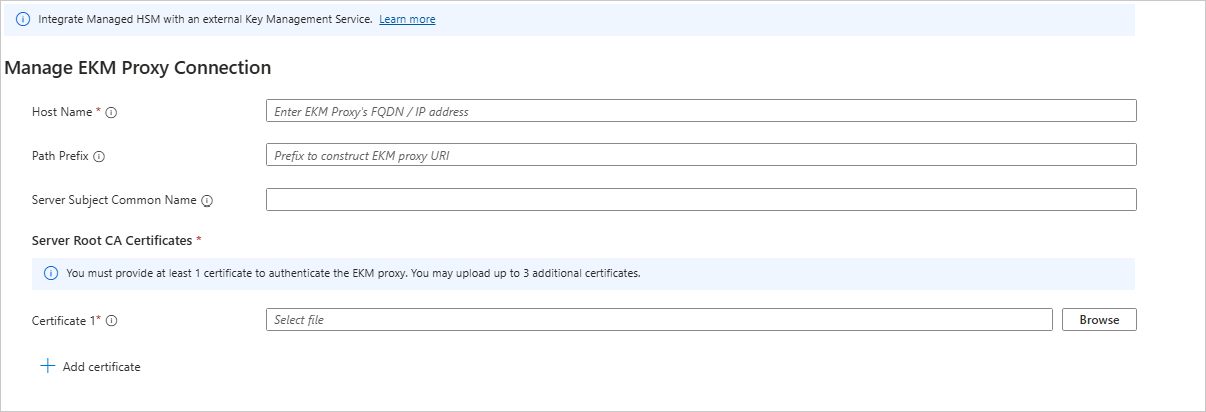
In the Host Name field, enter the fully qualified domain name (FQDN) or IP address of your EKM Proxy. For example,
proxy.contoso.com. The proxy must listen on TCP port 443.(Optional) In the Path Prefix field, enter a URL path prefix if your proxy uses path-based routing. For example,
/contoso/prod.In the Server Subject Common Name field, enter the subject common name from your proxy's TLS server certificate. This field is optional when you connect using an FQDN, but required when you connect using an IP address.
Under Server Root CA Certificates, select + Add certificate and upload the root CA certificate that signed your proxy's TLS server certificate. The file must be in PEM format with a
.cerextension. You must upload at least one certificate. You can upload up to four certificates total to support CA rotation without downtime.
Select Save in the toolbar.
Note
Each Managed HSM pool supports one EKM Proxy connection. The connection is identified by the host name you enter.
Verify the connection
After saving, the Connection Status section at the bottom of the blade updates to reflect whether Managed HSM can reach your proxy and complete the mTLS handshake.
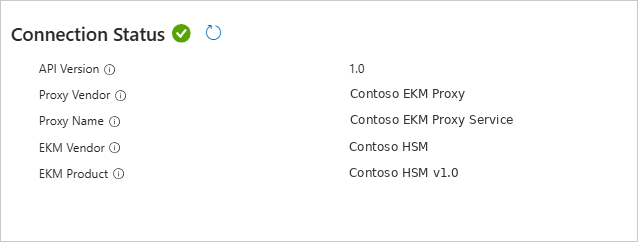
A green checkmark next to Connection Status indicates a successful connection. The section also shows:
- API Version — the EKM Proxy API version the proxy reported.
- Proxy Vendor — the vendor name the proxy reported.
- Proxy Name — the proxy service name.
- EKM Vendor — the external HSM vendor.
- EKM Product — the external HSM product name and version.
If the status shows an error, see Troubleshoot Managed HSM external key management.
Create an external key
In the left navigation, select Keys.
Select + Generate/Import.
In the Options dropdown, select Generate external key.
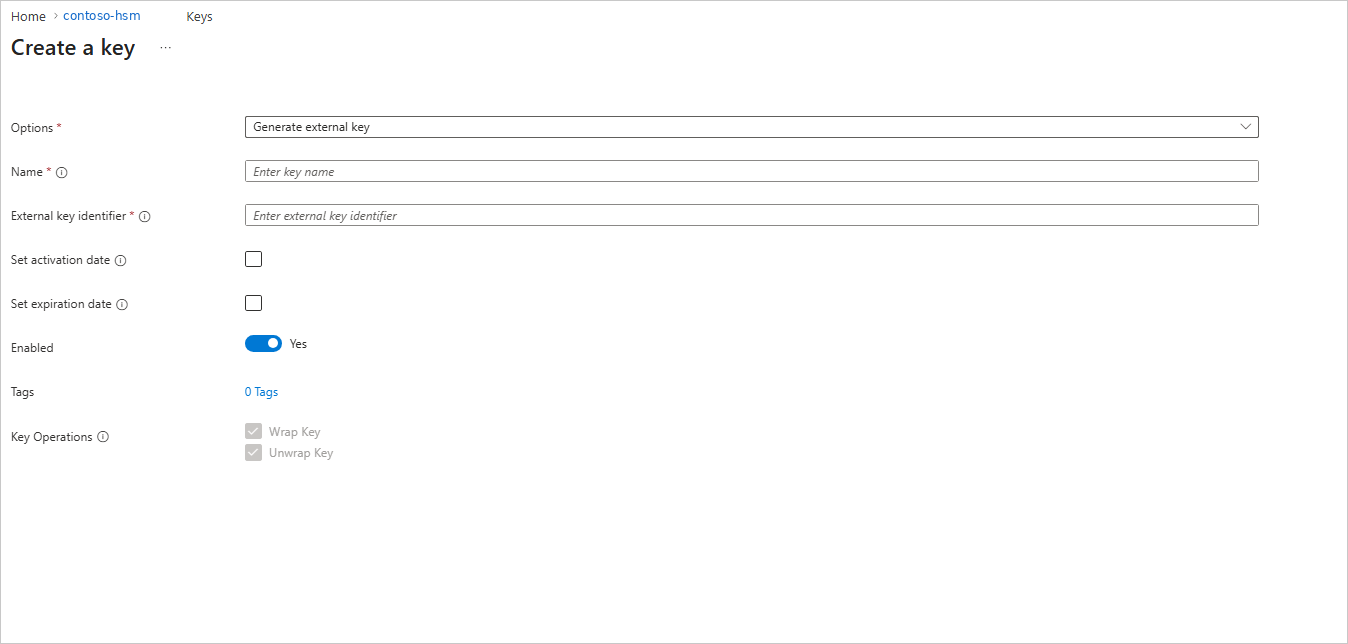
Set the following values:
- Name — enter a name for the key reference. This name becomes part of the key URI that Azure services use.
- External key identifier — enter the external key identifier that your proxy uses to look up the key in your external HSM.
Select Create.
The key URI appears in the key list in the form https://<hsm-name>.managedhsm.azure.net/keys/<key-name>/<version>. Use this URI when configuring customer-managed key (CMK) settings in Azure services.
Important
The external key identifier is immutable after the key reference is created. To rotate to a new external key, create a new key version with a new external key identifier.
Verify wrap/unwrap
The Azure portal doesn't provide a built-in test operation for external key wrap and unwrap. To run an end-to-end wrap/unwrap round-trip against your new key, use the Azure CLI. See Verify wrap/unwrap in the CLI quickstart for the exact commands.
View audit logs
Every EKM Proxy call produces an EkmProxyOperation entry in your Managed HSM diagnostic logs.
In the left navigation under Monitoring, select Diagnostic settings.
If diagnostic settings aren't configured, select + Add diagnostic setting, enable AuditEvent, and send logs to a Log Analytics workspace.
To query external key management activity, use the following KQL query in your Log Analytics workspace:
AzureDiagnostics
| where ResourceProvider == "MICROSOFT.KEYVAULT"
| where OperationName contains "Ekm"
| project TimeGenerated, Resource, OperationName, requestUri_s, ResultType, ResultDescription
| order by TimeGenerated desc
For the full logging and monitoring guide, see Logging and monitoring for Managed HSM external key management.
Clean up resources
To remove the resources created in this quickstart:
In the left navigation, select Keys, select the key reference you created, select the key version, and then select Delete.
In the left navigation under Settings, select External Key Management (Preview).
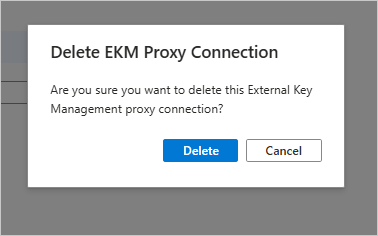
Select Delete in the toolbar to remove the EKM Proxy connection. When prompted, select Delete to confirm.
Deleting the key reference and proxy connection doesn't affect the key material in your external HSM.
Next steps
- Quickstart: Create your first external key using the Azure CLI — verify wrap and unwrap with the CLI commands
- External key lifecycle in Managed HSM external key management — key rotation, versioning, and decommissioning external keys
- Configure networking and mTLS for Managed HSM external key management — connectivity model and certificate rotation
- Logging and monitoring for Managed HSM external key management — alert rules, KQL queries, and proxy log correlation
- Troubleshoot Managed HSM external key management — error codes, proxy diagnostics, and remediation steps