Bilješka
Pristup ovoj stranici zahtijeva provjeru vjerodostojnosti. Možete pokušati da se prijavite ili promijenite direktorije.
Pristup ovoj stranici zahtijeva provjeru vjerodostojnosti. Možete pokušati promijeniti direktorije.
This article describes how to manage your Everpure Cloud resource and connect storage to your Azure VMware Solution (AVS) resource.
Resource overview
Begin by signing in to the Azure portal.
In the Azure portal search bar, enter All resources and select All resources from the results.
From the Resources list, select your resource.
The Azure portal shows the resource with the Overview page open, by default.
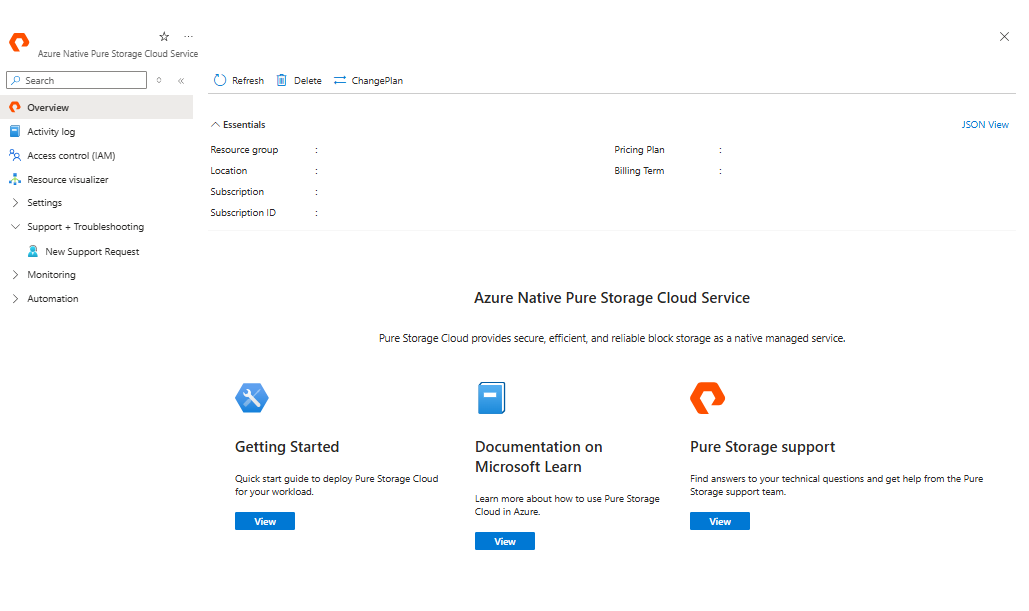
The Essentials details include:
- Resource group
- Location
- Subscription
- Subscription ID
- Pricing Plan
- Billing Term
To manage your resource, select the links next to each detail.
In the section after the essentials, you can select the links to navigate to other details about your resource.
- Get Started
- Documentation on Microsoft Learn
- Everpure Cloud support
Create a storage pool
After you create a resource, you can create a storage pool to connect to an Azure VMware Solution resource.
Select Settings > Storage Pool from the sidebar menu.
Select Create a new storage pool from the working pane's command bar.
The Create a Storage Pool window appears.
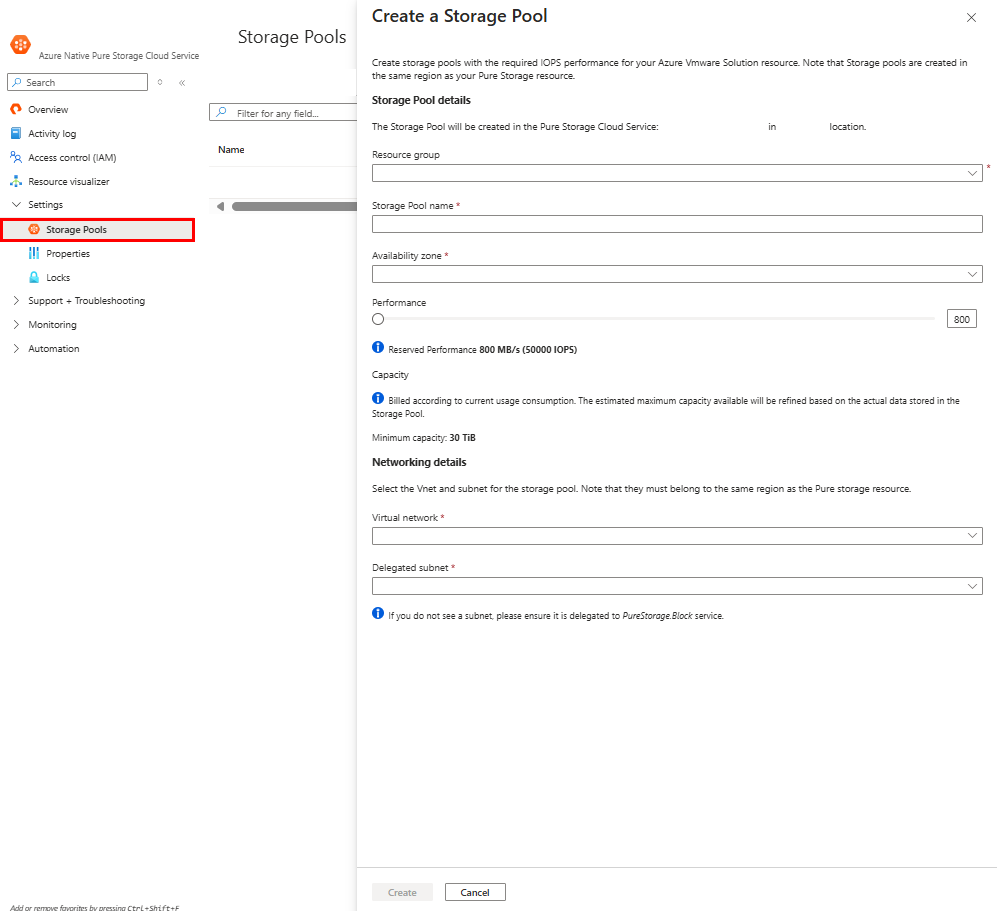
Fill out the required fields.
Note
The storage pool defaults to the same region as your Everpure Cloud resource.
Enter values for each required setting.
Setting Value Resource group Choose a resource group. Storage Pool name Provide a name for your storage pool. Availability zone Choose an availability zone. Performance Adjust the performance slider. Virtual network Choose a virtual network. Delegated subnet Choose a delegated subnet. Select the Create button.
Note
Deployment can take up to one hour to complete.
Connect volumes to Azure virtual machines
For the native VM use case, create a volume group in a storage pool, create one or more volumes in that volume group, and then mount the volume group to a supported Azure virtual machine.
Create a volume group
- Select the storage pool where you want to create the volume group.
- In the sidebar, expand Storage management, and then select Volume Groups.
- Select Create a Volume Group.
- Enter a name for the volume group. To customize specific QoS settings, expand Advanced Settings.
- Select Create.
The new volume group appears in the list of available volume groups. Provisioning typically takes a few minutes.
Create a volume
- Open the volume group where you want to create the volume.
- Select Create a Volume.
- Enter the volume details, including the volume name and provisioned size.
- Select Create.
Provisioning a new volume typically takes a few minutes. After creation, the volume appears in the volume group. A single volume group can contain up to 64 volumes.
Mount a volume group to an Azure VM
- Open the volume group that contains the volume that you want to use, and then select the option to mount the volume group to a VM.
- Review the volume group details, such as the virtual network and the storage pool availability zone.
- In the Azure VM details section, select the VM that you want to use. The selector presents VMs in the same Azure region and subscription as the service.
- Select the number of iSCSI sessions, and choose whether to restart the VM automatically if a restart is required.
- Select Mount.
When you start the mount operation, the service deploys an Azure VM extension on the selected VM. The extension automates the guest-side configuration that is required for the mount operation, including iSCSI session configuration and the expected operating system settings, so that you don't need to complete a separate manual host-side runbook.
Connect a Storage Pool to an Azure VMware Solution resource
Important
- Before you can connect a storage pool to an Azure VMware Solution resource, you must create a Storage Pool and an Azure VMware Solution.
- All hosts must be in the same host location within the same Azure subscription.
- To connect your storage pool to an Azure VMware Solution resource, you must be an Owner or RBACAdministrator in your subscription.
Begin by signing in to the Azure portal.
In the Azure portal search bar, enter All resources and select All resources from the results.
From the Resources list, select your resource.
The Azure portal shows the resource with the Overview page open, by default.
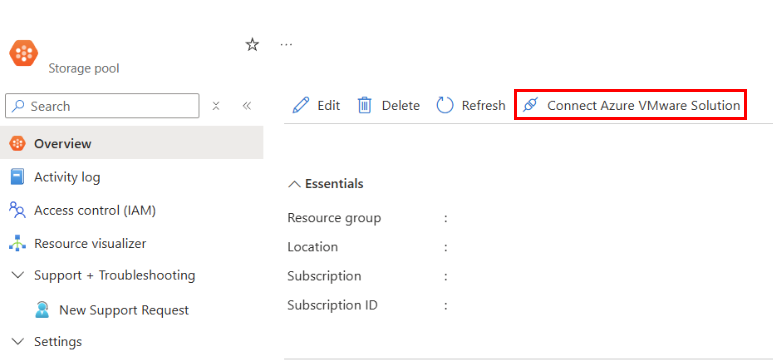
To connect a storage pool to an Azure VMware Solution resource, select Connect Azure VMware Solution from the working pane's command bar.
Important
After you connect, see the Everpure Cloud Resource Guide to learn how to manage your datastores and volumes.
Get support
Contact Everpure Cloud for customer support.
For more information, see the Everpure Cloud troubleshooting documentation.