Bilješka
Pristup ovoj stranici zahtijeva provjeru vjerodostojnosti. Možete pokušati da se prijavite ili promijenite direktorije.
Pristup ovoj stranici zahtijeva provjeru vjerodostojnosti. Možete pokušati promijeniti direktorije.
In this article, you learn how to use Stream Analytics tools for Visual Studio to author, debug, and create Stream Analytics Edge jobs. After you create and test the job, you go to the Azure portal to deploy it to your devices.
Prerequisites for developing Edge jobs
You need the following prerequisites to complete the steps in this article:
Install Visual Studio 2019, Visual Studio 2015, or Visual Studio 2013 Update 4. Stream Analytics tools support the Enterprise (Ultimate/Premium), Professional, and Community editions, but not the Express edition.
Follow the installation instructions to install Stream Analytics tools for Visual Studio.
Create a Stream Analytics Edge project
Create the Edge project that contains your job definition.
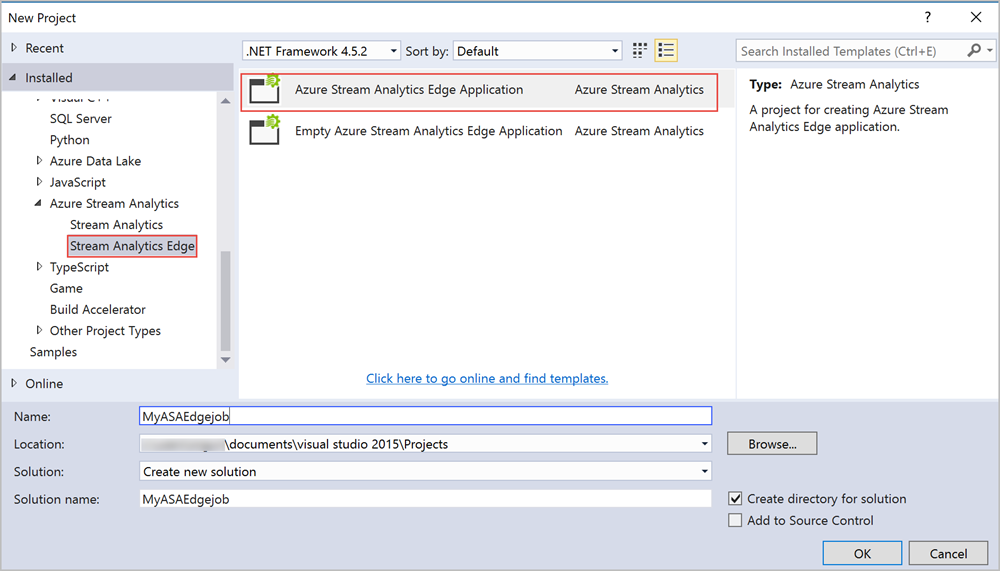
From Visual Studio, select File > New > Project. Go to the Templates list on the left, and then expand Azure Stream Analytics > Stream Analytics Edge > Azure Stream Analytics Edge Application. Enter a name, location, and solution name for your project, and then select OK.
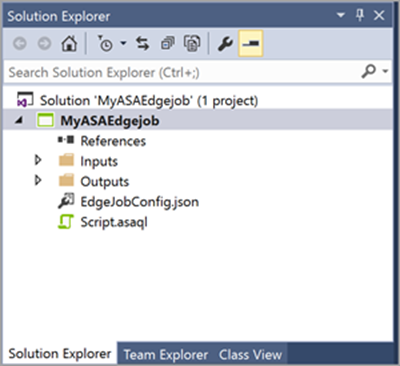
After Visual Studio creates the project, go to Solution Explorer to view the folder hierarchy.
Choose the correct subscription
Connect Visual Studio to the Azure subscription where you want to create the job.
From your Visual Studio View menu, select Server Explorer.
Select and hold (or right-click) Azure, select Connect to Microsoft Azure Subscription, and then sign in with your Azure account.
Define inputs
Configure the Edge Hub input that the job reads streaming events from.
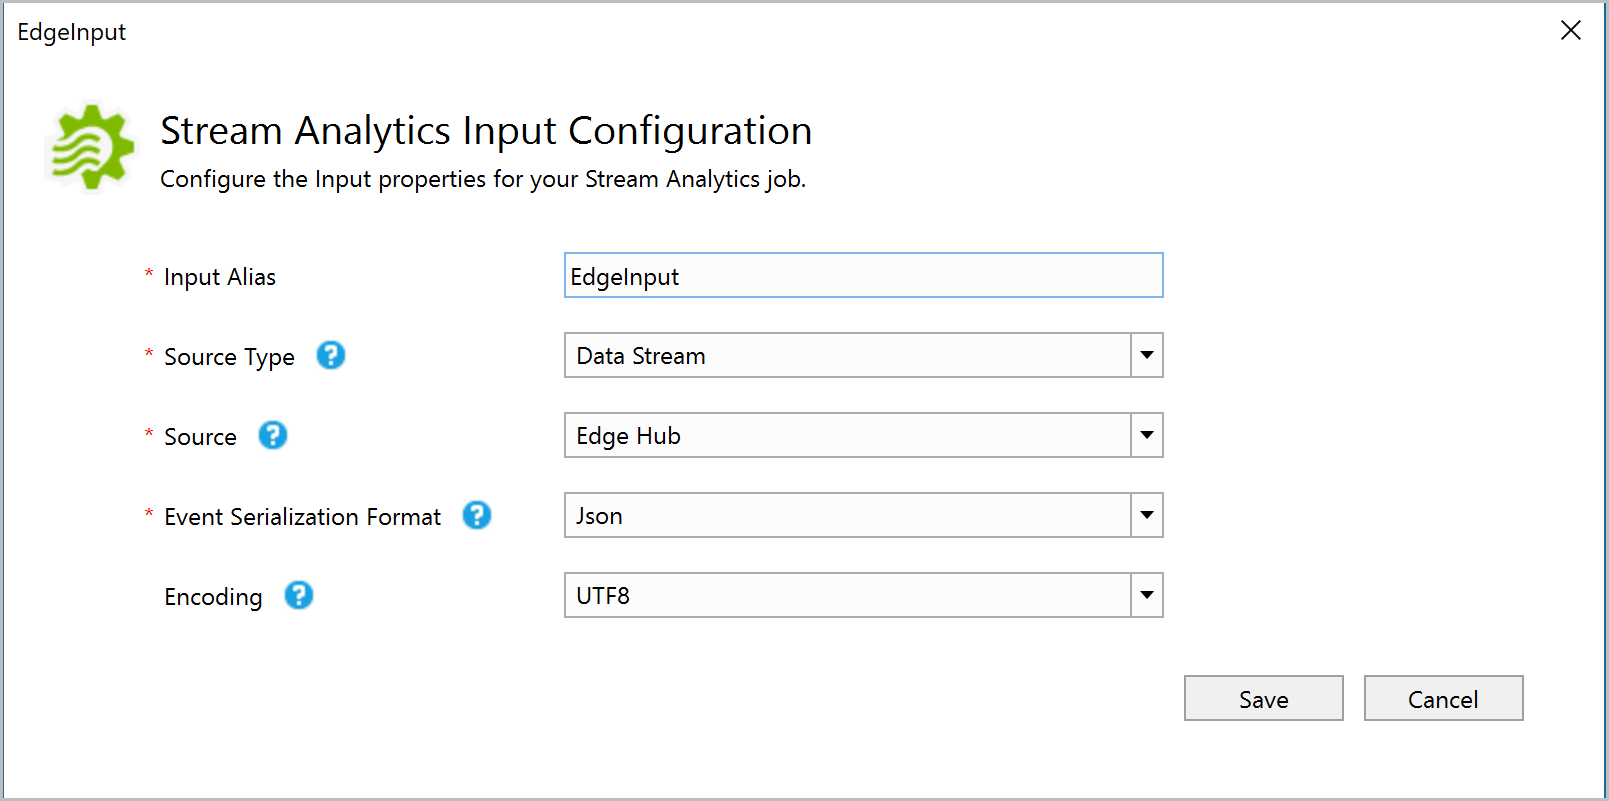
From the Solution Explorer, expand the Inputs node. You see an input named EdgeInput.json. Open it to view its settings.
Set Source Type to Data Stream. Then set Source to Edge Hub, Event Serialization Format to Json, and Encoding to UTF8. Optionally, rename the Input Alias, but leave it as is for this example. If you rename the input alias, use the name you specify when you define the query. Select Save to save the settings.
Define outputs
Configure the Edge Hub output that the job writes results to.
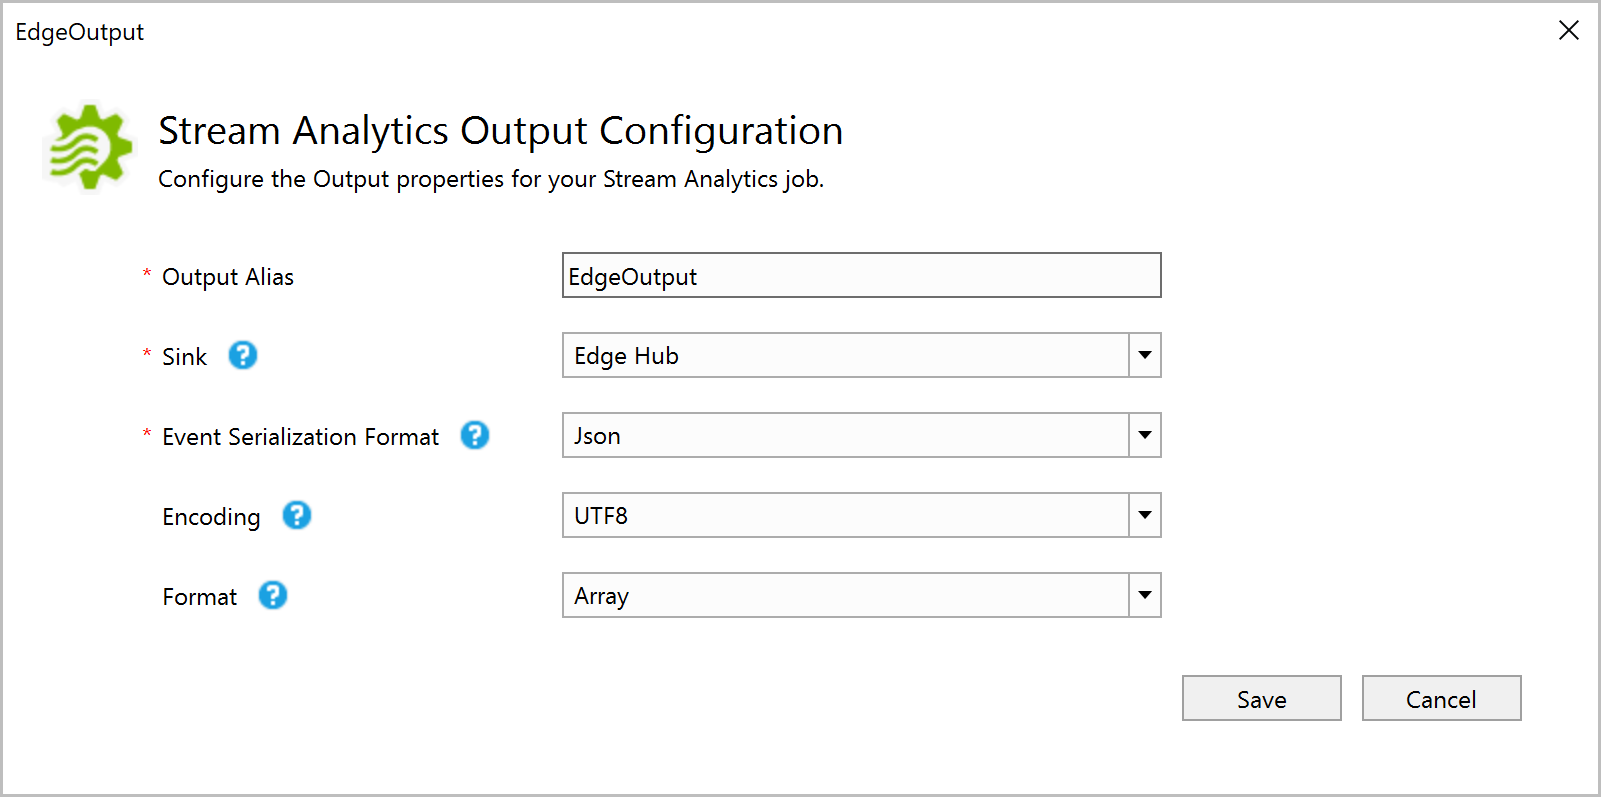
From the Solution Explorer, expand the Outputs node. You see an output named EdgeOutput.json. Open it to view its settings.
Set Sink to Edge Hub, set Event Serialization Format to Json, set Encoding to UTF8, and set Format to Array. Optionally, rename the Output Alias, but leave it as is for this example. If you rename the output alias, use the name you specify when you define the query. Select Save to save the settings.
Review unsupported operations
Stream Analytics jobs deployed in the Stream Analytics IoT Edge environments support most of the Stream Analytics Query Language reference. However, the following operations aren't supported for Stream Analytics Edge jobs:
- PARTITION BY
- TIMESTAMP BY OVER
- JavaScript UDF
- User-defined aggregates (UDA)
- GetMetadataPropertyValue
- Using more than 14 aggregates in a single step
When you create a Stream Analytics Edge job in the portal, the compiler automatically warns you if you aren't using a supported operator.
Define the transformation query
From Visual Studio, define the following transformation query in the query editor (the script.asaql file).
SELECT * INTO EdgeOutput
FROM EdgeInput
Test the job locally
To test the query locally, upload the sample data. To get sample data, download the registration data from the GitHub repository and save it to your local computer.
To upload sample data, select and hold (or right-click) the EdgeInput.json file, and then select Add Local Input.
In the pop-up window, Browse the sample data from your local path and select Save.
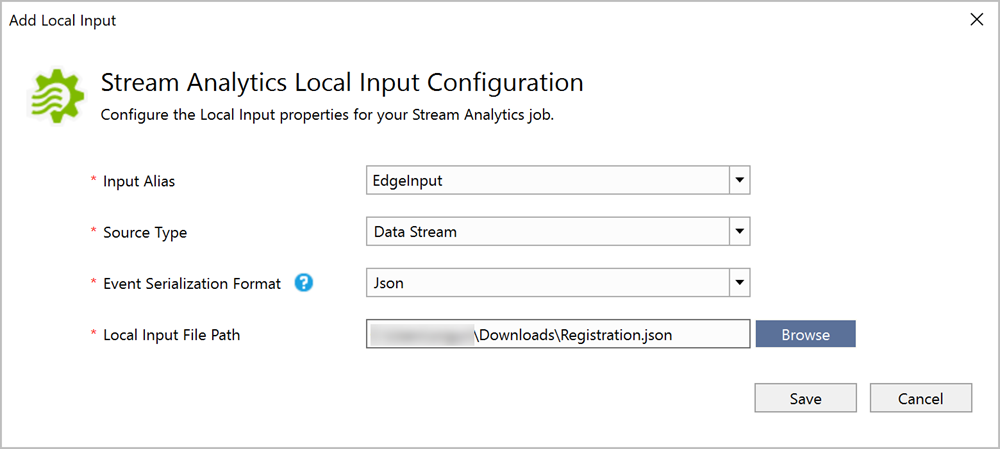
Visual Studio automatically adds a file named local_EdgeInput.json to your inputs folder.
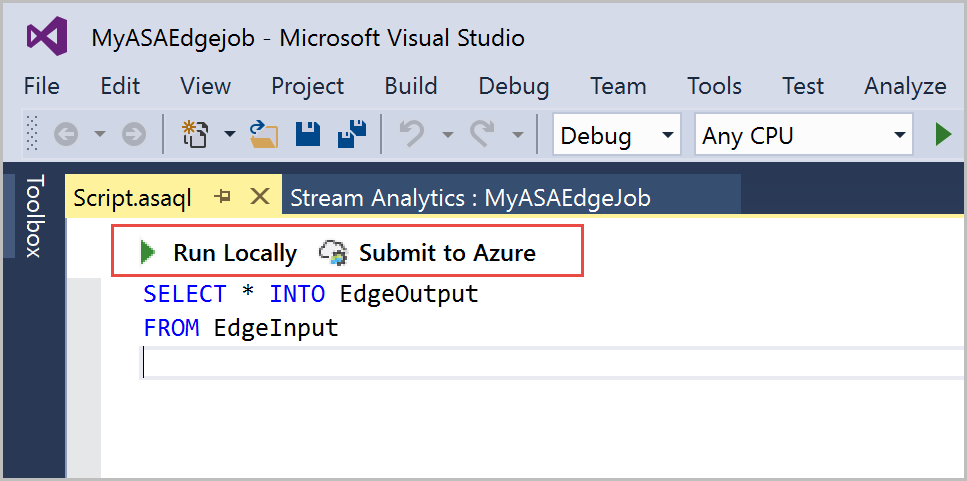
You can either run it locally or submit it to Azure. To test the query, select Run Locally.
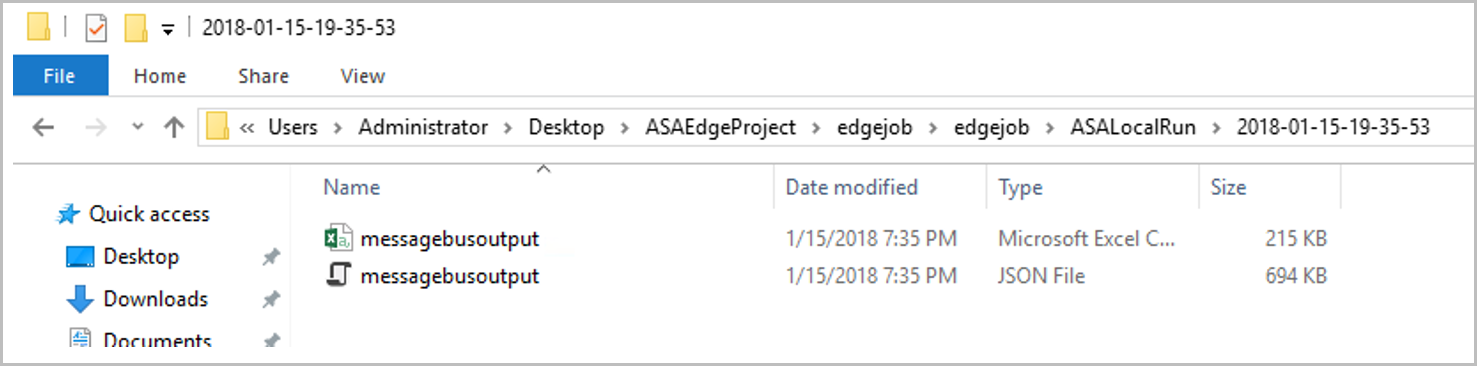
The command prompt window shows the status of the job. When the job runs successfully, it creates a folder that looks like
2018-02-23-11-31-42in your project folder pathVisual Studio 2015\Projects\MyASAEdgejob\MyASAEdgejob\ASALocalRun\2018-02-23-11-31-42. Go to the folder path to view the results in the local folder.You can also sign in to the Azure portal and verify that the job is created.
Submit the job to Azure
After you test the query, publish the job to your Azure subscription.
Before you submit the job to Azure, connect to your Azure subscription. Open Server Explorer, select and hold (or right-click) Azure, select Connect to Microsoft Azure subscription, and then sign in to your Azure subscription.
To submit the job to Azure, go to the query editor and select Submit to Azure.
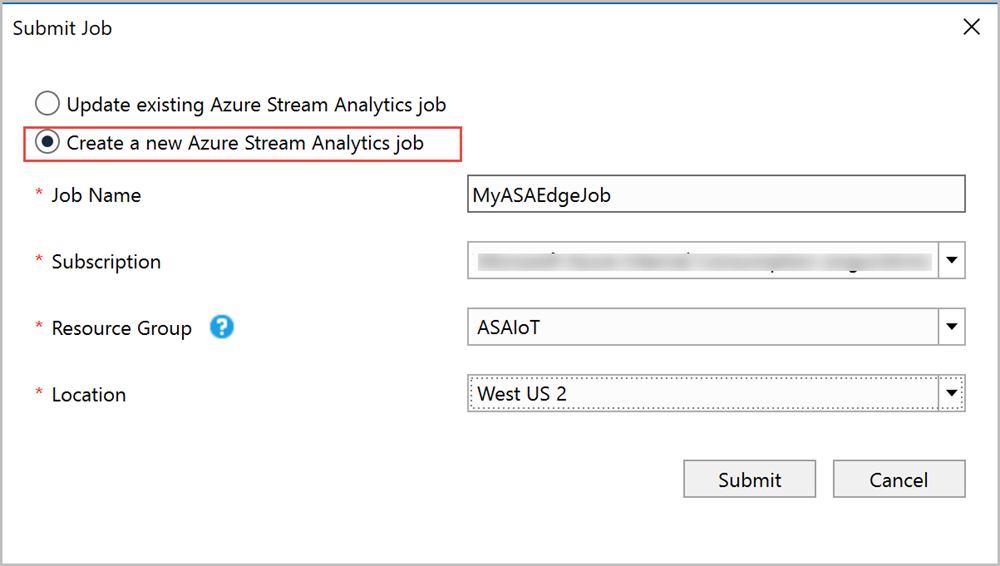
A pop-up window opens. Choose to update an existing Stream Analytics Edge job or create a new one. When you update an existing job, it replaces all the job configuration. In this scenario, you publish a new job. Select Create a New Azure Stream Analytics Job, enter a name for your job such as MyASAEdgeJob, choose the required Subscription, Resource Group, and Location, and then select Submit.
You now have a Stream Analytics Edge job. To learn how to deploy it to your devices, see Run jobs on IoT Edge.
Manage the job
Manage the job status and the job diagram from Server Explorer.
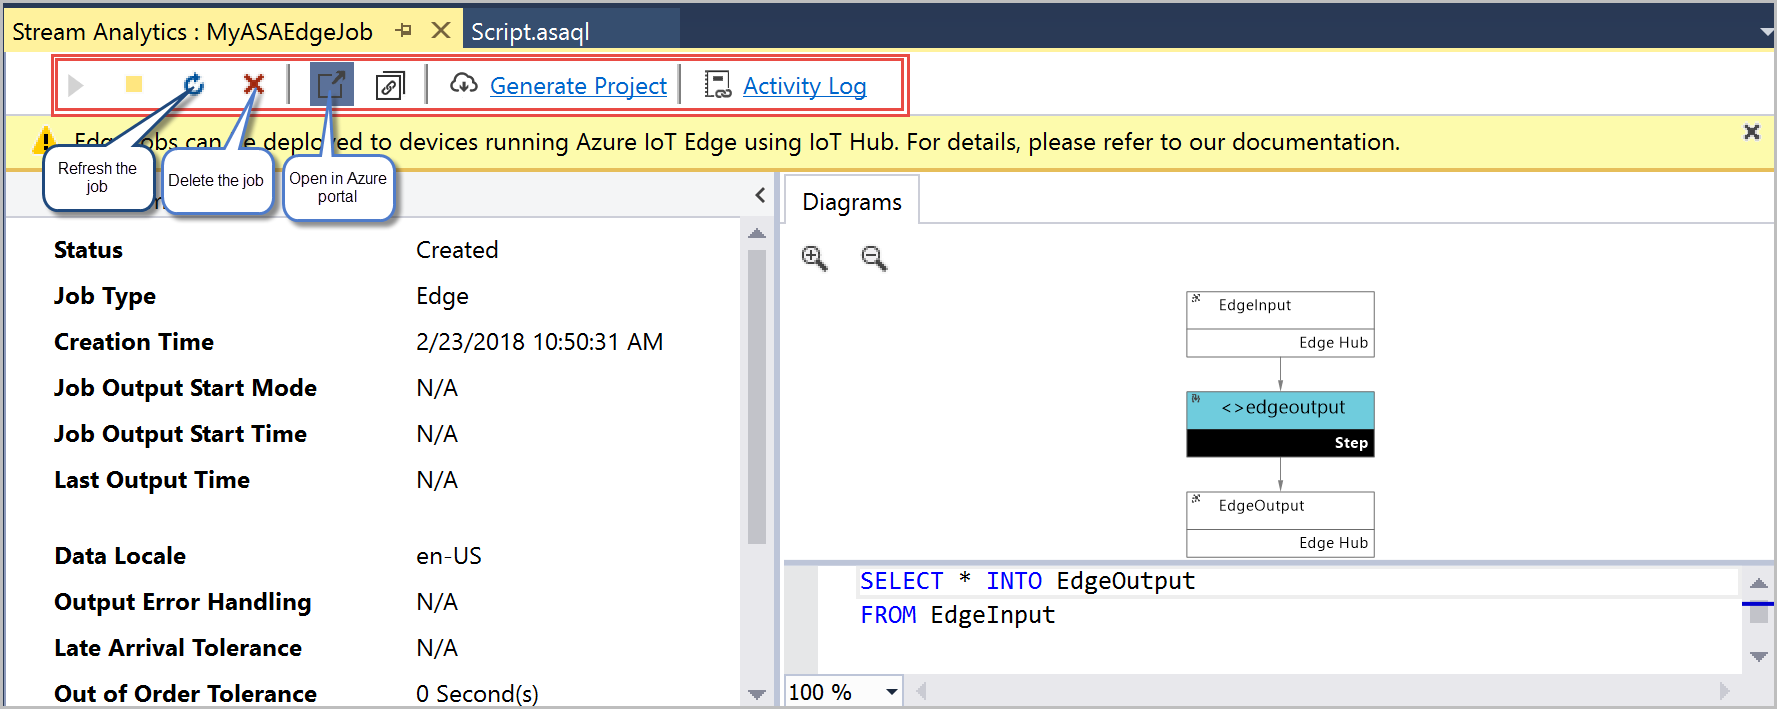
From Stream Analytics in Server Explorer, expand the subscription and the resource group where you deployed the Stream Analytics Edge job. You see MyASAEdgejob with the status Created. Expand your job node, and then open it to view the job.
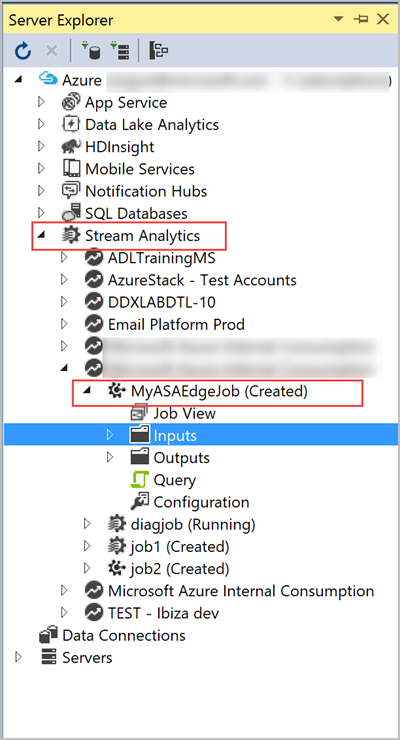
In the job view window, you can refresh the job, delete it, and open it in the Azure portal.