Bilješka
Pristup ovoj stranici zahtijeva provjeru vjerodostojnosti. Možete pokušati da se prijavite ili promijenite direktorije.
Pristup ovoj stranici zahtijeva provjeru vjerodostojnosti. Možete pokušati promijeniti direktorije.
Use the link to incident feature to add advanced hunting query results to a new or existing incident. This feature helps you capture records from advanced hunting activities, including behavior-based results, to create richer incident context.
You can also use this feature to capture records from advanced hunting activities. These records help you build a richer timeline or context of events for an incident.
Required permissions for linking incidents
To link query results to an incident, you need the same permissions required for managing custom detections. For more information, see Create custom detection rules.
To link results from the BehaviorInfo table (preview), you also need access to the BehaviorInfo and BehaviorEntities tables, and the relevant behaviors data sources must be onboarded. For onboarding guidance, see Deploy supported services and Enable the UEBA behaviors layer.
Link results to new or existing incidents
Use the following steps to link advanced hunting results to a new or existing incident.
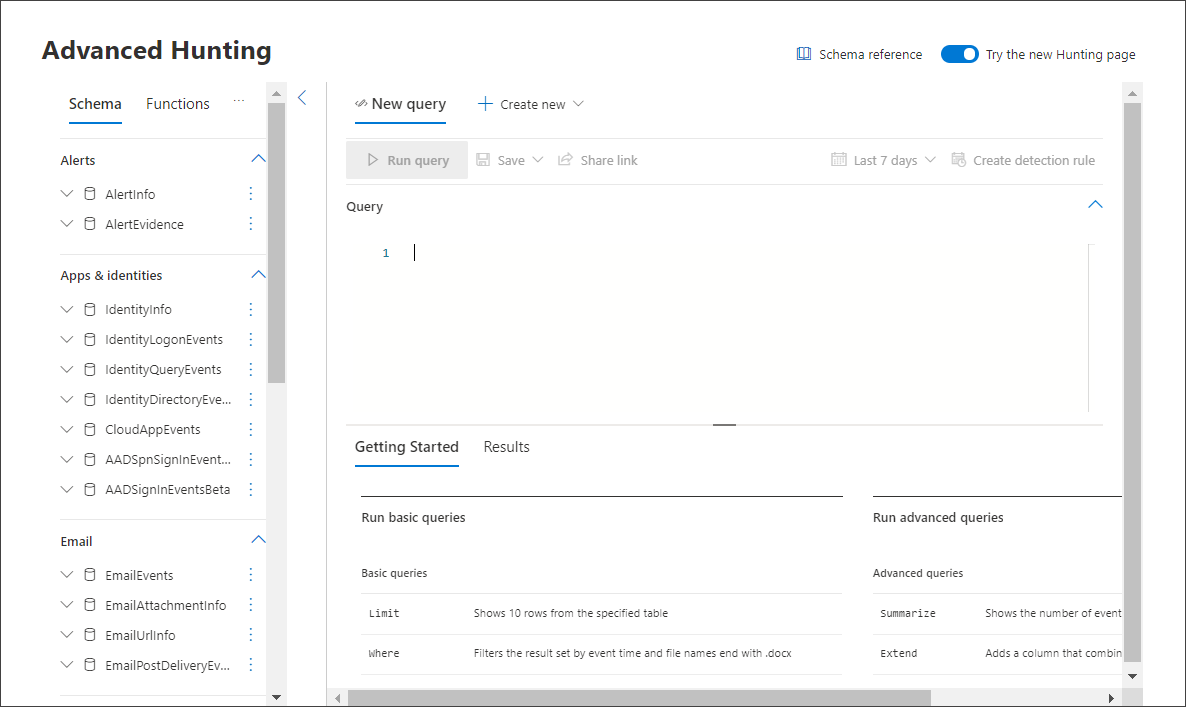
On the advanced hunting page, enter your query and then select Run query.
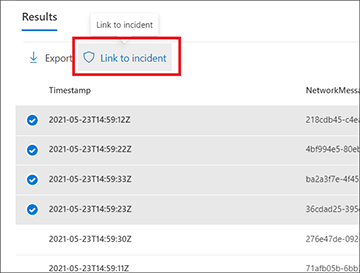
In the Results page, select the events or records that are related to a new or current investigation you're working on, then select Link to incident.
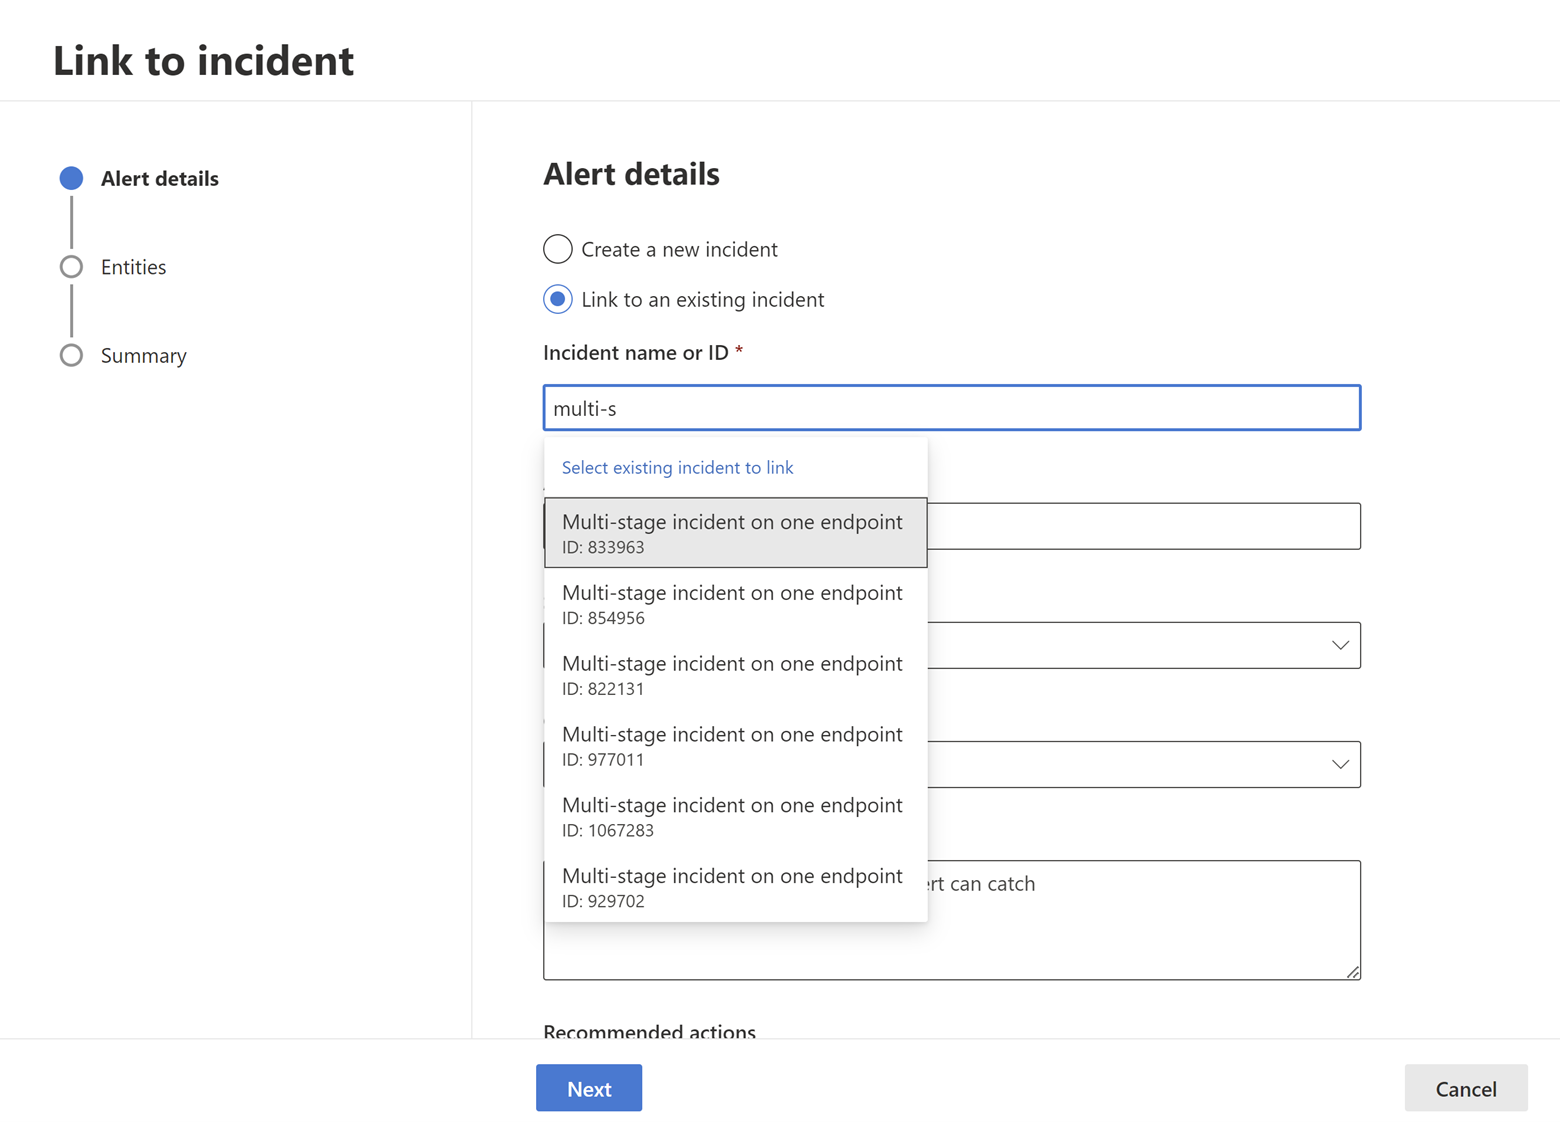
Find the Alert details section in the Link to incident pane, then select Create new incident to convert the events to alerts and group them to a new incident:
Or select Link to an existing incident to add the selected records to an existing one. Choose the related incident from the dropdown list of existing incidents. You can also enter the first few characters of the incident name or ID to find the existing incident.
For either option—Create new incident or Link to an existing incident—provide the following details, then select Next:
- Alert title - Provide a descriptive title for the results that your incident responders can understand. This descriptive title becomes the alert title.
- Severity - Choose the severity applicable to the group of alerts.
- Category - Choose the appropriate threat category for the alerts.
- Description - Give a helpful description for the grouped alerts.
- Recommended actions - Provide remediation actions.
In the Entities section, you can find which entities are used to correlate other alerts to the linked incident. They also appear in the incident page. You can review the preselected entities categorized as follows:
a. Impacted assets – Assets impacted by the selected events, can be:
- Account
- Device
- Mailbox
- Cloud application
- Azure resource
- Amazon Web Services resource
- Google Cloud Platform resource
b. Related evidence – Non-assets that appear in the selected events. The supported entity types are:
- Process
- File
- Registry value
- IP
- OAuth application
- DNS
- Security group
- URL
- Mail cluster
- Mail message
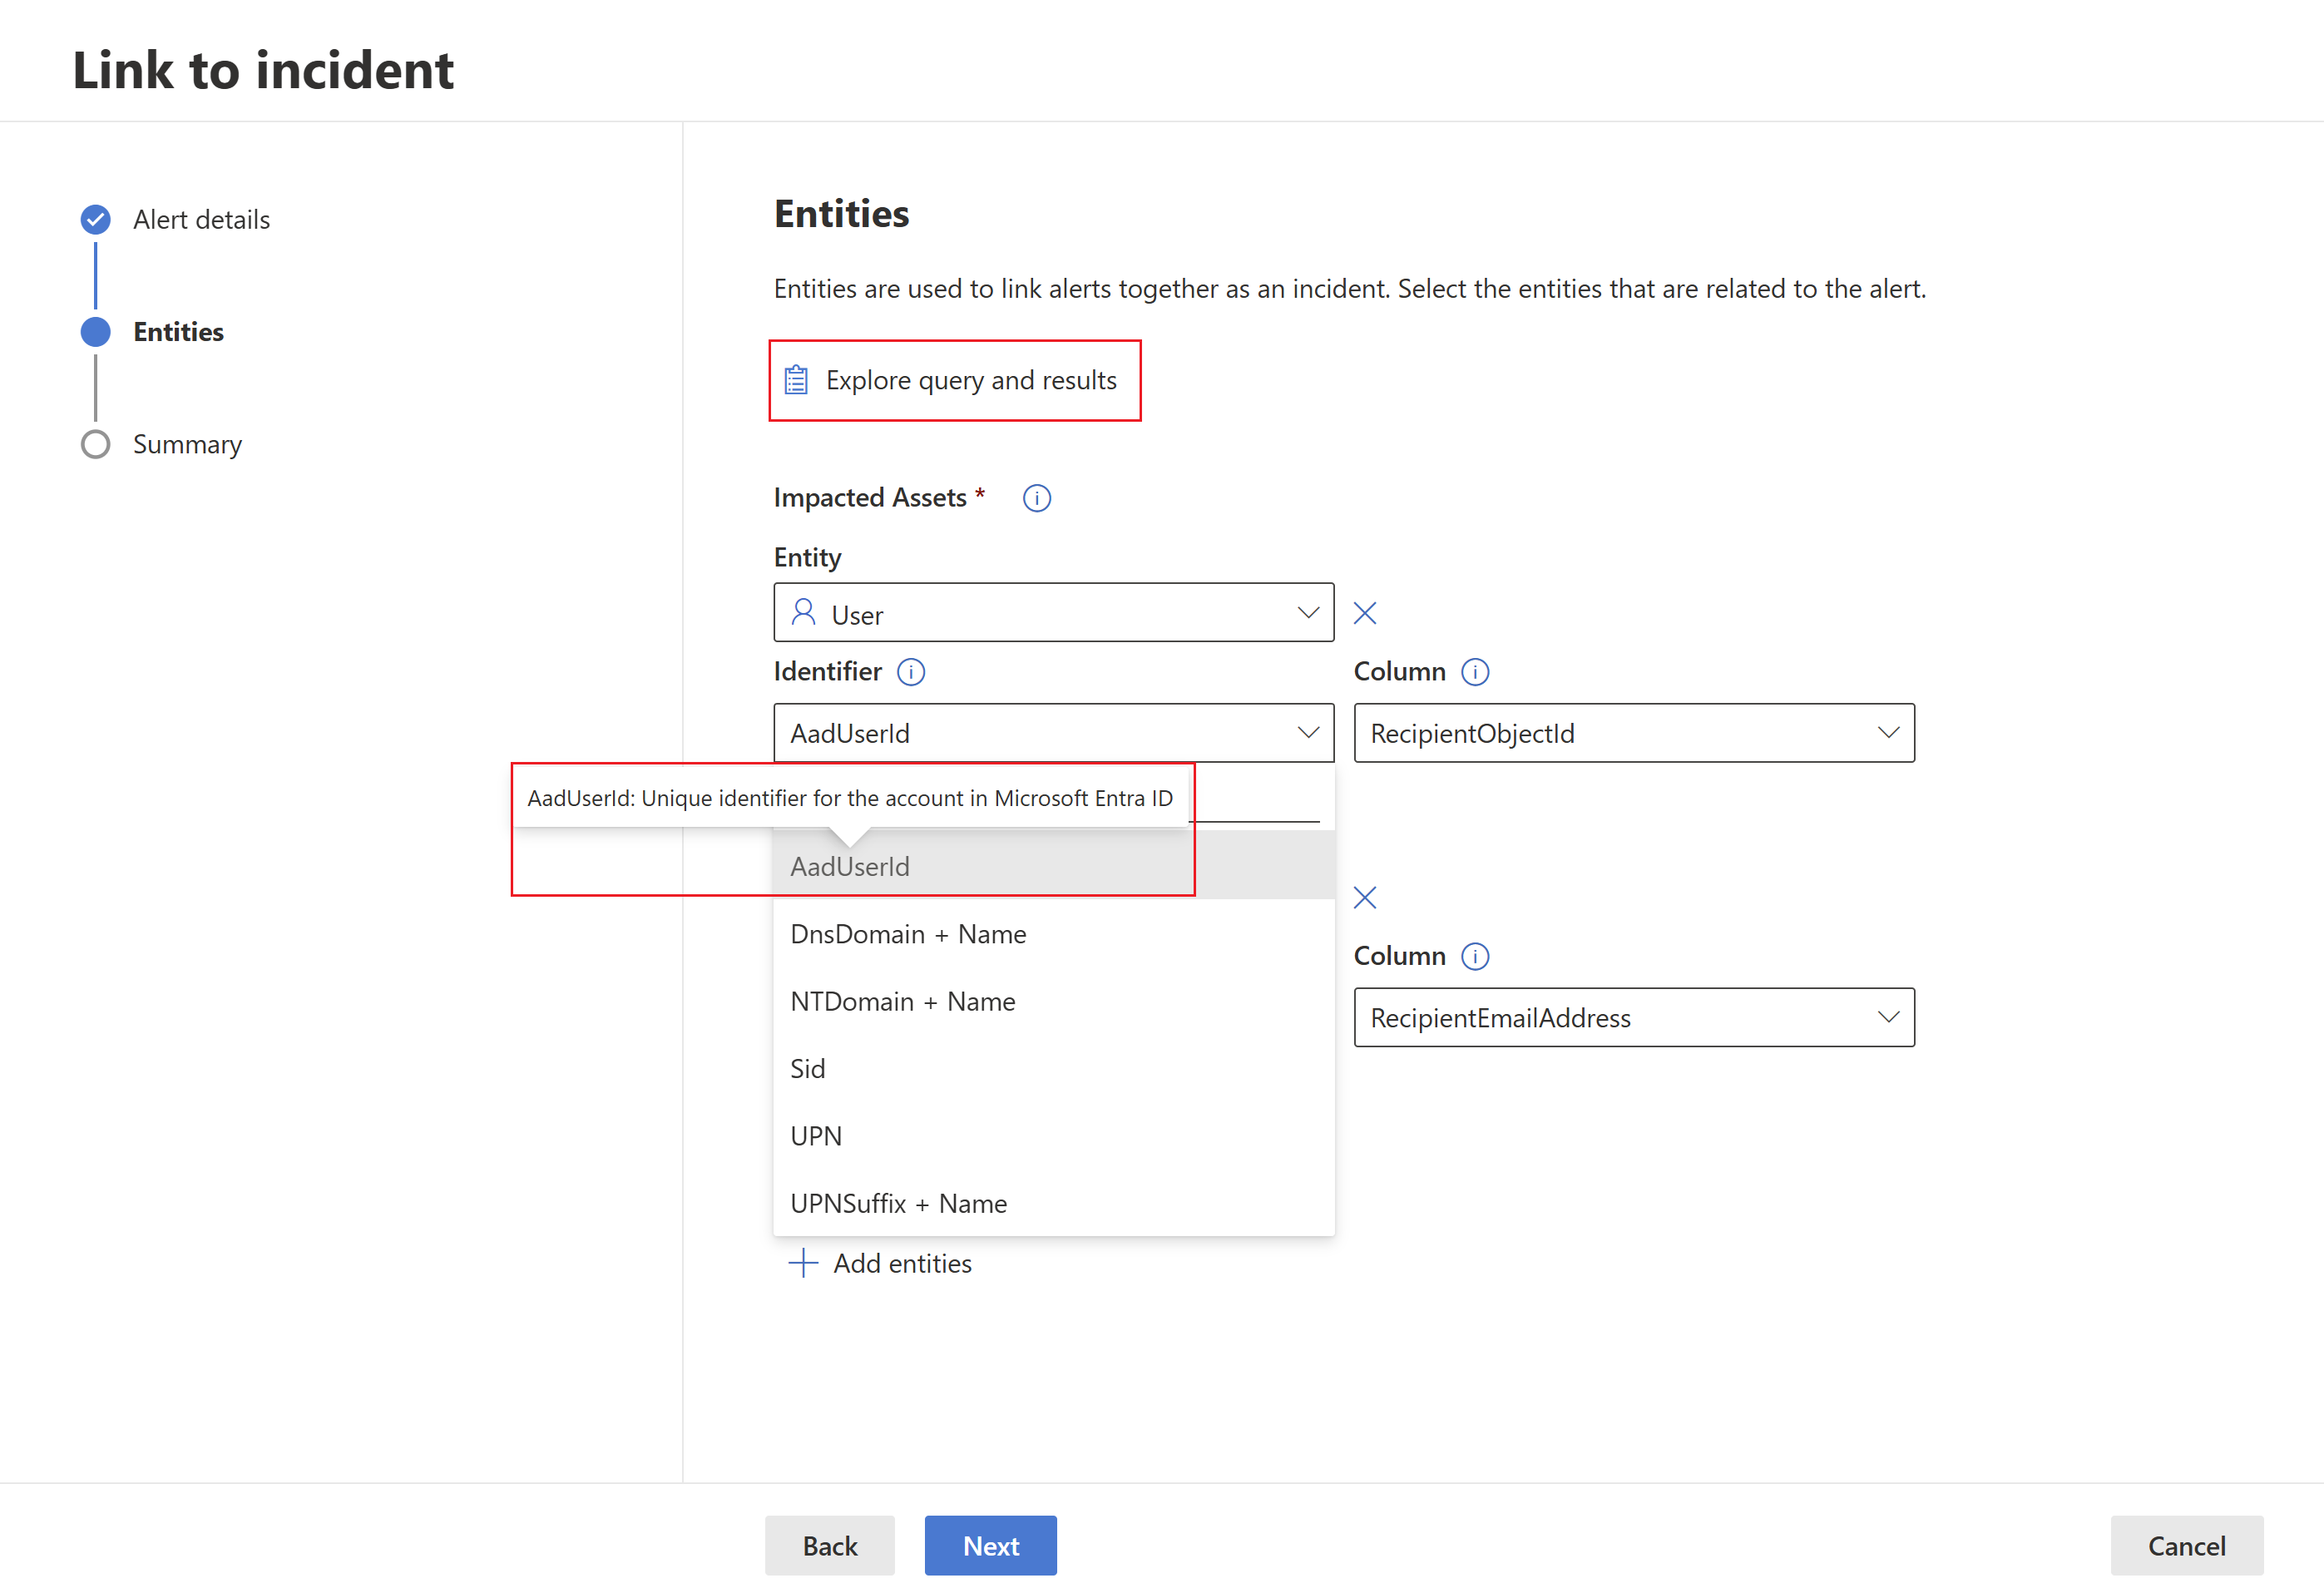
After an entity type is selected, select an identifier type that exists in the selected records so that it can be used to identify this entity. Each entity type has a list of supported identifiers, as can be seen in the relevant drop-down. Read the description displayed when hovering on each identifier to better understand it.
After selecting the identifier, select a column from the query results that contain the selected identifier. You can select Explore query and results to open the advanced hunting context panel. This allows you to explore your query and results to make sure you chose the right column for the selected identifier.
In our example, we used a query to find events related to a possible email exfiltration incident, therefore the recipient's mailbox and recipient's account are the impacted entities, and the sender's IP as well as email message are related evidence.
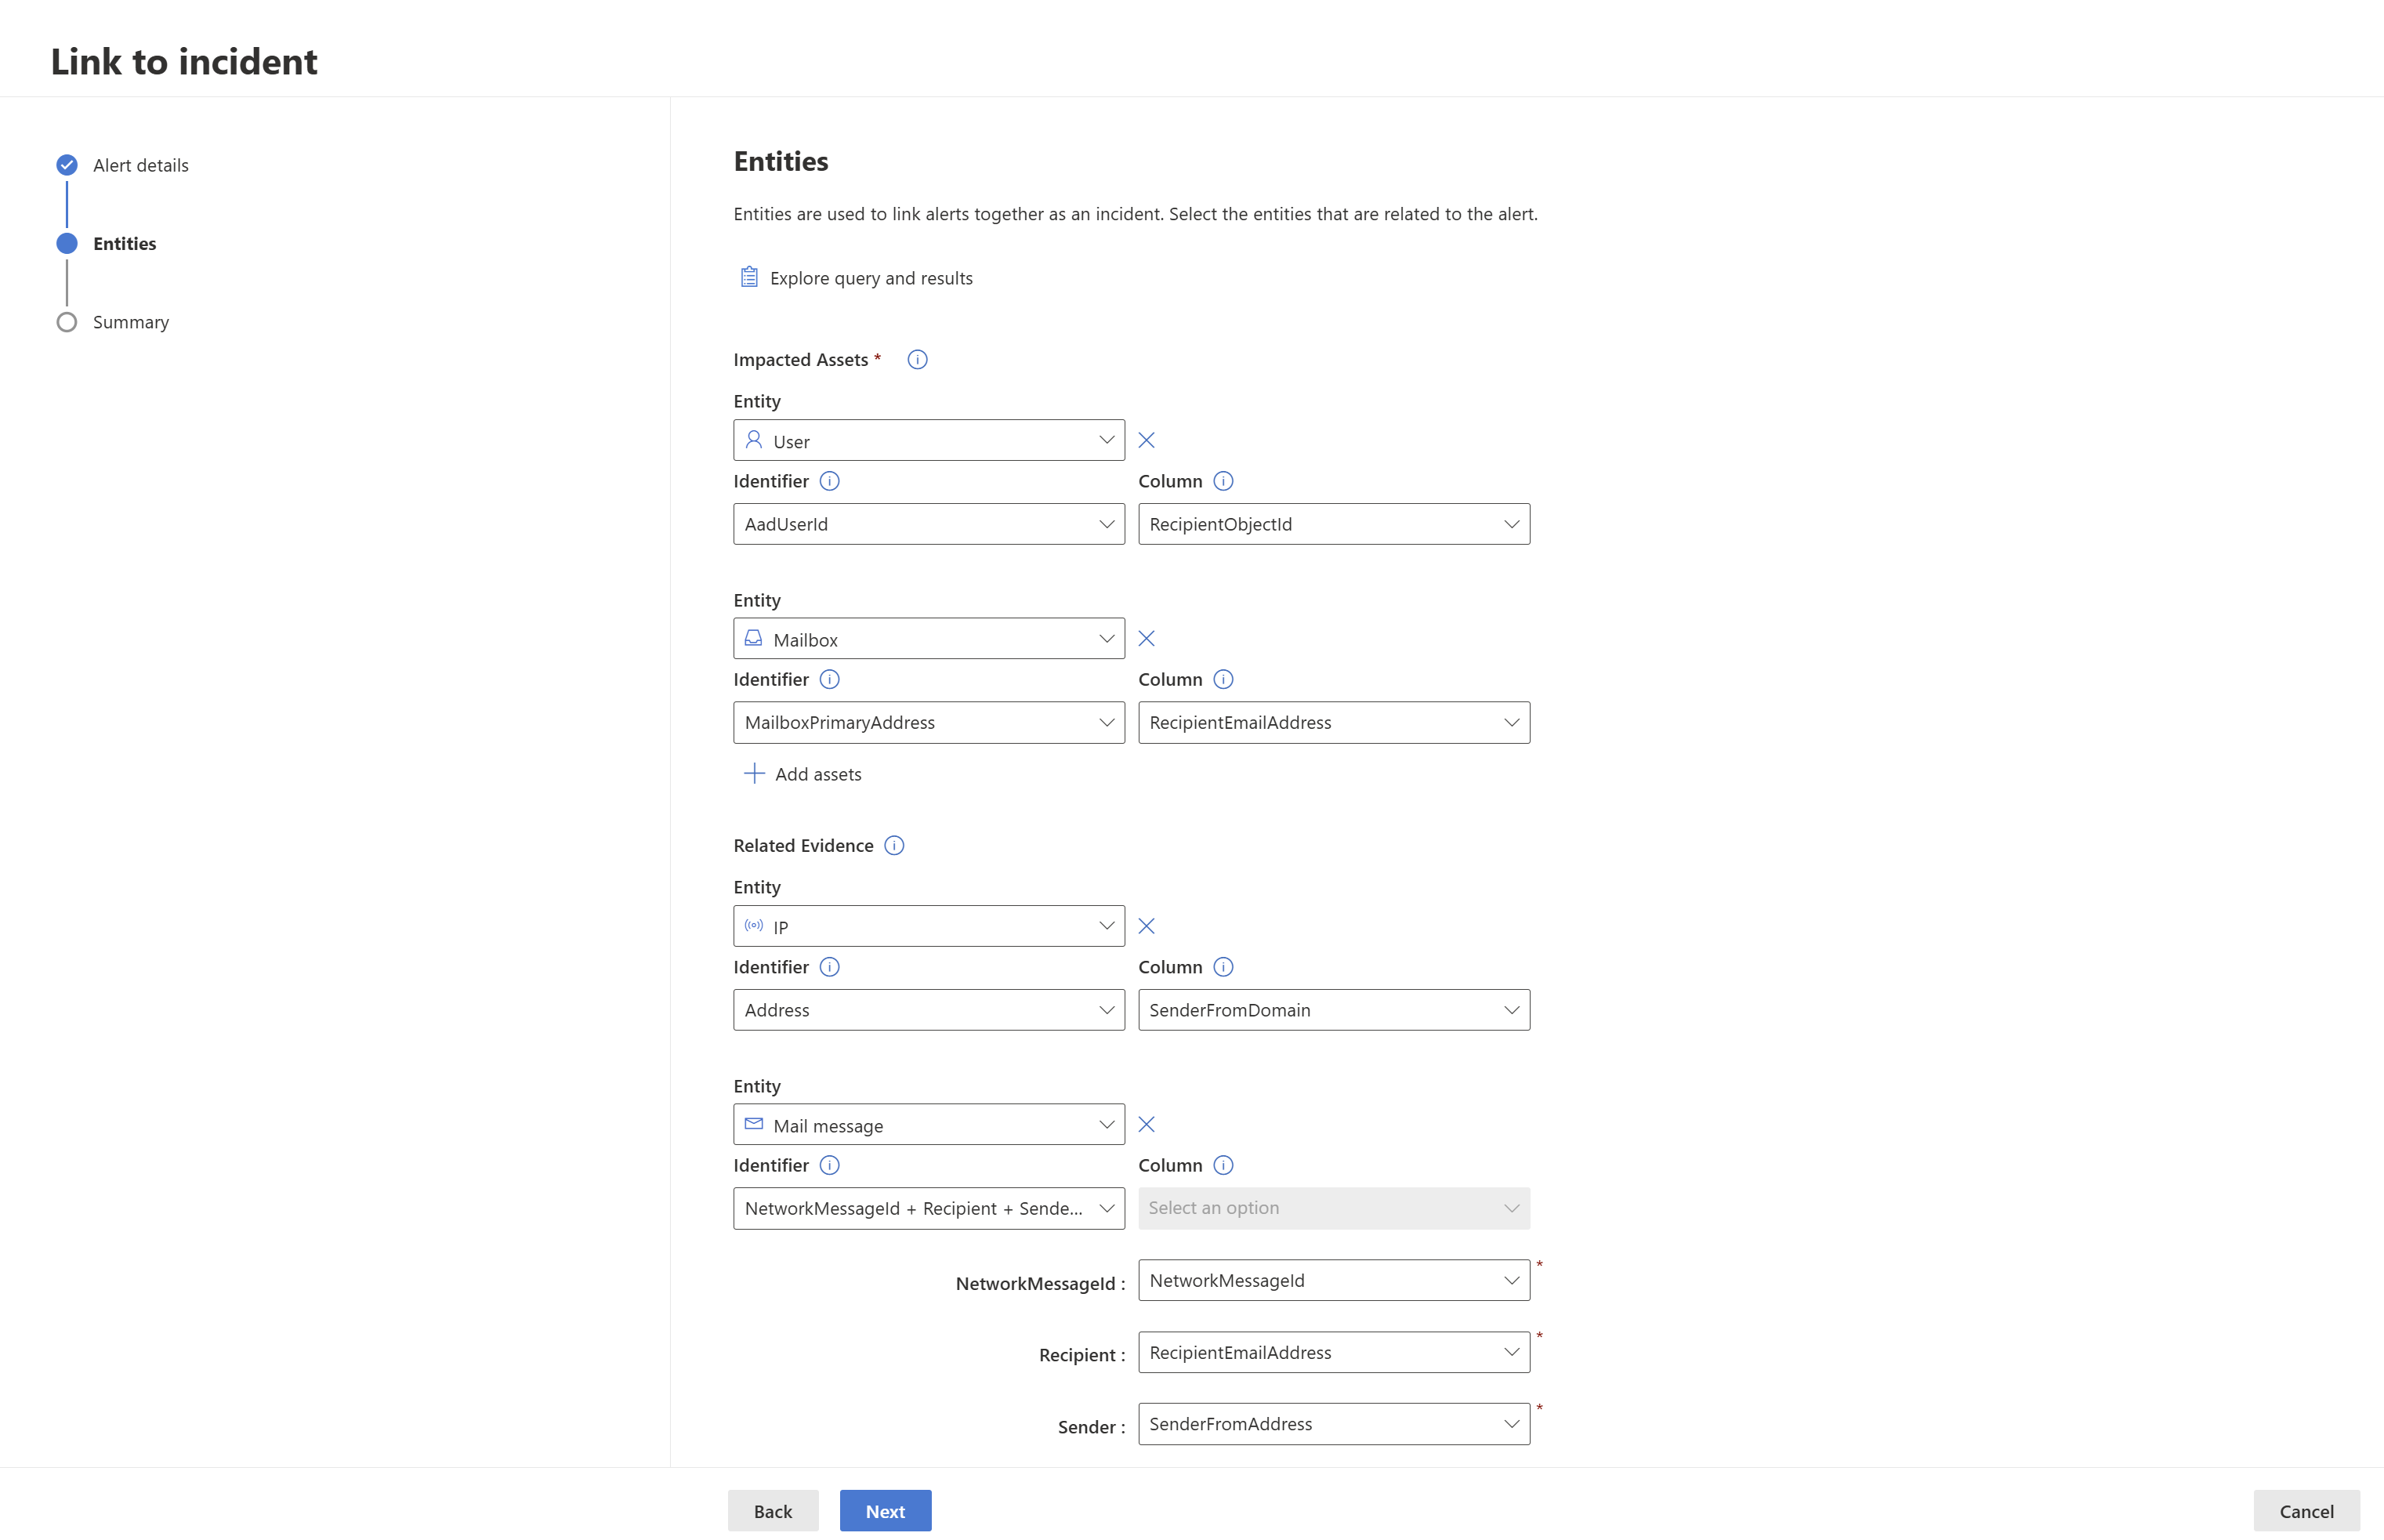
A different alert is created for each record with a unique combination of impacted entities. In our example, if there are three different recipient mailboxes and recipient object ID combinations, for instance, then three alerts are created and linked to the chosen incident.
Select Next.
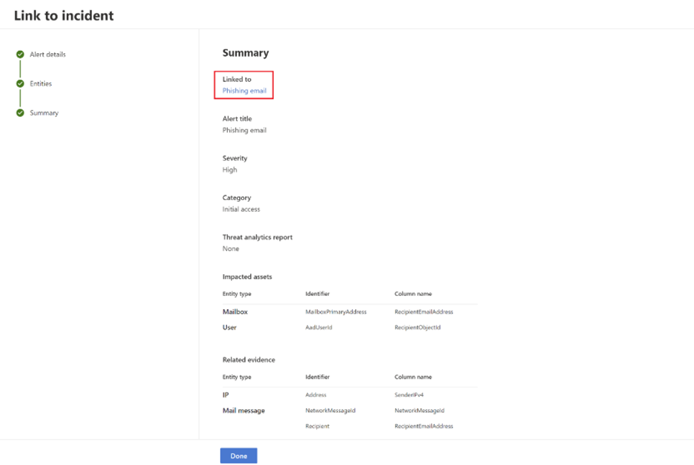
Review the details you provided in the Summary section.
Select Done.
Link a behavior result to an incident (Preview)
When you query the BehaviorInfo table, you can link a single behavior record to a new or existing incident.
Before you start, confirm that behavior-based data sources are set up and that you can access the BehaviorInfo and BehaviorEntities tables. You also need permissions to manage custom detections. For more information, see Required permissions for linking incidents.
This preview follows existing RBAC and incident scoping policies. If Link to incident isn't available or the wizard doesn't show entities, check your table access, data source setup, and incident scope.
In this workflow, you select one BehaviorId at a time. The wizard creates one alert per behavior. It fills in alert details and entities from the selected record. You can edit these fields. Severity and recommended actions stay under your control.
In the advanced hunting query page, run a query on the
BehaviorInfotable to retrieve behavior records.Example query:
BehaviorInfo
| where ServiceSource == "Microsoft Sentinel"
| take 10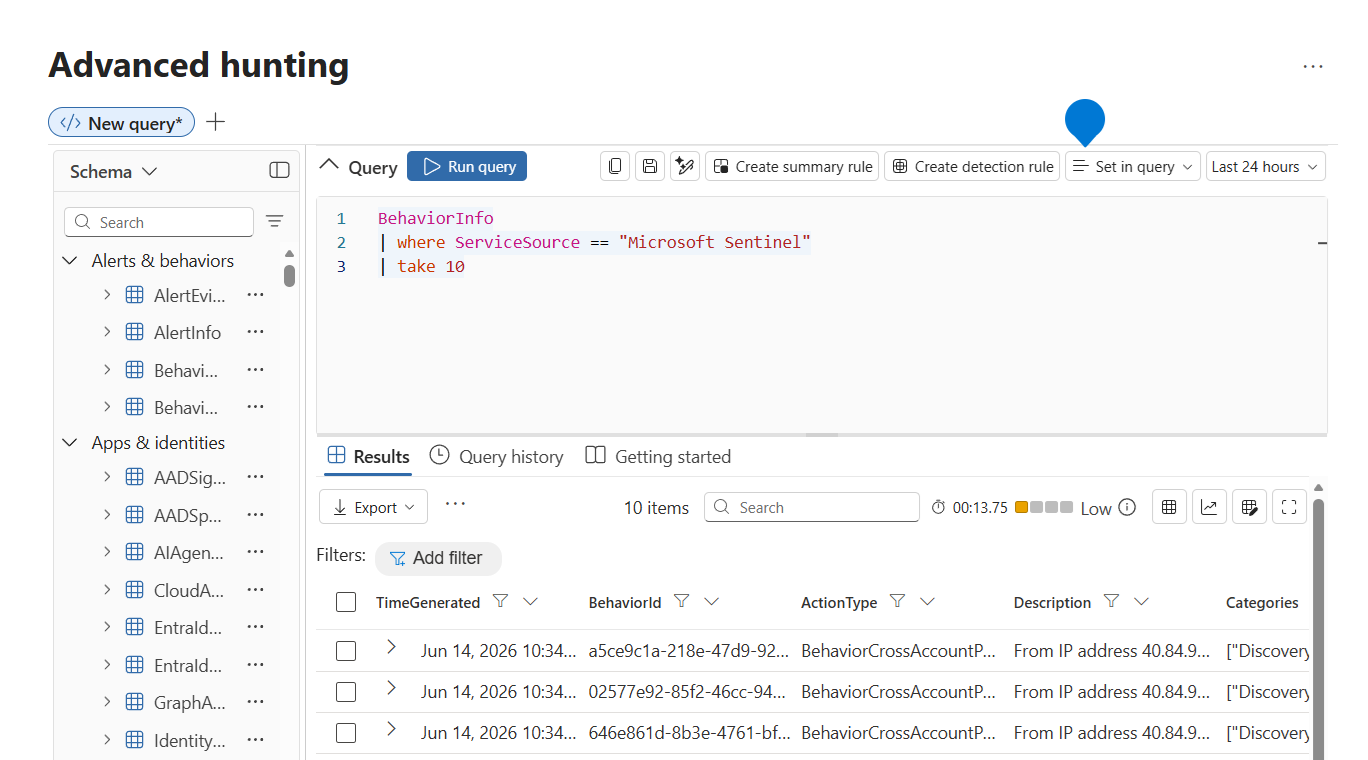
In the Results page, select a single behavior record (
BehaviorId) related to the investigation, and then select Link to incident.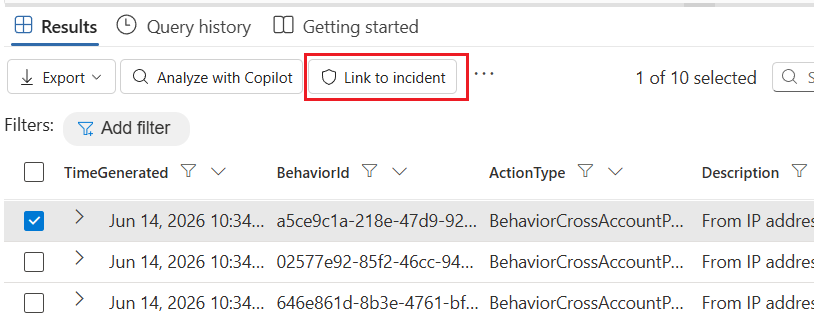
In the Alert details section, select Create new incident to create a single alert from the selected behavior and link it to a new incident. Or select Correlate alerts with an existing incident to add the selected record to an existing incident. If you choose an existing incident, select the incident from the list, or enter the first few characters of the incident name or ID to find it.
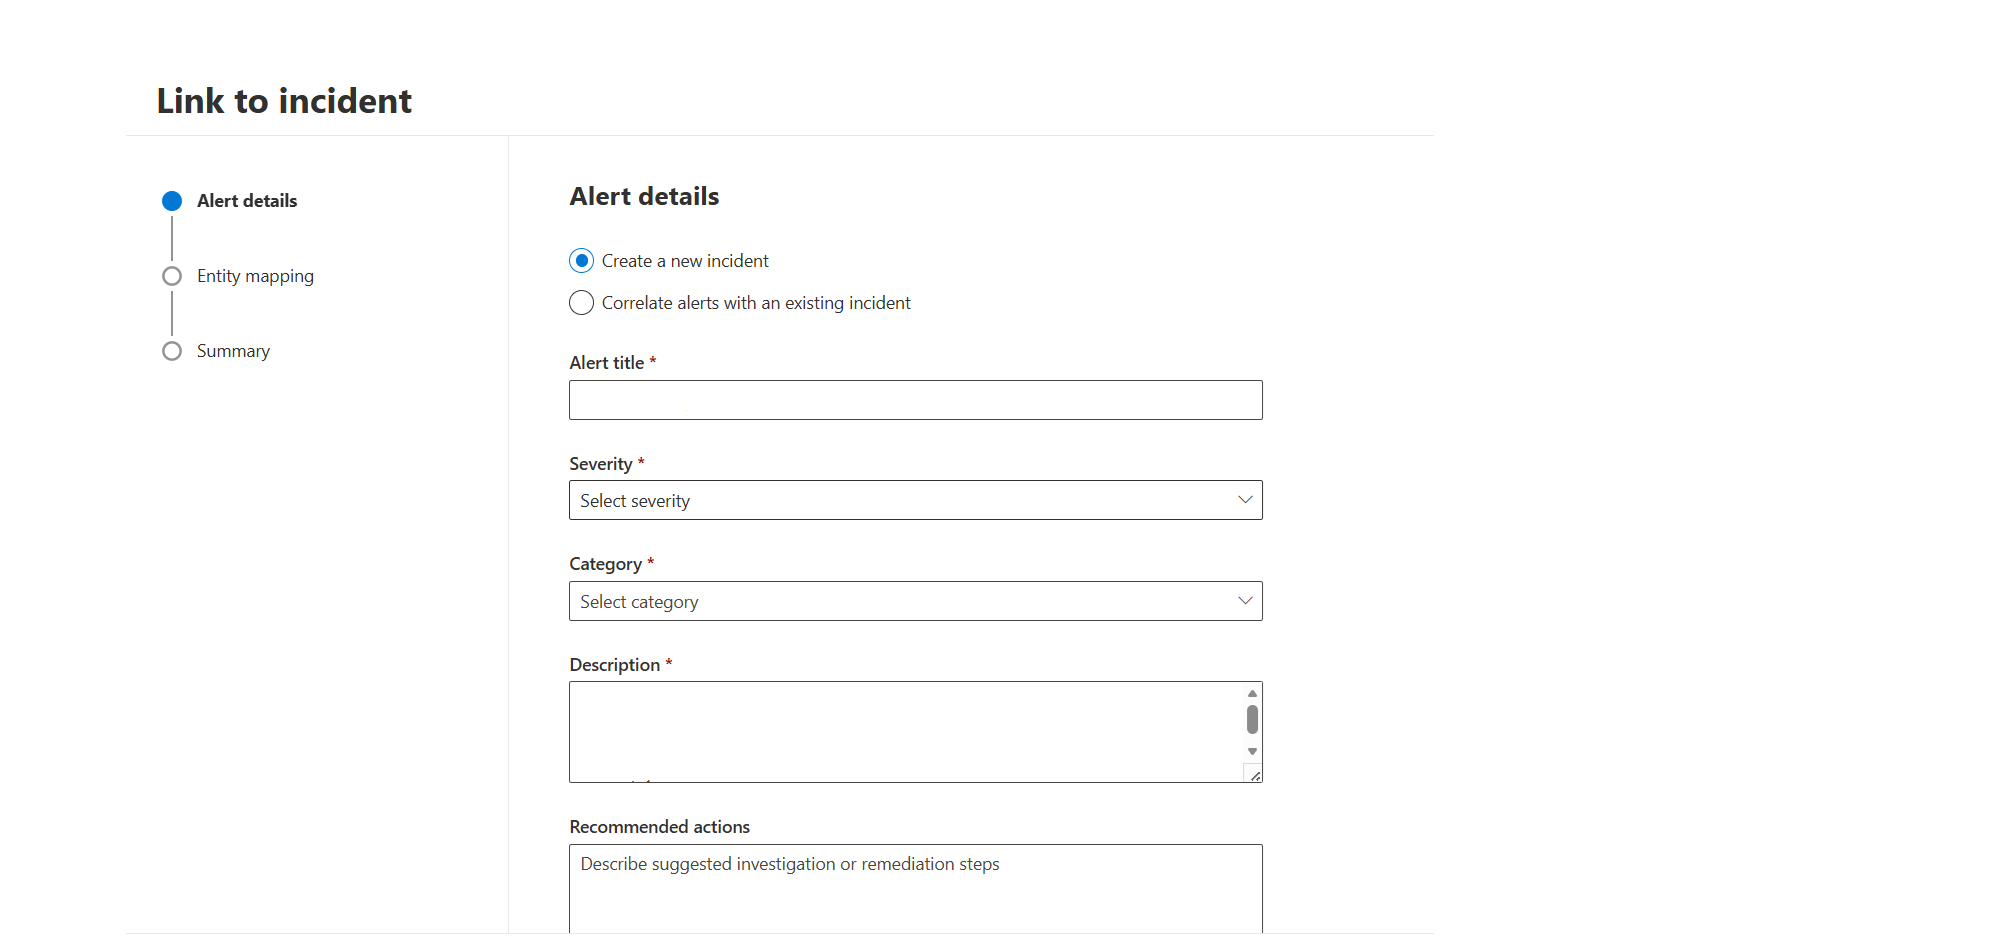
Review the alert details, and then select Next. The following fields are automatically populated from the selected behavior record and remain editable:
- Alert title
- Category
- Description
- MITRE ATT&CK framework
You can also provide values for the following fields:
- Severity
- Recommended actions
In the Entities section, the involved entities are automatically populated from the selected behavior record. The wizard uses data from the
BehaviorEntitiestable to prepopulate the related entities, and you can review and edit them before you continue.As with other link to incident workflows, you can review the entities under Impacted assets and Related evidence, and edit them if needed. The wizard currently supports UEBA entities. For non-UEBA behaviors or behaviors with unsupported entities, you might need to map some entities manually.
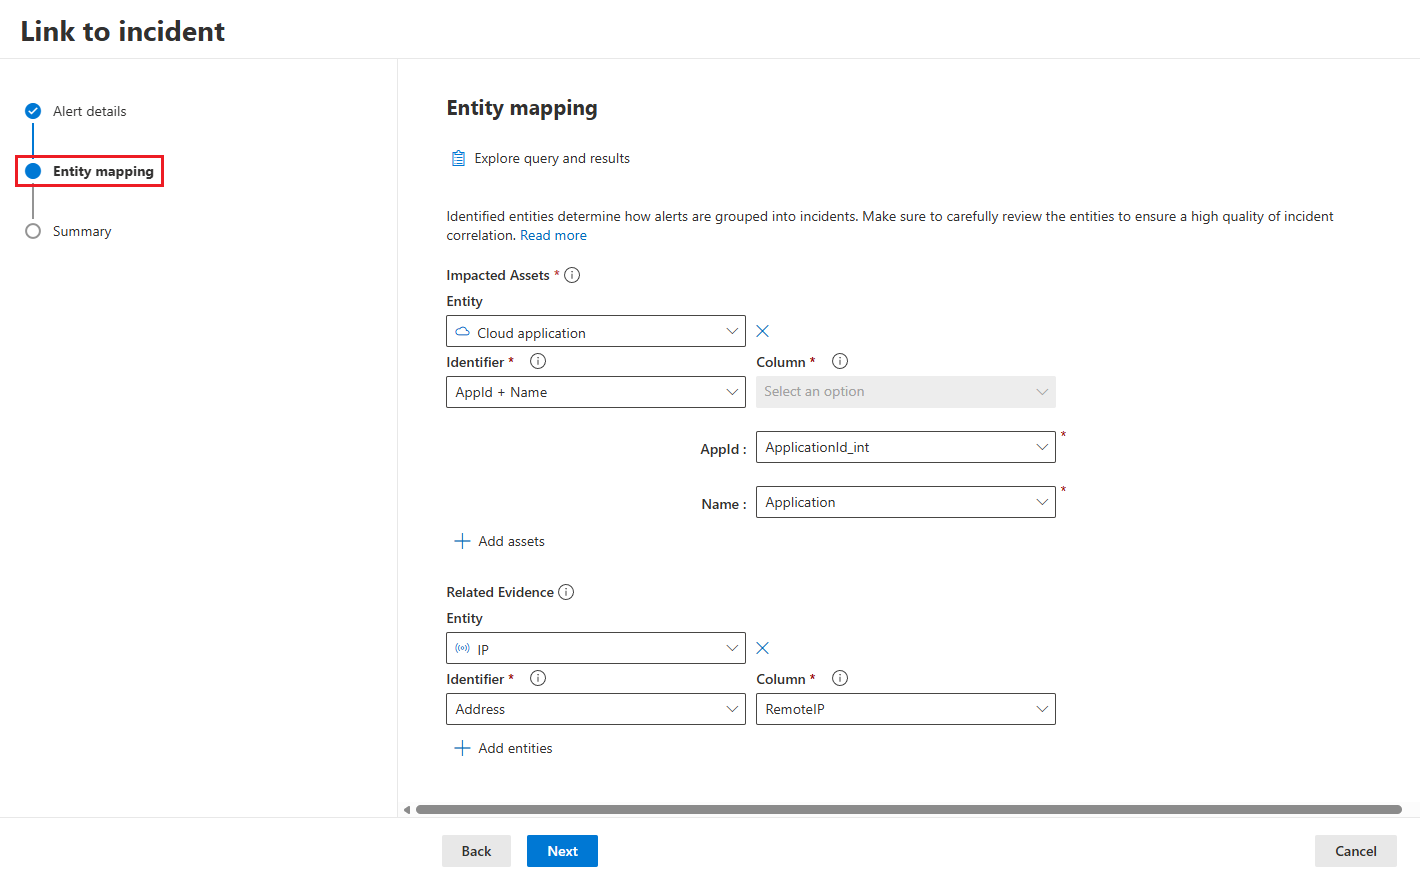
If you select Explore query and results, the advanced hunting context panel opens with a query filtered to the selected
BehaviorId. If your original query doesn't already includeBehaviorEntities, the panel uses a joined query to show the related entities from that table so you can verify that the selected entity values and mappings are correct.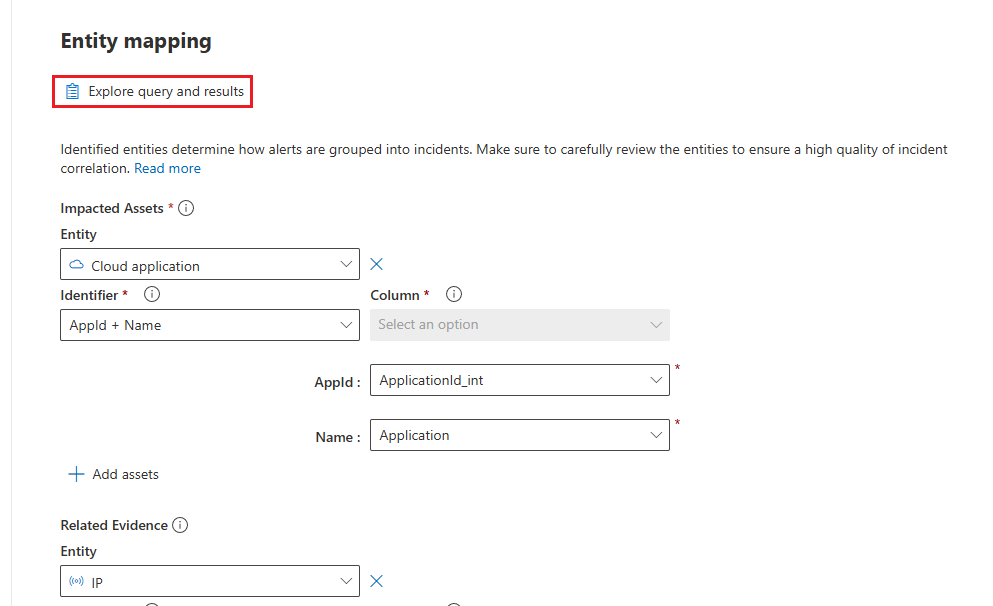
Select Next, review the Summary step, and then select Done.
View linked records in the incident
To view the linked incident, select the link shown in the summary step. You can also select the incident name from the incident queue.
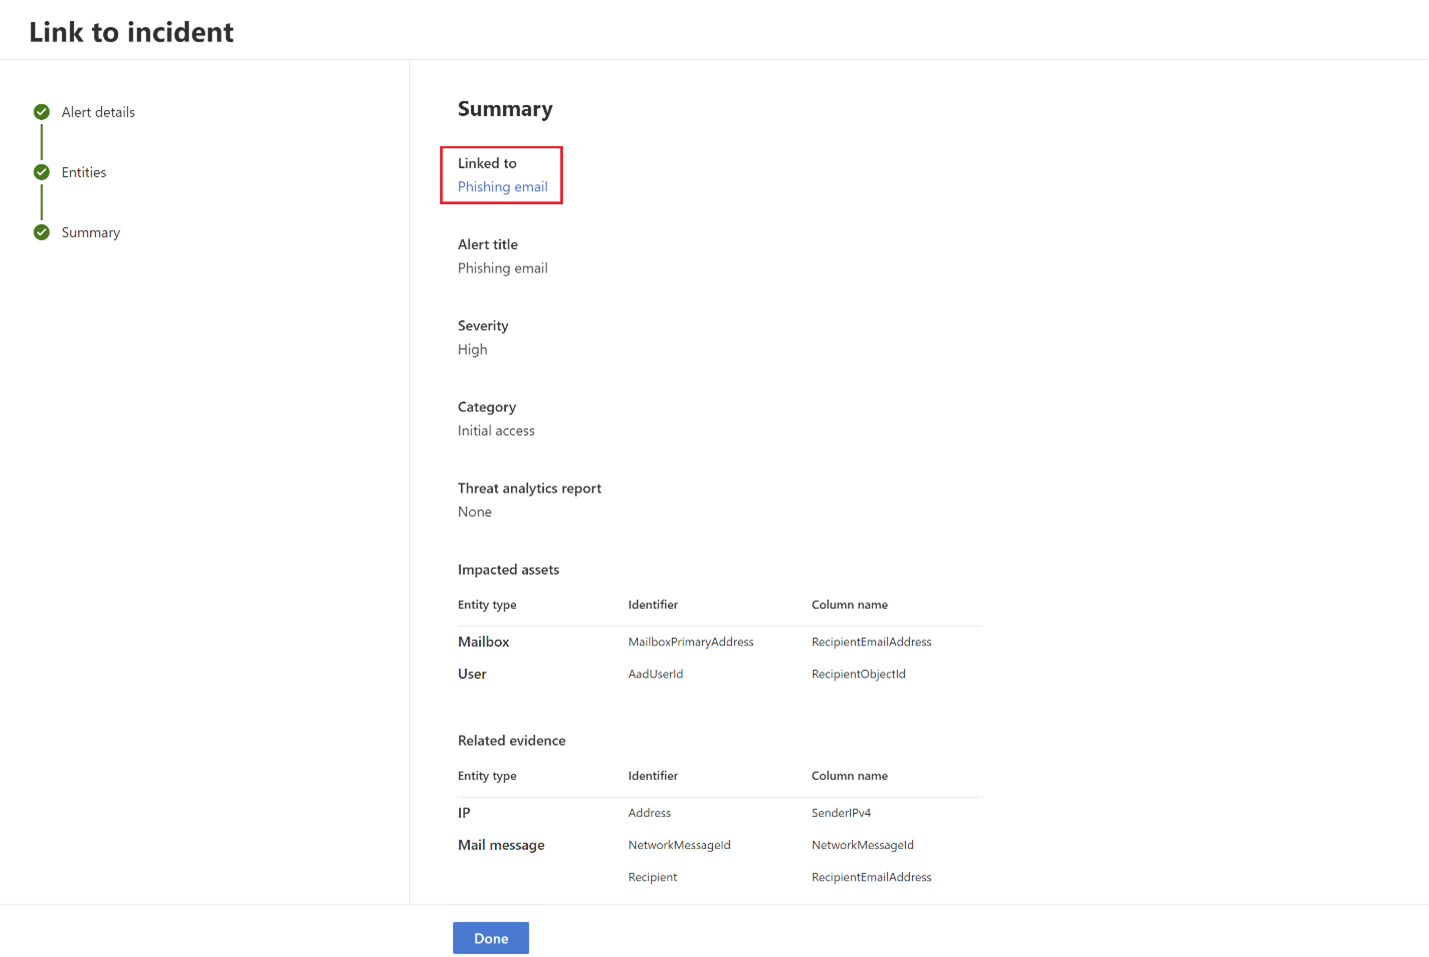
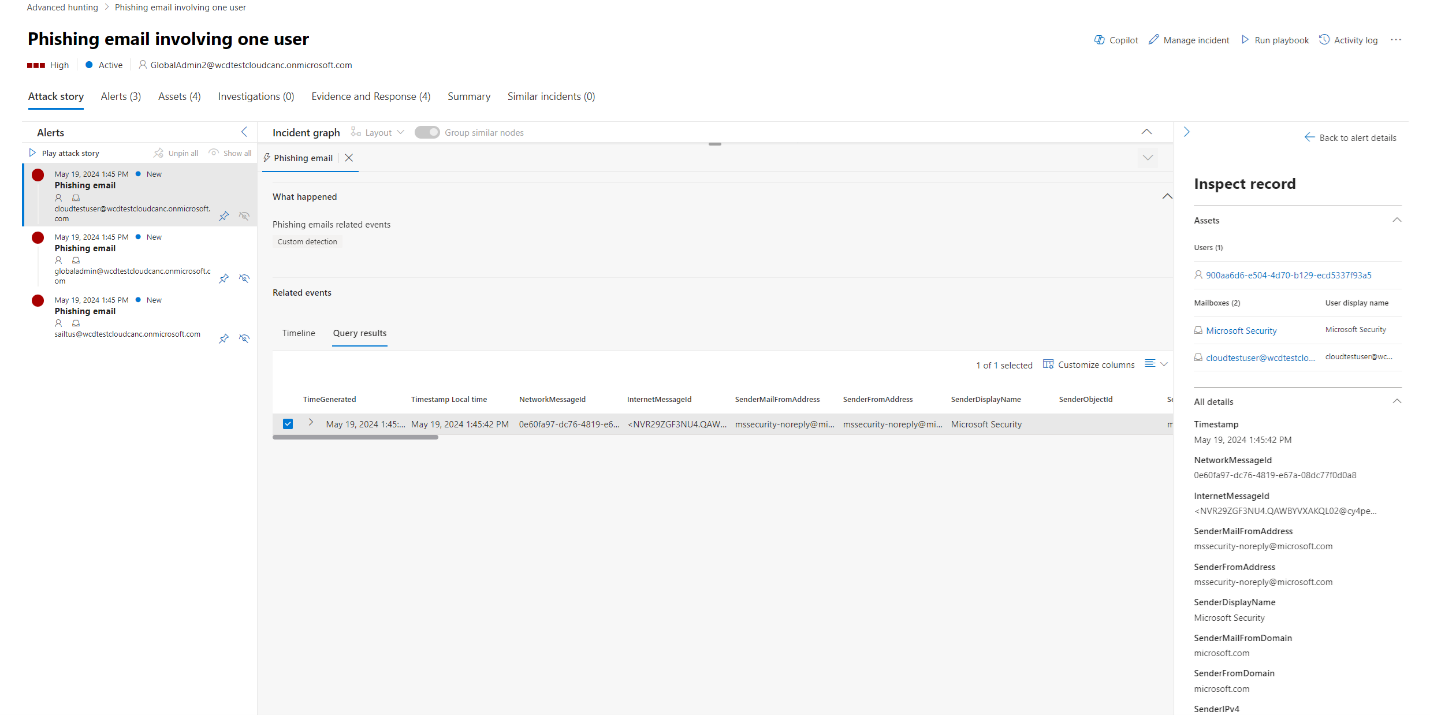
In this example, the alert from the selected event was linked to a new incident. On the alert page, you can view full event details in the timeline view (if available) and the query results view.
You can also select the event from the timeline view or from the query results view to open the Inspect record pane.
Filter for events added using advanced hunting
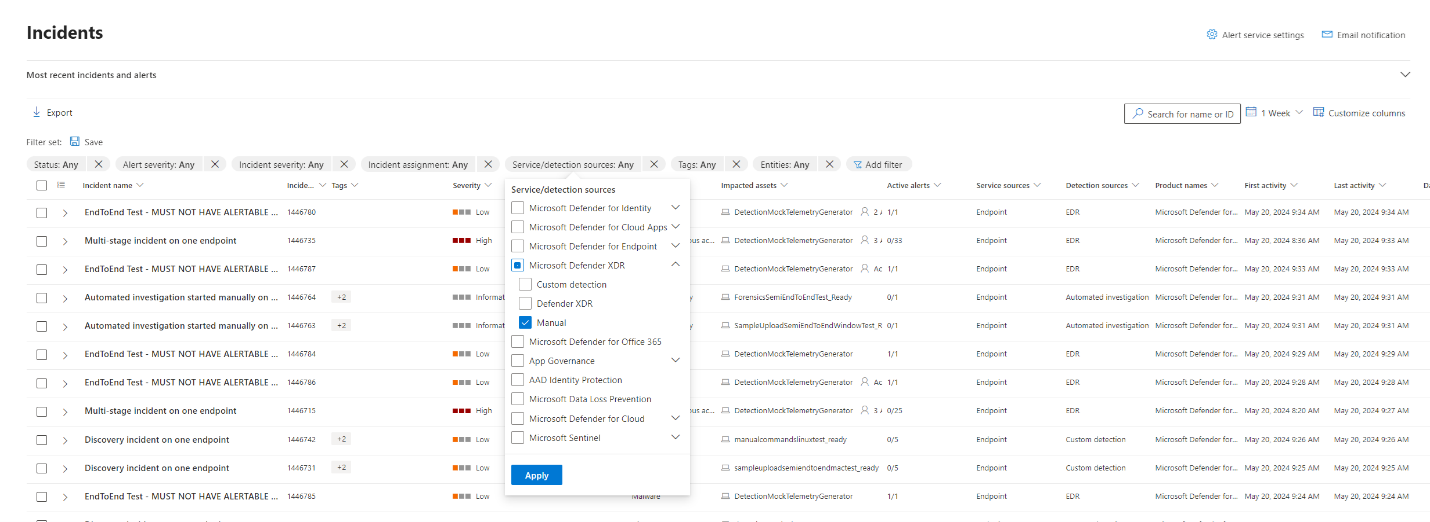
To find alerts created from advanced hunting, filter incidents and alerts by the Manual detection source.