Bilješka
Pristup ovoj stranici zahtijeva provjeru vjerodostojnosti. Možete pokušati da se prijavite ili promijenite direktorije.
Pristup ovoj stranici zahtijeva provjeru vjerodostojnosti. Možete pokušati promijeniti direktorije.
Applies to:  External tenants (learn more)
This tutorial is the final part of a series that demonstrates building a how to add sign-in and sign-out code in .NET Multi-platform App UI (.NET MAUI) shell and run the app on the Windows platform. In Part 1 of this series, you created a .NET MAUI shell app, added MSAL SDK support via MSAL helper classes, installed required libraries, and included an image resource. This final step demonstrates how to add sign-in and sign-out code in .NET MAUI shell and run the app on the Windows platform.
In this tutorial, you:
- Add sign-in and sign-out code.
- Modify the app Shell.
- Add platform-specific code.
- Add app settings.
- Run and test .NET MAUI shell app.
Prerequisites
Add sign-in and sign-out code
The user interface (UI) of a .NET MAUI app is constructed of objects that map to the native controls of each target platform. The main control groups used to create the UI of a .NET MAUI app are pages, layouts, and views.
Add main view page
The next steps will organize our code so that the main view is defined.
- Delete MainPage.xaml and MainPage.xaml.cs from your project, they're no longer needed. In the Solution Explorer pane, find the entry for MainPage.xaml, right-click it and select Delete.
- Right-click on the SignInMaui project and select Add > New Folder. Name the folder Views.
- Right-click on the Views.
- Select Add > New Item....
- Select .NET MAUI in the template list.
- Select the .NET MAUI ContentPage (XAML) template. Name the file MainView.xaml.
- Select Add.
- The MainView.xaml file will open in a new document tab, displaying all of the XAML markup that represents the UI of the page. Replace the XAML markup with the following markup:
Save the file.
Let's break down the key parts of the XAML controls placed on the page:
<ContentPage>is the root object for the MainView class.<VerticalStackLayout>is the child object of the ContentPage. This layout control arranges its children vertically, one after the other.<Image>displays an image, in this case it's using the azureactive_directory.png_ that you downloaded earlier.<Label>controls display text.<Button>can be pressed by the user, which raises theClickedevent. You can run code in response to theClickedevent.Clicked="OnSignInClicked"theClickedevent of the button is assigned to theOnSignInClickedevent handler, which will be defined in the code-behind file. You'll create this code in the next step.
Handle the OnSignInClicked event
The next step is to add the code for the button's Clicked event.
- In the Solution Explorer pane of Visual Studio, expand the MainView.xaml file to reveal its code-behind file MainView.xaml.cs. Open the MainView.xaml.cs and replace the content of the file with following code:
The MainView class is a content page responsible for displaying the main view of the app. In the constructor, it retrieves the cached user account using the MSALClientHelper from the PublicClientSingleton instance and enables the sign-in button, if no cached user account is found.
When the sign-in button is clicked, it calls the AcquireTokenSilentAsync method to acquire a token silently and navigates to the claimsview page using the Shell.Current.GoToAsync method. Additionally, the OnBackButtonPressed method is overridden to return true, indicating that the back button is disabled for this view.
Add claims view page
The next steps will organize the code so that ClaimsView page is defined. The page will display the user's claims found in the ID token.
- In the Solution Explorer pane of Visual Studio, right-click on the Views.
- Select Add > New Item....
- Select .NET MAUI in the template list.
- Select the .NET MAUI ContentPage (XAML) template. Name the file ClaimsView.xaml.
- Select Add.
- The ClaimsView.xaml file will open in a new document tab, displaying all of the XAML markup that represents the UI of the page. Replace the XAML markup with the following markup:
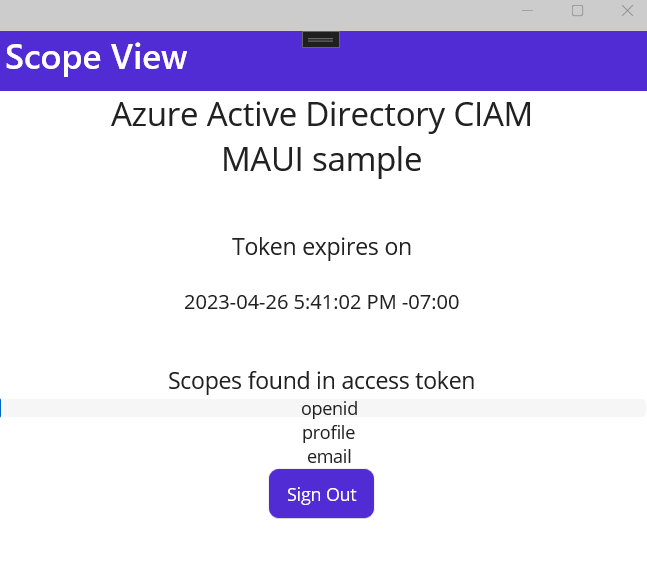
This XAML markup code represents the UI layout for a claim view in a .NET MAUI app. It starts by defining the ContentPage with a title and disabling the back button behavior.
Inside a VerticalStackLayout, there are several Label elements displaying static text, followed by a ListView named Claims that binds to a collection called IdTokenClaims to display the claims found in the ID token. Each claim is rendered within a ViewCell using a DataTemplate and displayed as a centered Label within a Grid.
Lastly, there's a Sign Out button centered at the bottom of the layout, which triggers the SignOutButton_Clicked event handler when clicked.
Handle the ClaimsView data
The next step is to add the code to handle ClaimsView data.
- In the Solution Explorer pane of Visual Studio, expand the ClaimsView.xaml file to reveal its code-behind file ClaimsView.xaml.cs. Open the ClaimsView.xaml.cs and replace the content of the file with following code:
The ClaimsView.xaml.cs code represents the code-behind for a claim view in a .NET MAUI app. It starts by importing the necessary namespaces and defining the ClaimsView class, which extends ContentPage. The IdTokenClaims property is an enumerable of strings, initially set to a single string indicating no claims found.
The ClaimsView constructor sets the binding context to the current instance, initializes the view components, and calls the SetViewDataAsync method asynchronously. The SetViewDataAsync method attempts to acquire a token silently, retrieves the claims from the authentication result, and sets the IdTokenClaims property to display them in the ListView named Claims. If a MsalUiRequiredException occurs, indicating that user interaction is needed for authentication, the app navigates to the claims view.
The OnBackButtonPressed method overrides the back button behavior to always return true, preventing the user from going back from this view. The SignOutButton_Clicked event handler signs the user out using the PublicClientSingleton instance, and upon completion, navigates to the main view.
Modify the app Shell
The AppShell class defines an app's visual hierarchy, the XAML markup used in creating the UI of the app. Update the AppShell to let it know about the Views.
Double-click the
AppShell.xamlfile in the Solution Explorer pane to open the XAML editor. Replace the XAML markup with the following code:<?xml version="1.0" encoding="UTF-8" ?> <Shell x:Class="SignInMaui.AppShell" xmlns="http://schemas.microsoft.com/dotnet/2021/maui" xmlns:x="http://schemas.microsoft.com/winfx/2009/xaml" xmlns:pages="clr-namespace:SignInMaui.Pages" Shell.FlyoutBehavior="Disabled"> <ShellContent Route="signin" ContentTemplate="{DataTemplate pages:SignInPage}" /> <ShellContent Route="claims" ContentTemplate="{DataTemplate pages:ClaimsPage}" /> </Shell>The XAML code defines an
AppShellclass that disables the flyout behavior and sets the main content to aShellContentelement with a titleHomeand a content template pointing to theMainViewclass.In the Solution Explorer pane of Visual Studio, expand the AppShell.xaml file to reveal its code-behind file AppShell.xaml.cs. Open the AppShell.xaml.cs and replace the content of the file with following code:
// Copyright (c) Microsoft Corporation. All rights reserved.
// Licensed under the MIT License.

namespace SignInMaui;

public partial class AppShell : Shell
{
    public AppShell()
    {
        InitializeComponent();
    }
}
You update the
AppShell.xaml.csfile to include the necessary route registrations for theMainViewandClaimsView. By calling theInitializeComponent()method, you ensure the initialization of theAppShellclass. TheRegisterRoute()method associate themainviewandclaimsviewroutes with their respective view types,MainViewandClaimsView.
Add platform-specific code
A .NET MAUI app project contains a Platforms folder, with each child folder representing a platform that .NET MAUI can target. To provide application-specific behavior to supplement the default application class, you modify Platforms/Windows/App.xaml.cs.
Replace the content of the file with following code:
using Microsoft.UI.Xaml;

// To learn more about WinUI, the WinUI project structure,
// and more about our project templates, see: http://aka.ms/winui-project-info.

namespace SignInMaui.WinUI;

/// <summary>
/// Provides application-specific behavior to supplement the default Application class.
/// </summary>
public partial class App : MauiWinUIApplication
{
    /// <summary>
    /// Initializes the singleton application object.  This is the first line of authored code
    /// executed, and as such is the logical equivalent of main() or WinMain().
    /// </summary>
    public App()
    {
        this.InitializeComponent();
    }

    protected override MauiApp CreateMauiApp() => MauiProgram.CreateMauiApp();
}
In the code, you configure the redirect URI for the application and initialized the MSAL, and then set the parent window for the application. Additionally, you override the OnLaunched method to handle the launch event and retrieve the parent window handle.
Add app settings
Settings allow the separation of data that configures the behavior of an app from the code, allowing the behavior to be changed without rebuilding the app. The MauiAppBuilder provides ConfigurationManager to configure settings in our .NET MAUI app. Let's add the appsettings.json file as an EmbeddedResource.
To create appsettings.json, follow these steps:
In the Solution Explorer pane of Visual Studio, right-click on the SignInMaui project > Add > New Item....
Select Web > JavaScript JSON Configuration File. Name the file
appsettings.json.Select Add.
Select appsettings.json
In the Properties pane, set Build Action to Embedded resource.
In the Properties pane, set Copy to Output Directory to Copy always.
Replace the content of
appsettings.jsonfile with the following code:{ "AzureAd": { "Authority": "https://Enter_the_Tenant_Subdomain_Here.ciamlogin.com/", "ClientId": "Enter_the_Application_Id_Here" }, "DownstreamApi": { "Scopes": [ "openid", "offline_access" ] } }In the
appsettings.json, find the placeholder:Enter_the_Tenant_Subdomain_Hereand replace it with the Directory (tenant) subdomain. For example, if your tenant primary domain iscontoso.onmicrosoft.com, usecontoso. If you don't have your tenant name, learn how to read your tenant details.Enter_the_Application_Id_Hereand replace it with the Application (client) ID of the app you registered earlier.
Use custom URL domain (Optional)
Use a custom domain to fully brand the authentication URL. From a user perspective, users remain on your domain during the authentication process, rather than being redirected to ciamlogin.com domain name.
Follow these steps to use a custom domain:
Use the steps in Enable custom URL domains for apps in external tenants to enable custom URL domain for your external tenant.
Open appsettings.json file:
- Update the value of the
Authorityproperty to https://Enter_the_Custom_Domain_Here/Enter_the_Tenant_ID_Here. ReplaceEnter_the_Custom_Domain_Herewith your custom URL domain andEnter_the_Tenant_ID_Herewith your tenant ID. If you don't have your tenant ID, learn how to read your tenant details. - Add
knownAuthoritiesproperty with a value [Enter_the_Custom_Domain_Here].
- Update the value of the
After you make the changes to your appsettings.json file, if your custom URL domain is login.contoso.com, and your tenant ID is aaaabbbb-0000-cccc-1111-dddd2222eeee, then your file should look similar to the following snippet:
{
  "AzureAd": {
    "Authority": "https://login.contoso.com/aaaabbbb-0000-cccc-1111-dddd2222eeee",
    "ClientId": "Enter_the_Application_Id_Here",
    "CacheFileName": "msal_cache.txt",
    "CacheDir": "C:/temp",
    "KnownAuthorities": ["login.contoso.com"]
  },
  "DownstreamApi": {
    "Scopes": "openid offline_access"
  }
}
Run and test .NET MAUI desktop app
.NET MAUI apps are designed to run on multiple operating systems and devices. You'll need to select which target you want to test and debug your app with.
Set the Debug Target in the Visual Studio toolbar to the device you want to debug and test with. The following steps demonstrate setting the Debug Target to Windows:
- Select Debug Target dropdown list.
- Select Framework
- Select net7.0-windows...
Run the app by pressing F5 or select the play button at the top of Visual Studio.
You can now test the sample .NET MAUI desktop application. After you run the application, the desktop application window appears automatically:
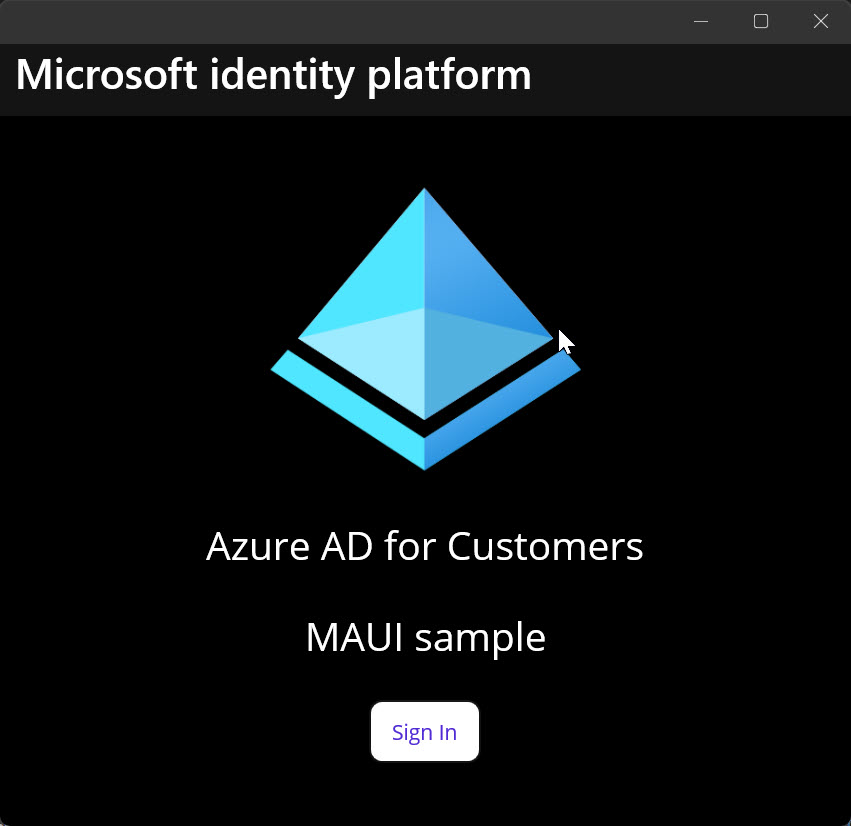
On the desktop window that appears, select the Sign In button. A browser window opens, and you're prompted to sign in.
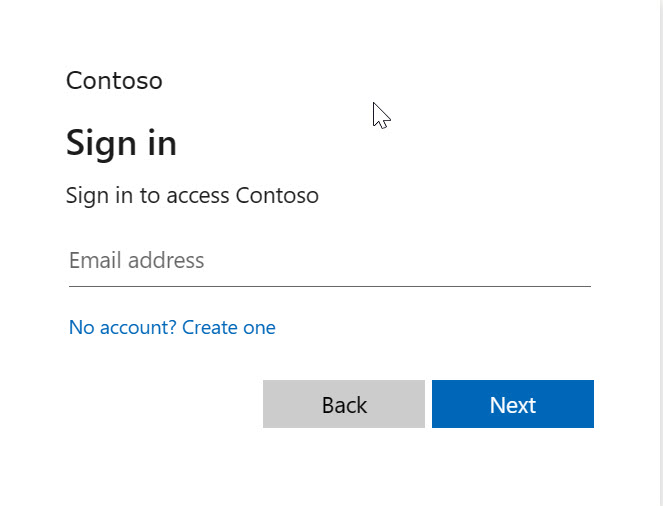
During the sign in process, you're prompted to grant various permissions (to allow the application to access your data). Upon successful sign in and consent, the application screen displays the main page.