Bilješka
Pristup ovoj stranici zahtijeva provjeru vjerodostojnosti. Možete pokušati da se prijavite ili promijenite direktorije.
Pristup ovoj stranici zahtijeva provjeru vjerodostojnosti. Možete pokušati promijeniti direktorije.
Dataflow Gen2 provides several ways to connect to and get your data. You can browse data sources by category, find Fabric items in the OneLake catalog, return to recently used items, upload files, or use Copilot to ingest and transform data with natural language commands.
Prerequisites
Before you begin, make sure you have the following setup:
- A Microsoft Fabric tenant account with an active subscription. Create a free account.
- A Microsoft Fabric enabled workspace.
- A Dataflow Gen2 item, or permissions to create one.
For Copilot features, you also need:
- A subscription that's at least an F2 or P1 capacity SKU: Fabric Copilot Capacity.
Get data for Dataflow Gen2
Dataflow Gen2 supports a wide range of connectors for databases, files, online services, and more. For the full list of supported connectors and their capabilities in Dataflow Gen2, pipelines, and Copy job, see the Connector overview.
To get data in a dataflow, select the Get data icon from the Home ribbon. Select the dropdown to select a specific source, or select the icon or the More option to see all connection options.
For Dataflow Gen2 the connection options include:
Home:
The home page acts as a summary of all the modules and presents you with different options to expedite the process and get you closer to your data. Typically, this module contains any existing data sources and gives you the option to use a new data source, table, and upload files. From the home page, you can select View more on the right side of the New sources, Recent (Preview), and OneLake catalog sections to visit those modules.

Copilot:
Copilot in the get data experience for Dataflow Gen2 helps you ingest and transform data with natural language commands. You can get help finding the right data and applying transformations without leaving the get data experience.
- Easily ingest data from your recently used tables by choosing from the recent tables list.
- Chat with your data to apply transformations to find the data you want.
For more information, see Chat with Copilot in the get data experience.
New:
The New module is the new data source module, where you can select from the full list of connectors. On this page, you can search for a connector across all categories by using the search bar at the top of the page. You can also navigate across the categories to find a specific connector to integrate with. When you select a connector, you open the connection settings window, which starts the process of connecting.
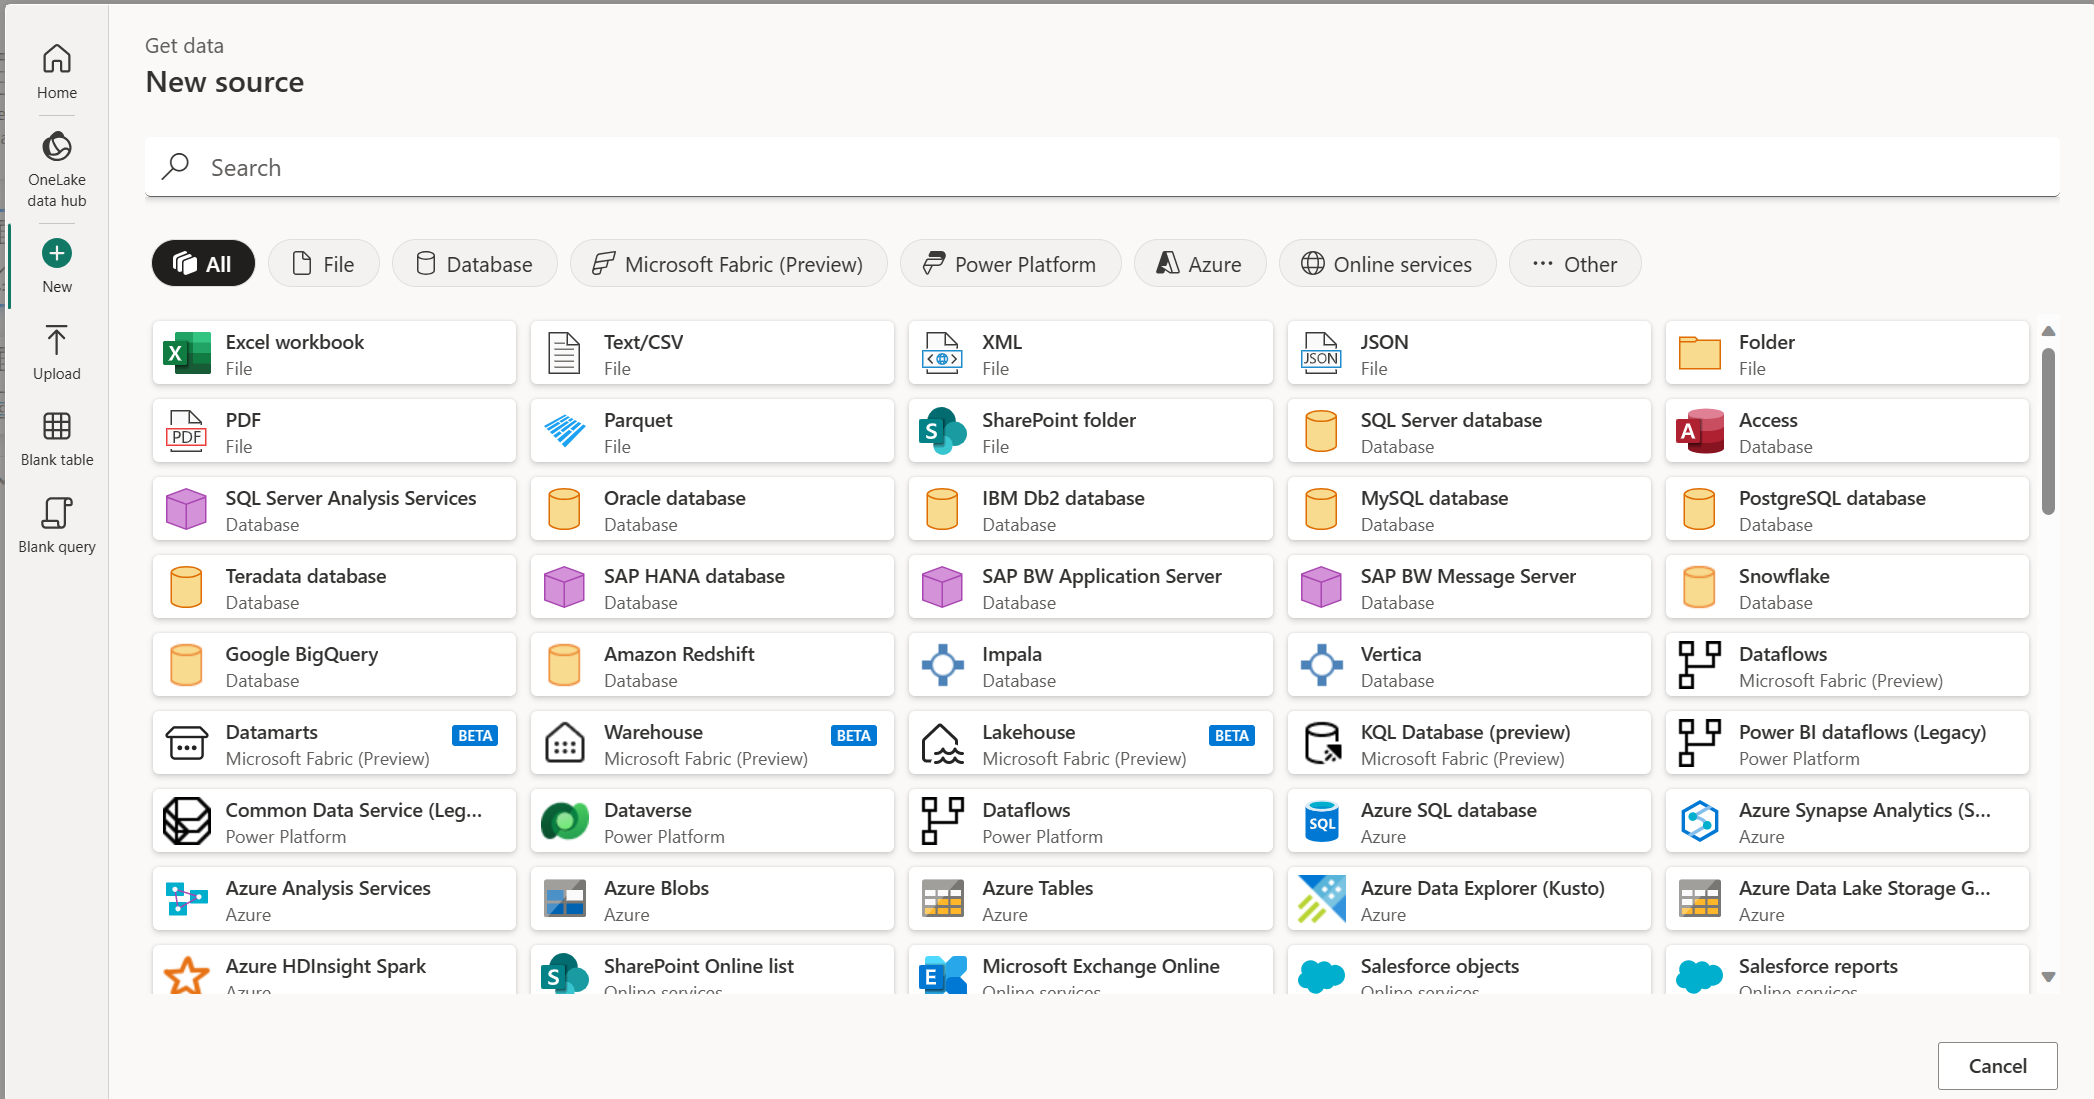
Recent:
The Recent module displays recently used data sources, so you can quickly reconnect to sources you used before.

For more information, see Use recent data in Dataflow Gen2.
OneLake catalog:
In Microsoft Fabric, the OneLake catalog module makes it easy to find, explore, and use the Fabric data items in your organization that you have access to. It provides information about the items and entry points for working with them. For more information about the OneLake catalog, see OneLake catalog.

Azure:
The Azure module enables you to connect to Azure-hosted data sources such as Azure SQL Database, Azure Blob Storage, and Azure Data Lake Storage.
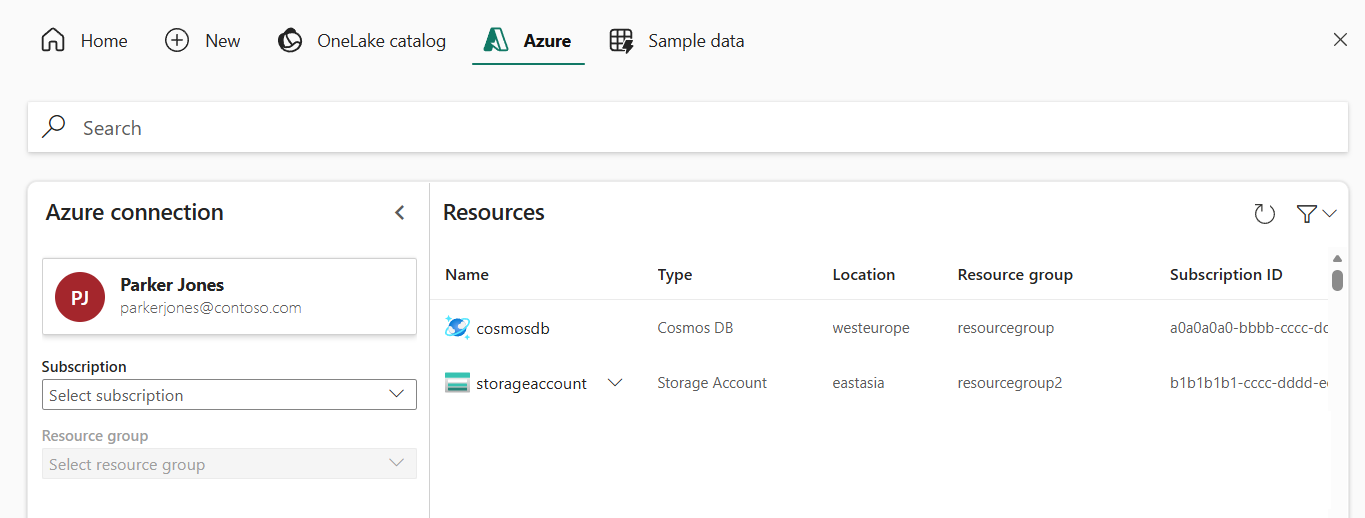
Upload:
The Upload module accepts file uploads directly through local file browsing or drag and drop. The following connectors support this capability:
For more information about uploading files, see Upload a file.

Blank table:
The Blank table module provides a quick start for creating a table in a Power Query dataflow.

Blank query:
The Blank query module enables you to write or paste your own M script to create a new query.


The modules that appear can vary based on the product experience and connector. For more information about the shared Power Query interface, see Get data modules in Power Query Online.
Connect to a data source
To get data in Data Factory:
On the left side of Data Factory, select Workspaces.
From your Data Factory workspace, select New > then select your data factory item: a dataflow, pipeline, copy job, or mirroring job.

In Power Query, either select Get data in the ribbon or select Get data from another source in the current view.

In the Choose data source page, use Search to search for the name of the connector, or select View more to the right of the connector list to see all the connectors available in Data Factory.
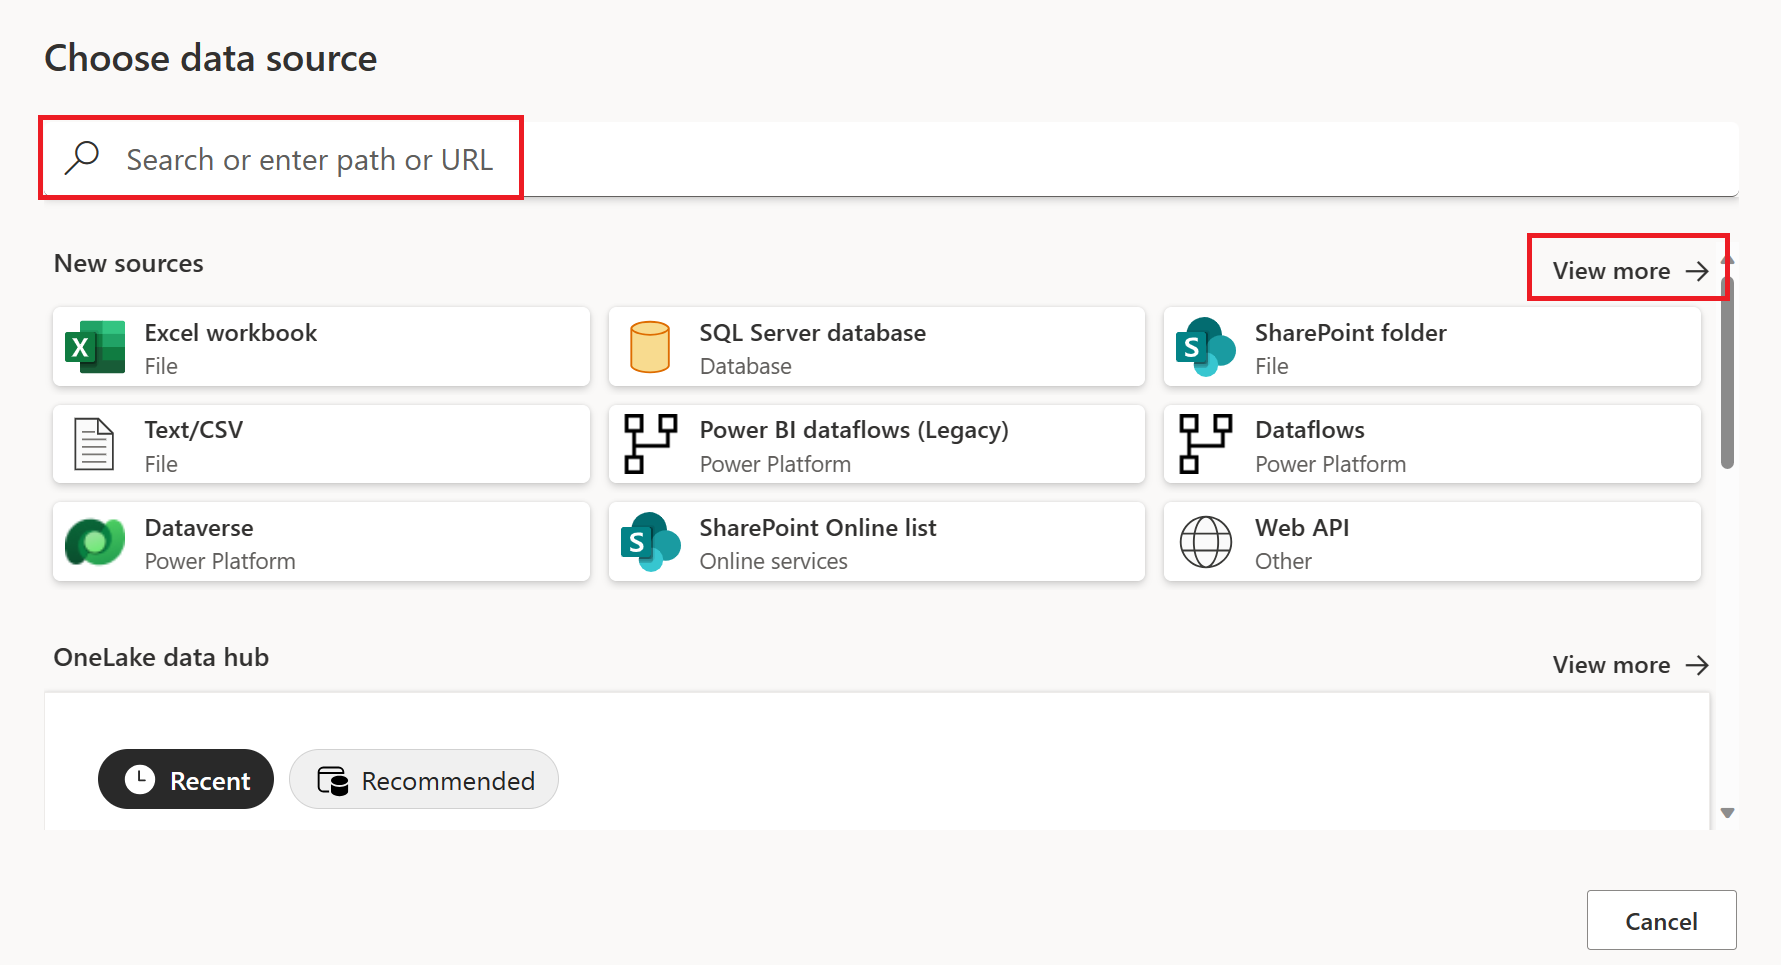
If you choose to view more connectors, you can still use Search to search for the name of the connector, or choose a category to see a list of connectors associated with that category.


After you select a connector, follow the connector-specific instructions to authenticate and choose the tables, files, or other items you want to load into your dataflow.
Instructions and requirements differ for each connector. For instructions for your connector, select your connector from the Connector overview.
Chat with Copilot in the get data experience
In Fabric Dataflow Gen2, select Get data to begin. In the Get data wizard, select the Copilot tab, and then start with the list of recently used tables. You can either choose the recently used tables in the get started module or choose recent tables from Choose context in the chat box.
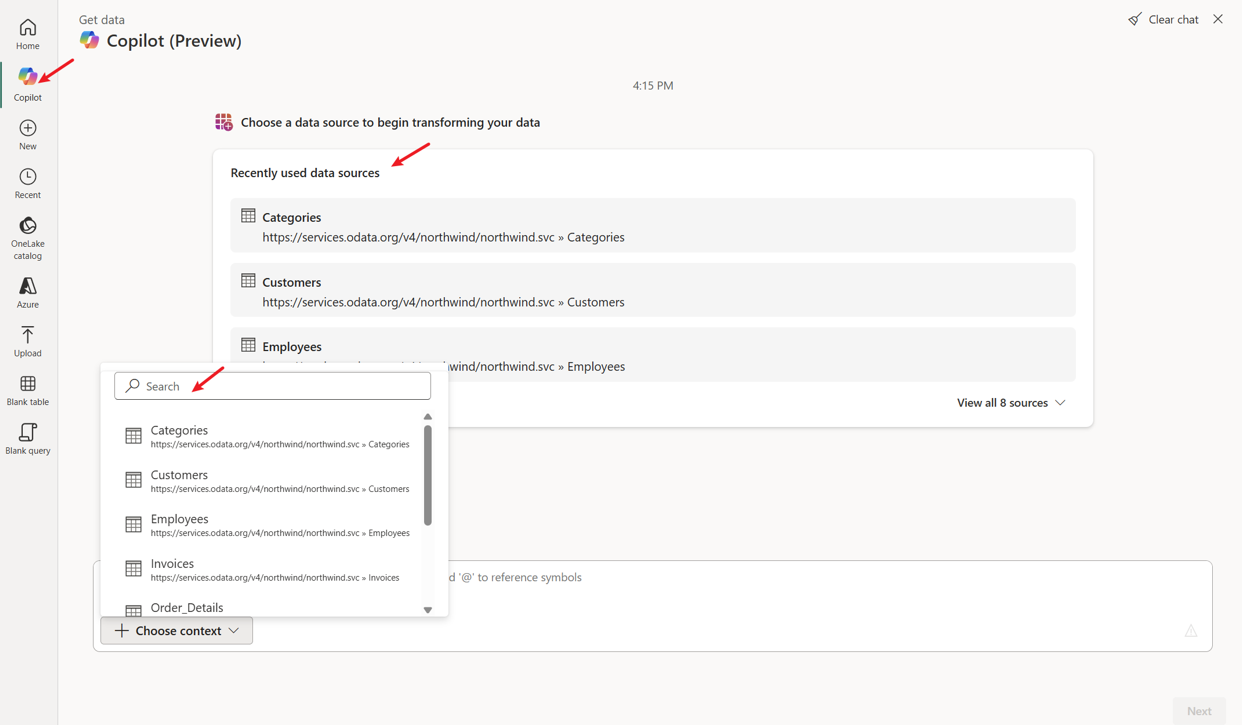
After loading the recently used table, chat with Copilot to find the data you want. For step-by-step exploration, you want to first group by the data on customers' titles to check the results. Then, depending on the range of the counts, decide which ranges to include.
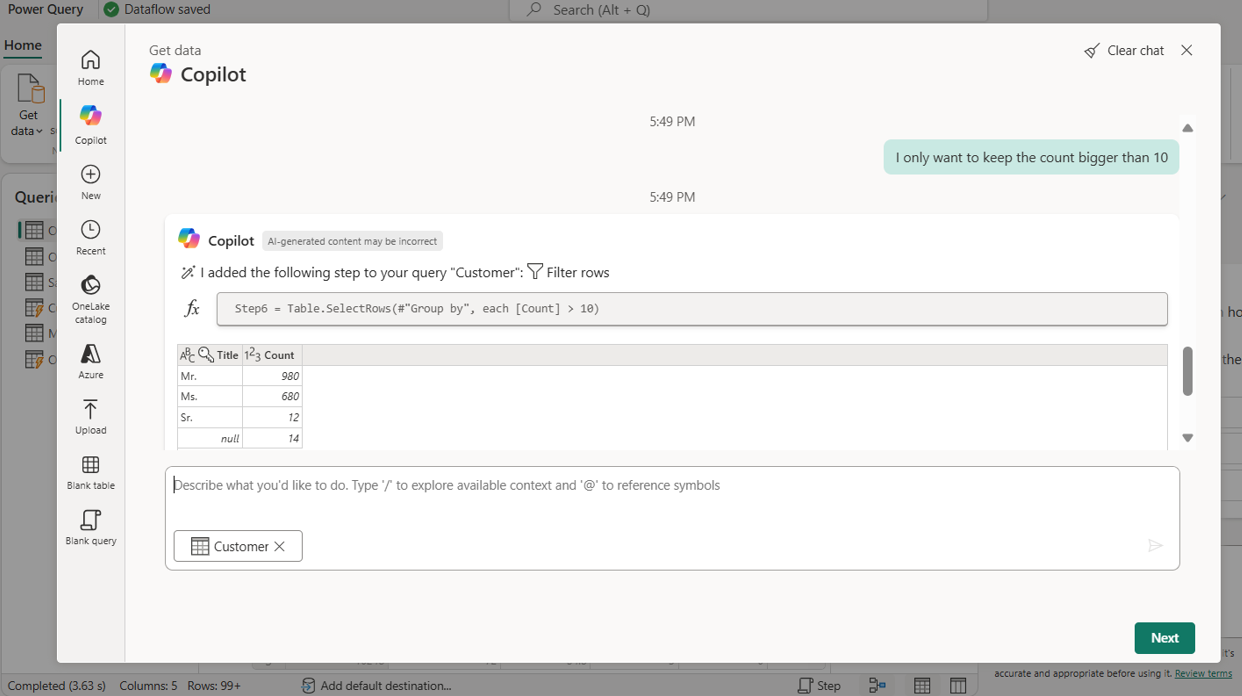
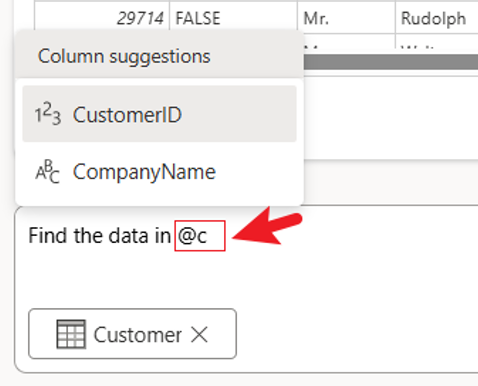
When selecting table columns, use @ to quickly view available columns. Then enter the letter to filter on detail column.
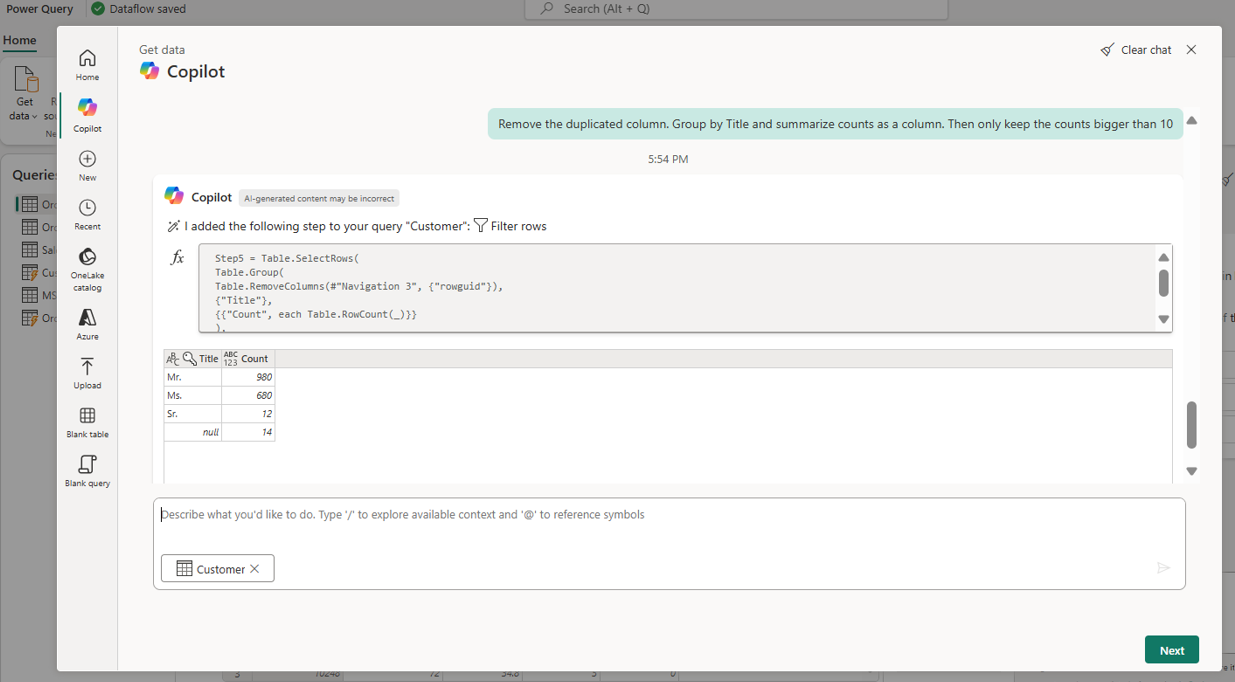
If you know all the operations you want to do at the beginning, describe them in one sentence. Then Copilot can quickly understand it and provide the filtered results to you.
To return to the previous step, select the Restore button next to it and your data reverts to that point. You can also copy the preview data to confirm with your colleagues before saving it into Dataflow Gen2.
Use recent data in Dataflow Gen2
Important
Recent data is currently in preview for Dataflow Gen2.
The Recent module provides quick access to data items that you used previously in Dataflow Gen2. You can return to tables, folders, databases, sheets, and other supported items without navigating through connection dialogs and folder structures again.
Items that support recent data
Recent data tracks the following types of data items:
- Table: A table from a database or other data source.
- Sheet: A worksheet from an Excel file.
- Database: A database instance from a supported data source.
- Schema: A database schema that contains related tables.
- Folder: A folder that contains files or other data items, including a folder in a Fabric lakehouse.
- View: A database view that presents data from one or more tables.
- Function: A custom or built-in function from a data source.
When you access a supported item in Dataflow Gen2, the item can appear in your recent data list in future sessions.
Access recent data from the Power Query ribbon
Use the Power Query ribbon to return directly to a recently used item.
- In your Fabric workspace, open an existing Dataflow Gen2 item or create one.
- In the Power Query editor, select Recent data from the ribbon.
- Review the recently used items from your previous dataflow sessions.
- Select an item to load it into the Power Query editor.
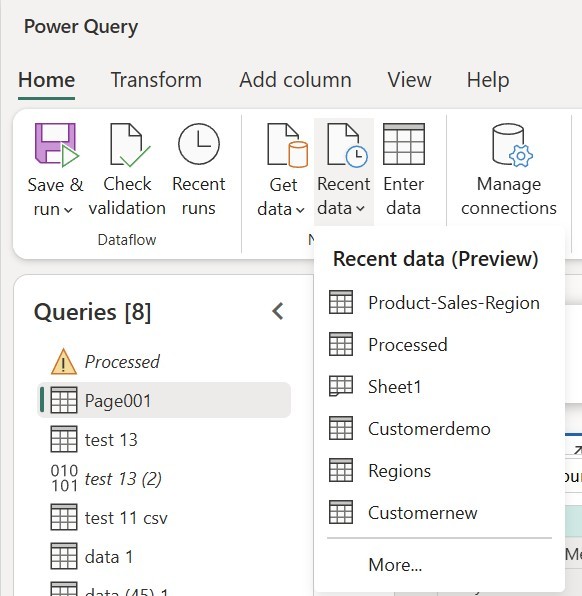
Access recent data from the get data experience
Use the get data experience when you add a data source to your dataflow.
- In your Fabric workspace, open an existing Dataflow Gen2 item or create one.
- In the Power Query editor, select Get data.
- In the Get data dialog, select the Recent module.
- Review the recently used items from your previous dataflow sessions.
- Select an item to load it into the Power Query editor.
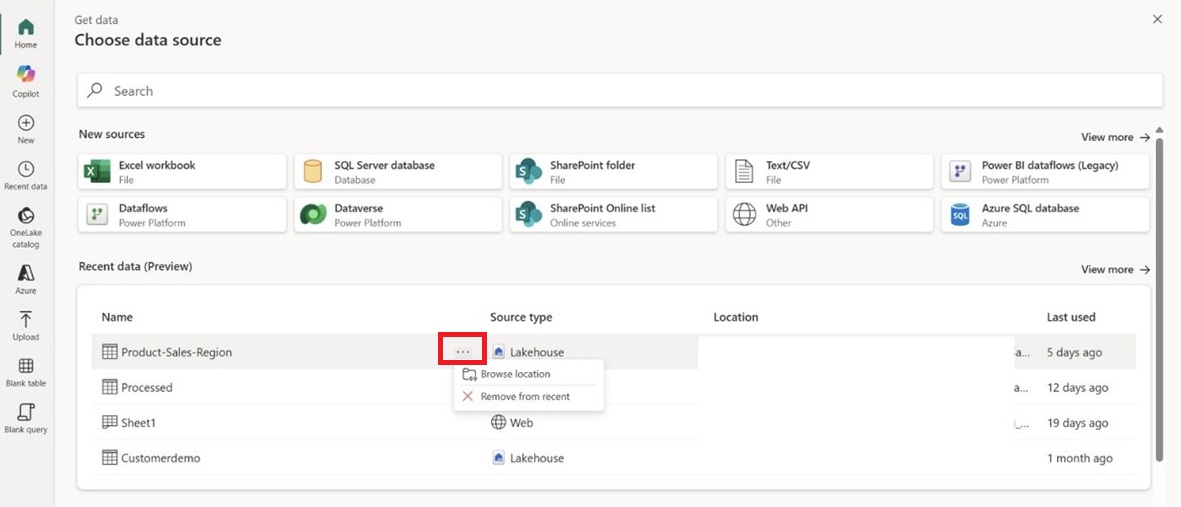
Browse related items
Use Browse location to explore other items in the same folder or database as a recent item.
- Select Browse location for an item in the recent data list.
- Review the other tables, files, or items available at the same location.
- Select the items to include in your dataflow. Each selected item creates a query in the Power Query editor.
- Apply transformations, merge queries, or configure your dataflow as needed.