Bilješka
Pristup ovoj stranici zahtijeva provjeru vjerodostojnosti. Možete pokušati da se prijavite ili promijenite direktorije.
Pristup ovoj stranici zahtijeva provjeru vjerodostojnosti. Možete pokušati promijeniti direktorije.
Microsoft Fabric notebooks support seamless interaction with Lakehouse data using Pandas, the most popular Python library for data exploration and processing. Within a notebook, you can quickly read data from and write data back to your Lakehouse resources in various file formats. This guide provides code samples to help you get started in your own notebook.
Prerequisites
Get a Microsoft Fabric subscription. Or, sign up for a free Microsoft Fabric trial.
Sign in to Microsoft Fabric.
Switch to Fabric by using the experience switcher on the lower-left side of your home page.
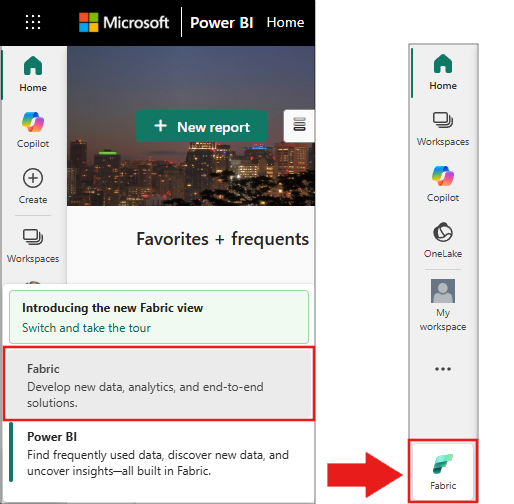
- Complete the steps in Prepare your system for data science tutorials to create a new notebook and attach a Lakehouse to it. For this article, follow the steps to create a new notebook rather than importing an existing one.
Use this workflow to choose the right pattern:
- For single files in the Lakehouse, read or write them with Pandas using a path under
Files. - For table-like data in a Lakehouse, use Spark and Delta tables, then convert to Pandas only when the result fits in your notebook memory.
- If the data is large, keep it in Spark for filtering, aggregation, and transformation before converting it to a Pandas DataFrame.
Load Lakehouse data into a notebook
Note
You need some data in your Lakehouse to follow the steps in this section. If you don't have any data, follow the steps in Download dataset and upload to lakehouse to add the churn.csv file to your Lakehouse.
Once you attach a Lakehouse to your Microsoft Fabric notebook, you can explore stored data without leaving the page and copy the file path you need for notebook code. In the Lakehouse explorer, you can either use the generated notebook snippet to load a file into a Spark or Pandas DataFrame or copy the file's full ABFS path. For the default Lakehouse attached to the notebook, a typical Files path looks like /lakehouse/default/Files/.... For other Lakehouses, use the ABFS path from the Lakehouse explorer.
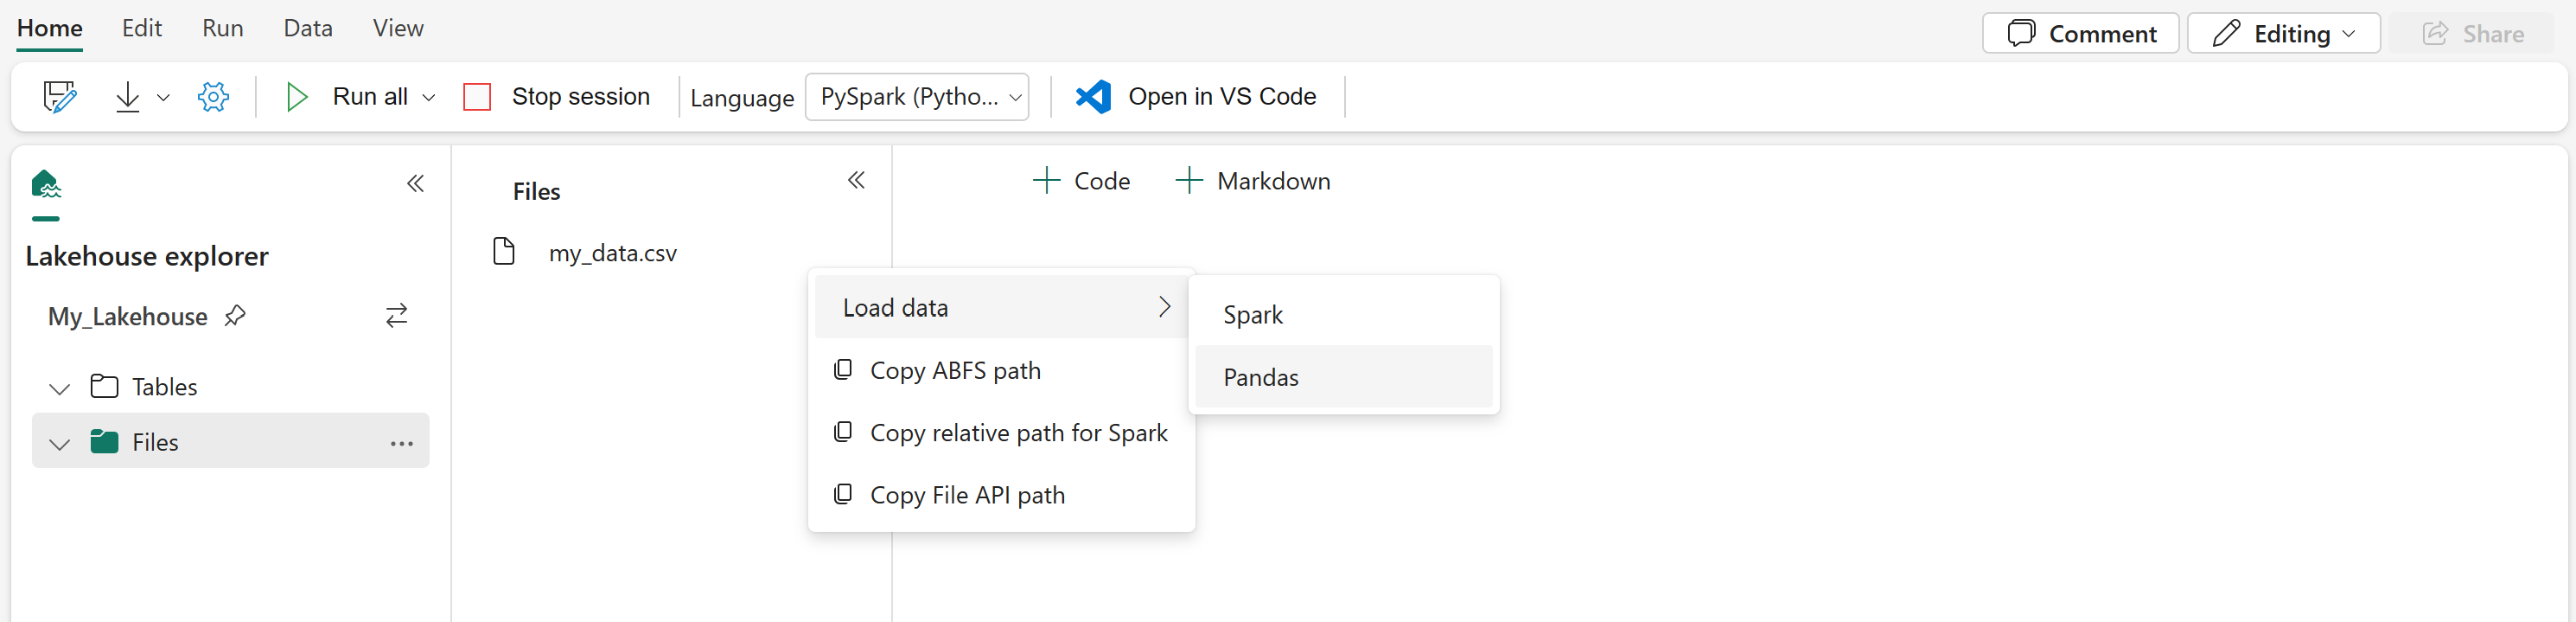
Selecting a file in the Lakehouse explorer can generate code that loads the file into a DataFrame in your notebook.
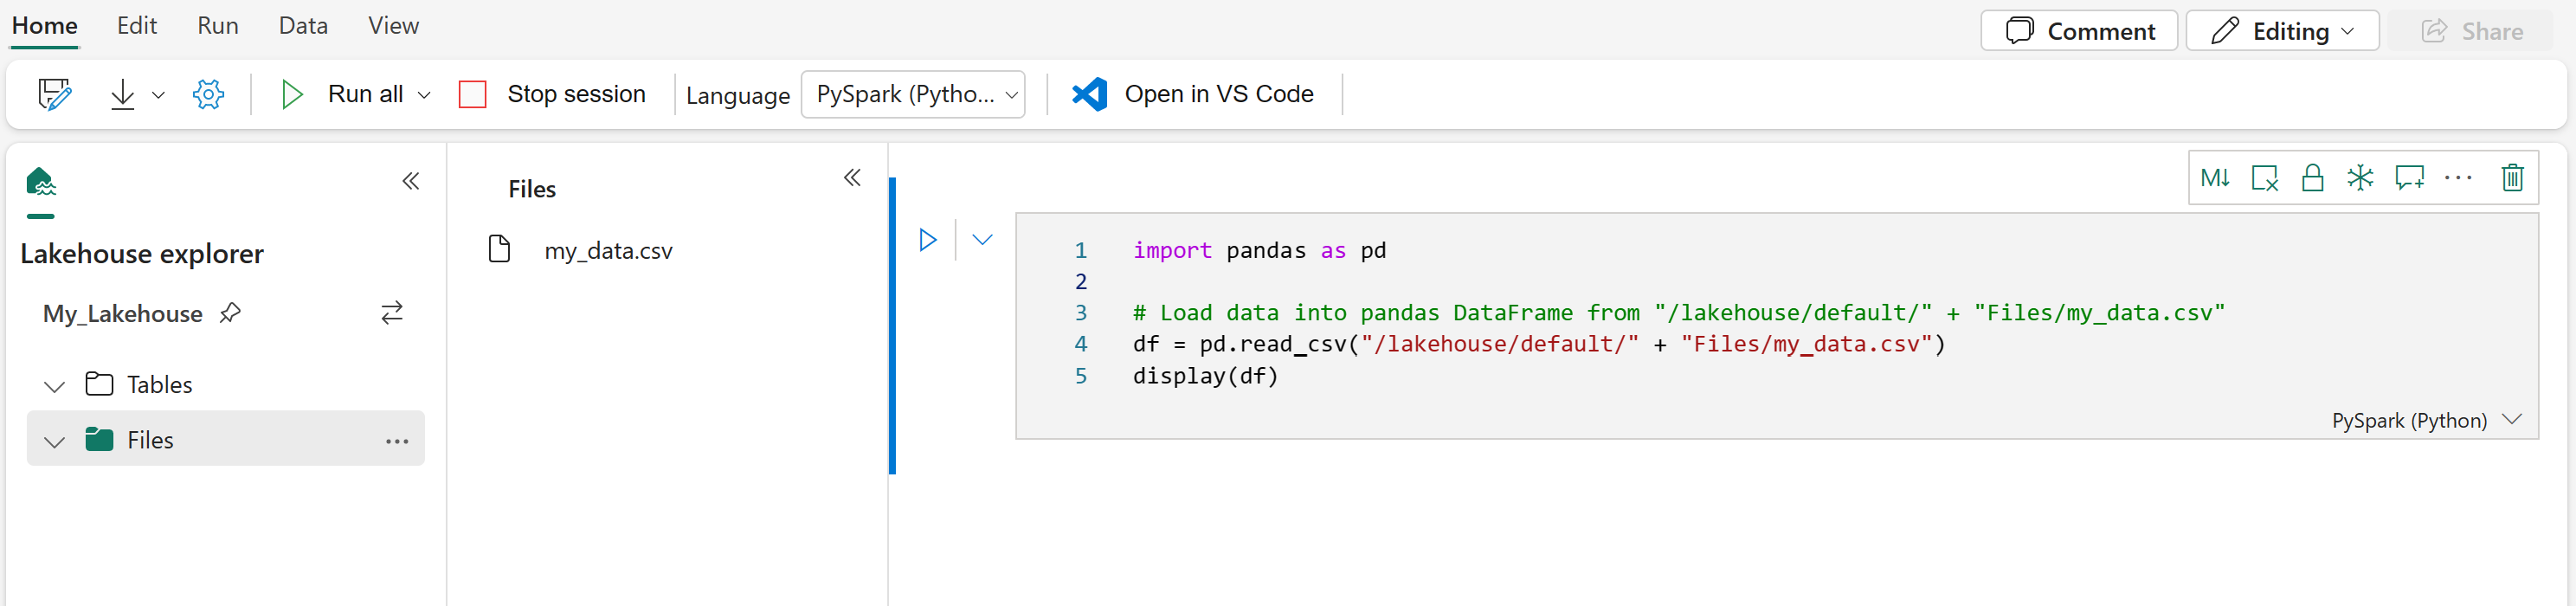
Converting a Spark DataFrame into a Pandas DataFrame
Important
toPandas() loads the full Spark DataFrame into the notebook driver memory. Only use it for small to medium result sets. If your dataset is large, filter, aggregate, or sample it in Spark before converting to Pandas.
For reference, this command shows how to convert a Spark DataFrame into a Pandas DataFrame:
# Replace "spark_df" with the name of your own Spark DataFrame
pandas_df = spark_df.toPandas()
Reading and writing various file formats
Note
Modifying the version of a specific package could potentially break other packages that depend on it. For instance, downgrading azure-storage-blob might cause problems with Pandas and various other libraries that rely on Pandas, including mssparkutils, fsspec_wrapper, and notebookutils.
You can view the list of preinstalled packages and their versions for each runtime here.
These code samples demonstrate Pandas operations to read and write various file formats. These samples aren't intended to be run sequentially as in a tutorial, but rather to be copied and pasted into your own notebook as needed.
Note
You must replace the file paths in these code samples with the full path for the file in your Lakehouse. For the default Lakehouse attached to the notebook, use a path such as /lakehouse/default/Files/.... For other Lakehouses, use the ABFS path from the Lakehouse explorer.
Read data from a CSV file
import pandas as pd

# Read a CSV file from your Lakehouse into a Pandas DataFrame
# For the default Lakehouse attached to the notebook, use the following path pattern:
df = pd.read_csv("/lakehouse/default/Files/FILENAME.csv")

# Verify that the file loaded successfully before continuing
print(df.head())
print(df.shape)
display(df)
Write data as a CSV file
import pandas as pd

# Write a Pandas DataFrame into a CSV file in your Lakehouse
# Replace FILENAME with your own value
df.to_csv("/lakehouse/default/Files/FILENAME.csv", index=False)
Read data from a Parquet file
import pandas as pd

# Read a Parquet file from your Lakehouse into a Pandas DataFrame
df = pd.read_parquet("/lakehouse/default/Files/FILENAME.parquet")
display(df)
Write data as a Parquet file
import pandas as pd

# Write a Pandas DataFrame into a Parquet file in your Lakehouse
df.to_parquet("/lakehouse/default/Files/FILENAME.parquet")
Read data from an Excel file
import pandas as pd

# Read an Excel file from your Lakehouse into a Pandas DataFrame
# If the file is in a subfolder, add the appropriate folder after Files/
df = pd.read_excel("/lakehouse/default/Files/FILENAME.xlsx")
display(df)
Write data as an Excel file
import pandas as pd

# Write a Pandas DataFrame into an Excel file in your Lakehouse
df.to_excel("/lakehouse/default/Files/FILENAME.xlsx", index=False)
Read data from a JSON file
import pandas as pd

# Read a JSON file from your Lakehouse into a Pandas DataFrame
df = pd.read_json("/lakehouse/default/Files/FILENAME.json")
display(df)
Write data as a JSON file
import pandas as pd

# Write a Pandas DataFrame into a JSON file in your Lakehouse
df.to_json("/lakehouse/default/Files/FILENAME.json")
Working with Delta tables
Delta tables are the default table format in Microsoft Fabric and are stored in the Tables section of your Lakehouse. Files and tables are different storage locations in Fabric, and they use different access patterns. To work with Delta tables in Pandas, first read the table into a Spark DataFrame, then convert the filtered result to a pandas DataFrame only when it fits in driver memory.
Create a test Delta table
To follow the steps in this section, you need a Delta table in your Lakehouse. Follow the steps in Download dataset and upload to lakehouse to add the churn.csv file to your Lakehouse, then create a test table from the churn.csv file by running this code in your notebook:
import pandas as pd
# Create a test Delta table from the churn.csv file

df = pd.read_csv("/lakehouse/default/Files/churn/raw/churn.csv")
spark_df = spark.createDataFrame(df)
spark_df.write.format("delta").mode("overwrite").saveAsTable("churn_table")
This step creates a Delta table named churn_table that you can use for testing the following examples.
Read data from a Delta table
# Read a Delta table from your Lakehouse into a pandas DataFrame
# This example uses the churn_table created above
spark_df = spark.read.table("churn_table")
pandas_df = spark_df.toPandas()
display(pandas_df)
You can also read Delta tables using Spark SQL syntax:
# Alternative method using Spark SQL
spark_df = spark.sql("SELECT * FROM churn_table")
pandas_df = spark_df.toPandas()
display(pandas_df)
Write pandas DataFrame to a Delta table
# Convert pandas DataFrame to Spark DataFrame, then save as Delta table
# Replace TABLE_NAME with your desired table name
spark_df = spark.createDataFrame(pandas_df)
spark_df.write.format("delta").mode("overwrite").saveAsTable("TABLE_NAME")
You can also save to a specific path in the Tables section:
# Save to a specific path in the Tables section
spark_df = spark.createDataFrame(pandas_df)
spark_df.write.format("delta").mode("overwrite").save("Tables/TABLE_NAME")
Write modes for Delta tables
When writing to Delta tables, you can specify different modes:
# Overwrite the entire table
spark_df.write.format("delta").mode("overwrite").saveAsTable("TABLE_NAME")

# Append new data to existing table
spark_df.write.format("delta").mode("append").saveAsTable("TABLE_NAME")
Note
Delta tables created in the Tables section of your Lakehouse are discoverable without any additional registration or configuration steps, and can be queried using Spark SQL. They also appear in the Lakehouse explorer interface (you may need to refresh the Lakehouse explorer to see recent changes).
Related content
- Use Data Wrangler to clean and prepare your data
- Start training ML models