Bilješka
Pristup ovoj stranici zahtijeva provjeru vjerodostojnosti. Možete pokušati da se prijavite ili promijenite direktorije.
Pristup ovoj stranici zahtijeva provjeru vjerodostojnosti. Možete pokušati promijeniti direktorije.
This article shows you how to create and manage business events in Microsoft Fabric Real-Time hub. Business events are custom events that you can define, publish, and consume within the Microsoft Fabric ecosystem. By creating business events, you can enable event-driven automation and integration scenarios across your data estate. For more information about business events, see Business events in Microsoft Fabric.
Important
This feature is in preview.
Create a business event from a new schema
Go to Business events in Real-Time hub.
Select + New business event and then select Create new schema.
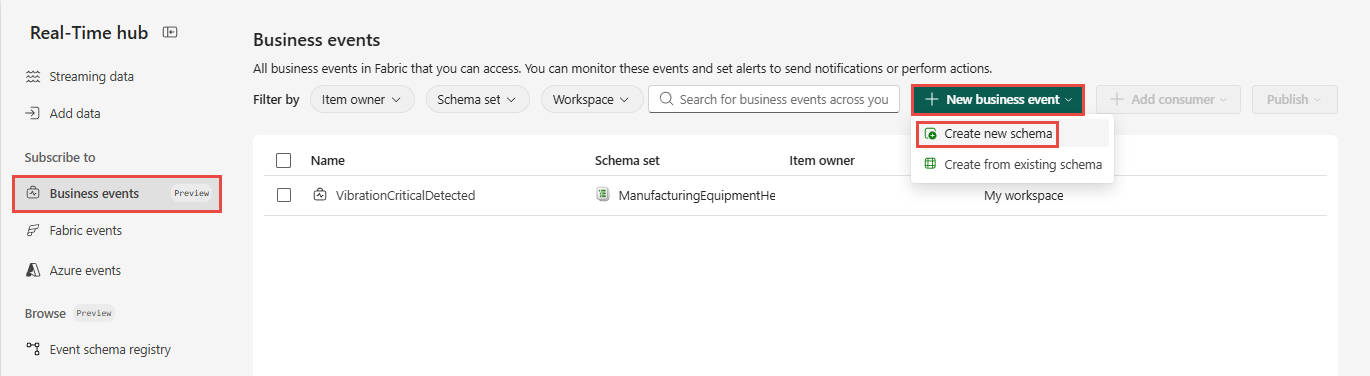
Define the business event schema.
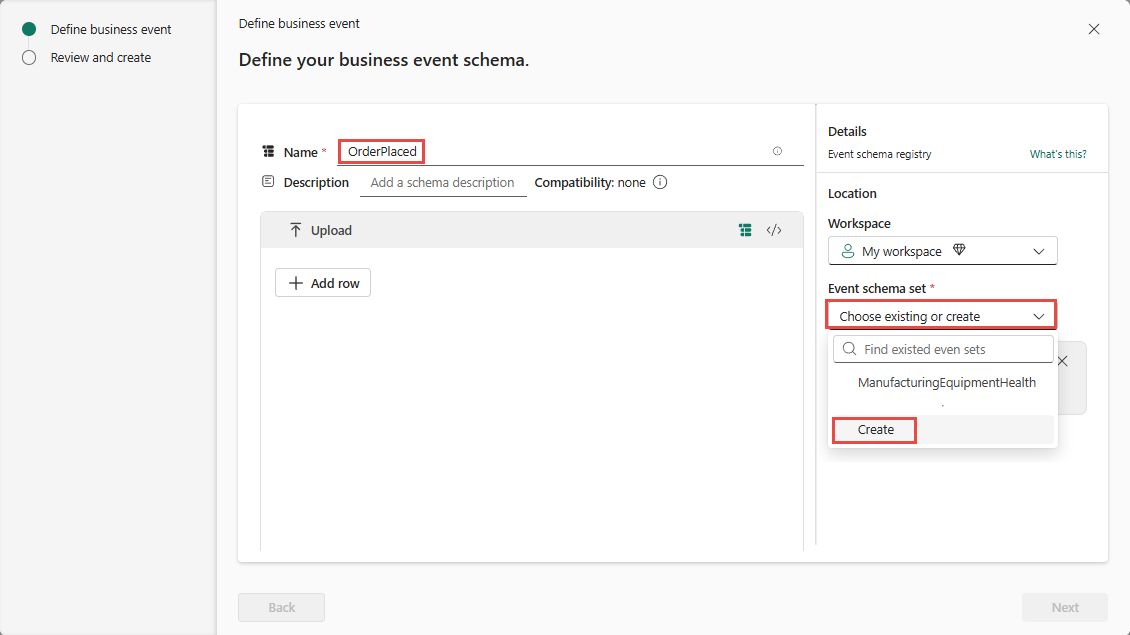
For Name, enter
OrderPlaced.In the right pane, for Event schema set, select Create.
Enter
Ordersfor the schema set name.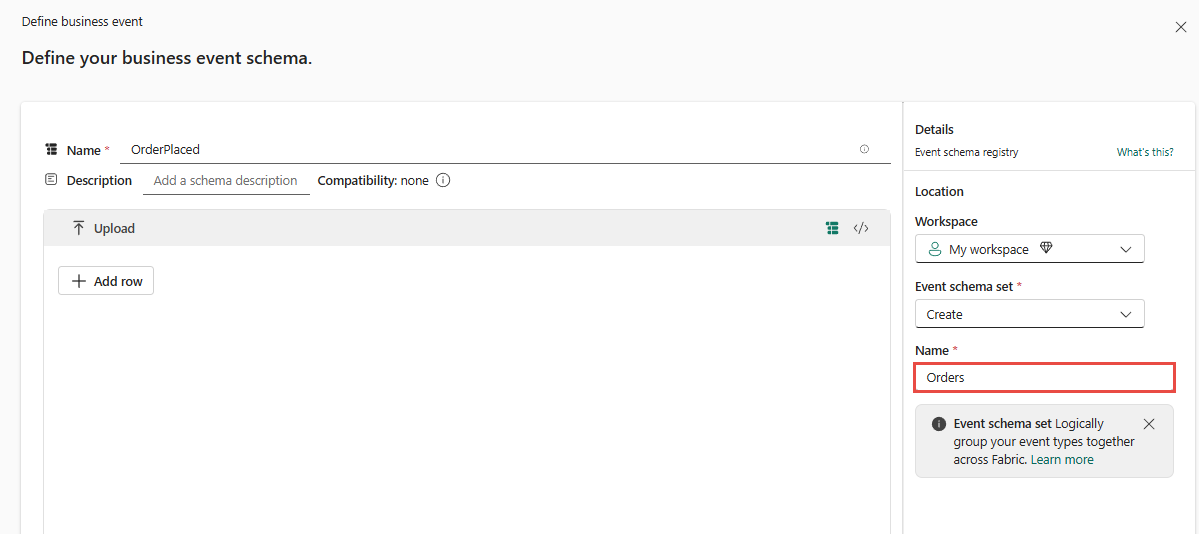
Select Add row in the middle plane.
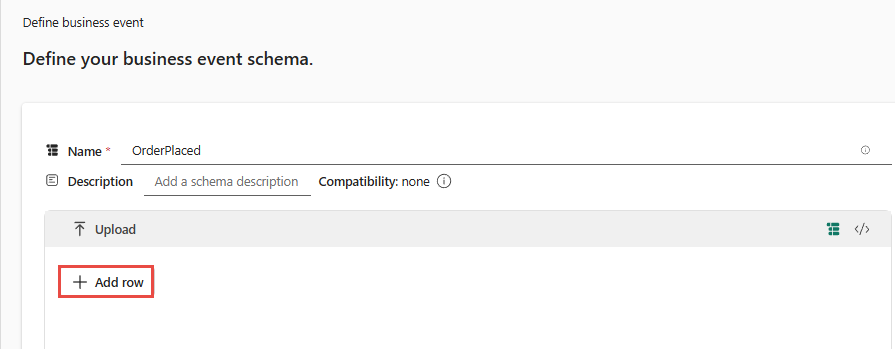
Select string for event type, and enter
OrderIDfor the name.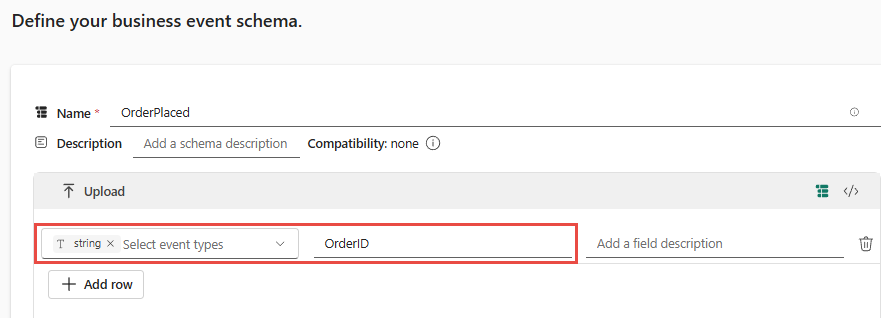
Repeat the previous step to add the following properties:
CustomerID(string),Quantity(string),OrderTotal(string),Status(string),DiscountApplied(string).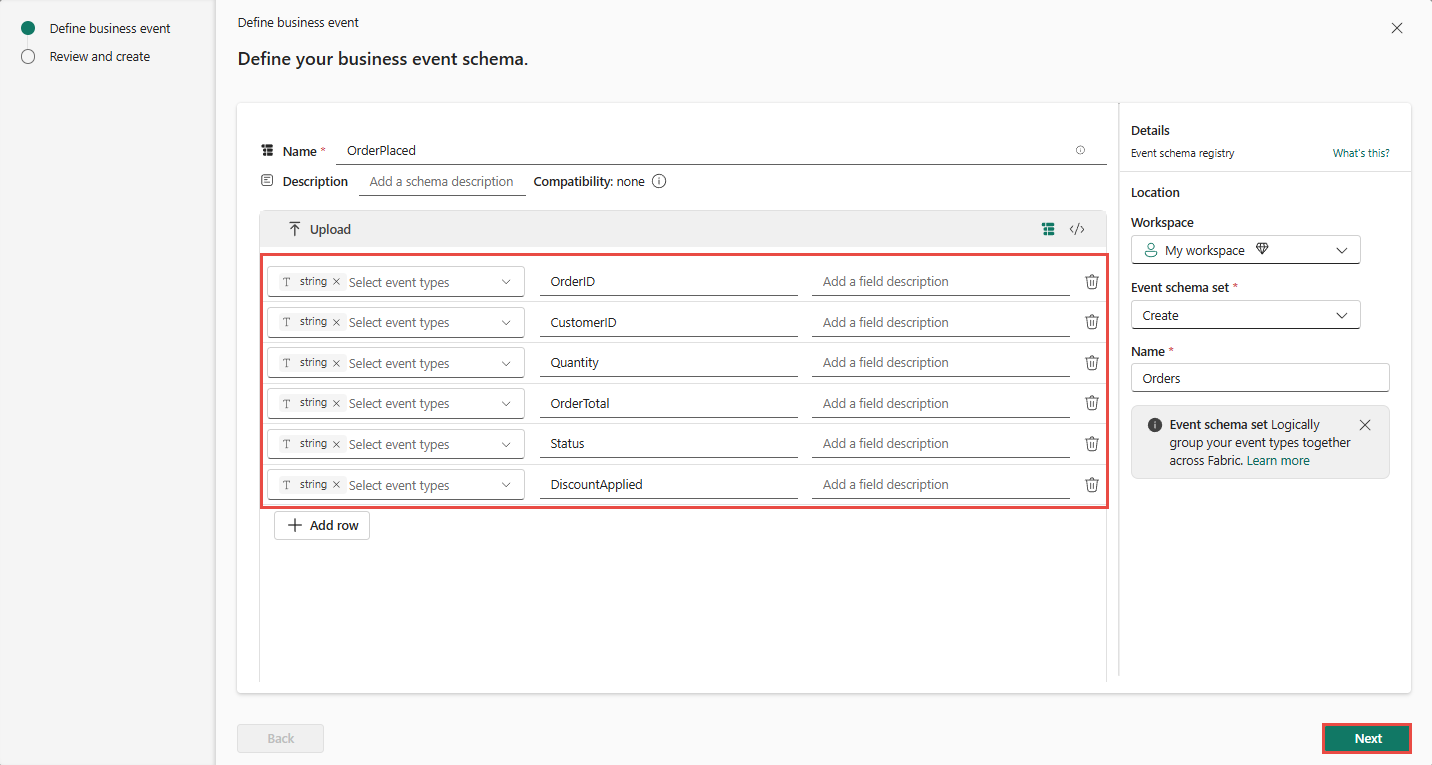
Select Next to continue.
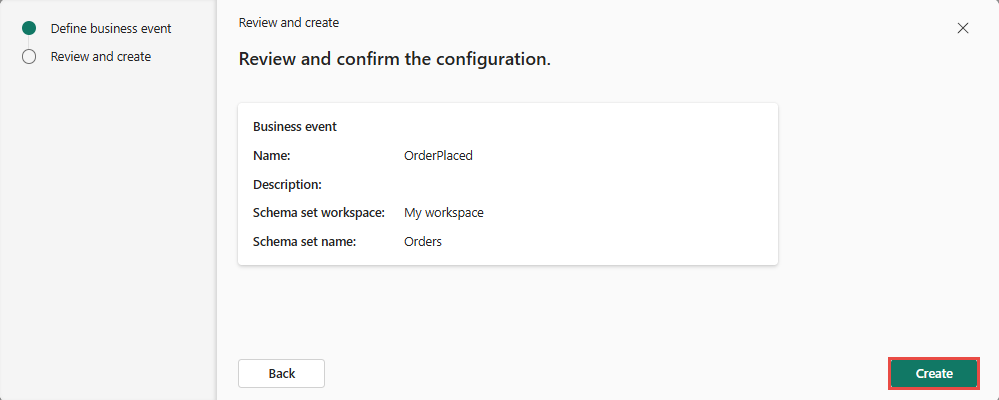
Review and confirm the configuration, and then select Create to create your business event.
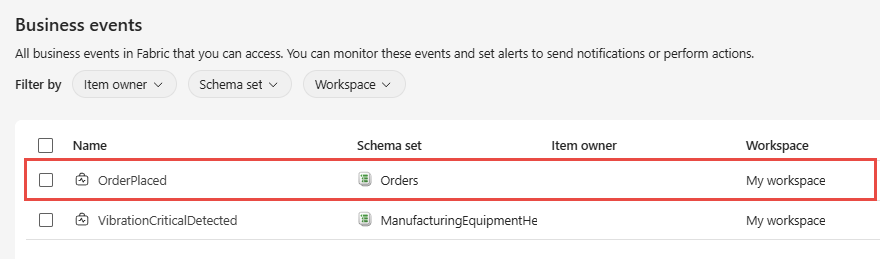
Confirm that you see the business event in the list of business events in Real-Time hub.
Create a business event from an existing schema
Go to Business events in Real-Time hub.
Select + New business event and then select Create from existing schema.
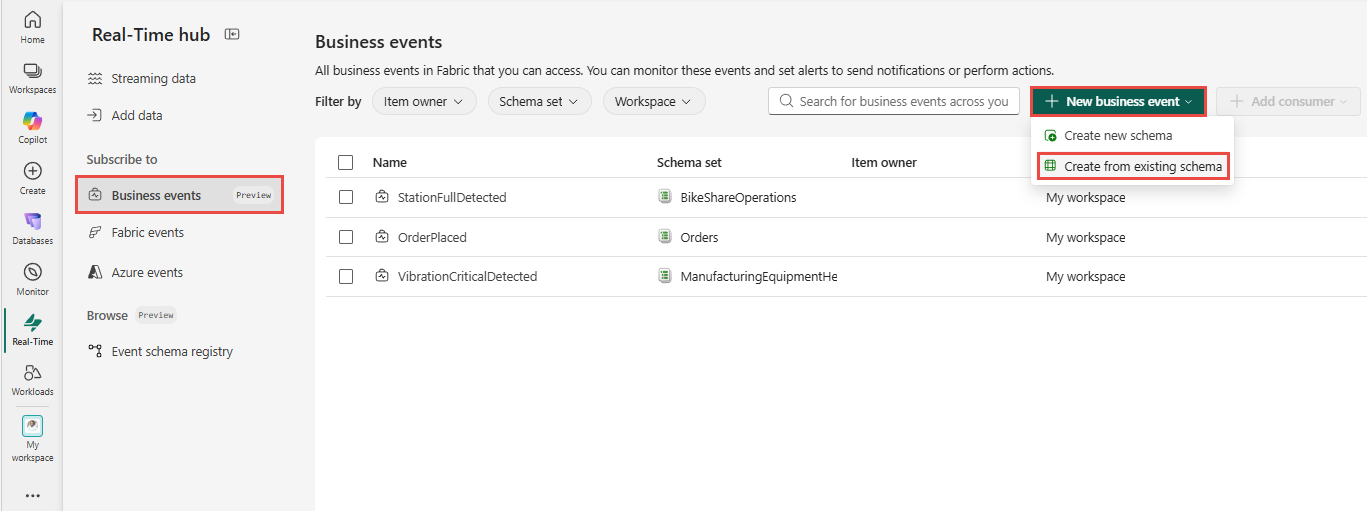
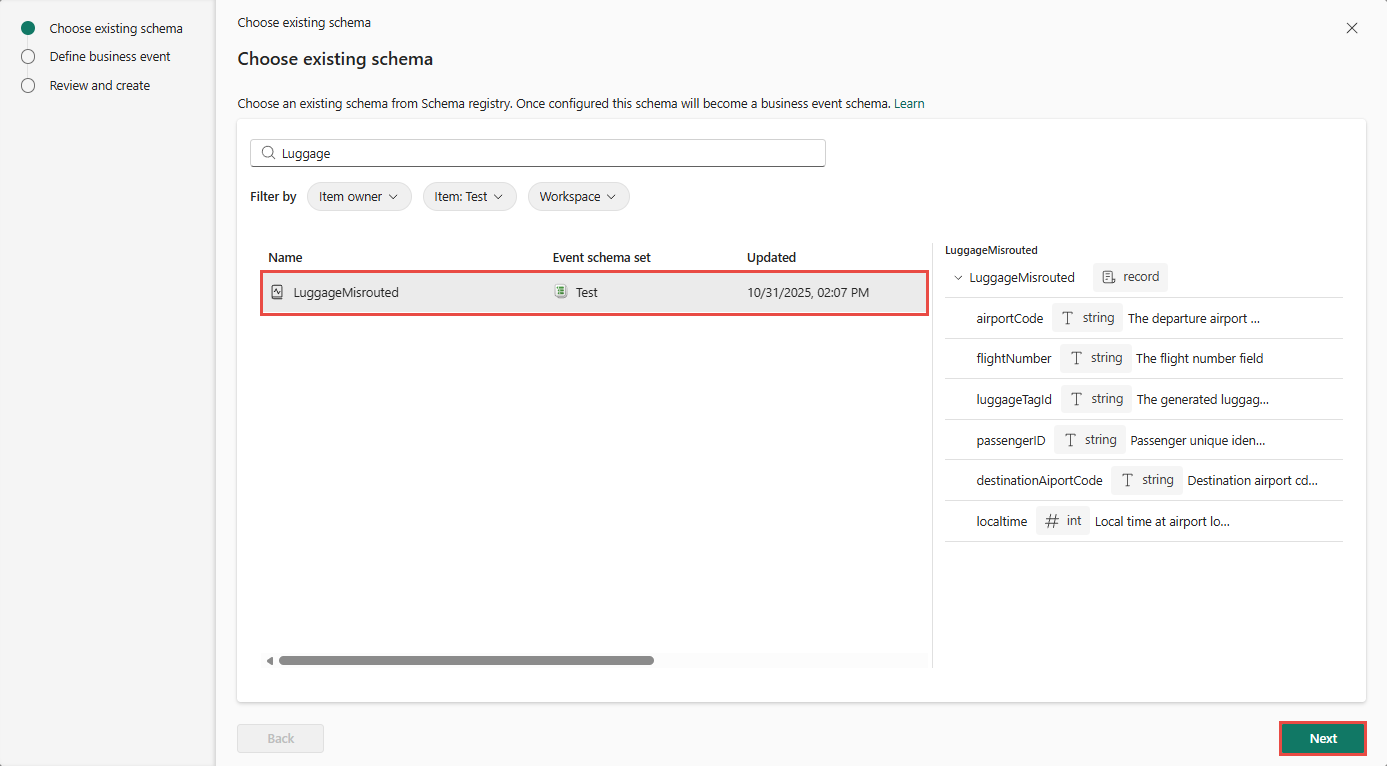
On the Choose existing schema page, select the existing schema that you want to use for your business event. Use schemas that are already registered in the Schema Registry. After selecting the schema, select Next.
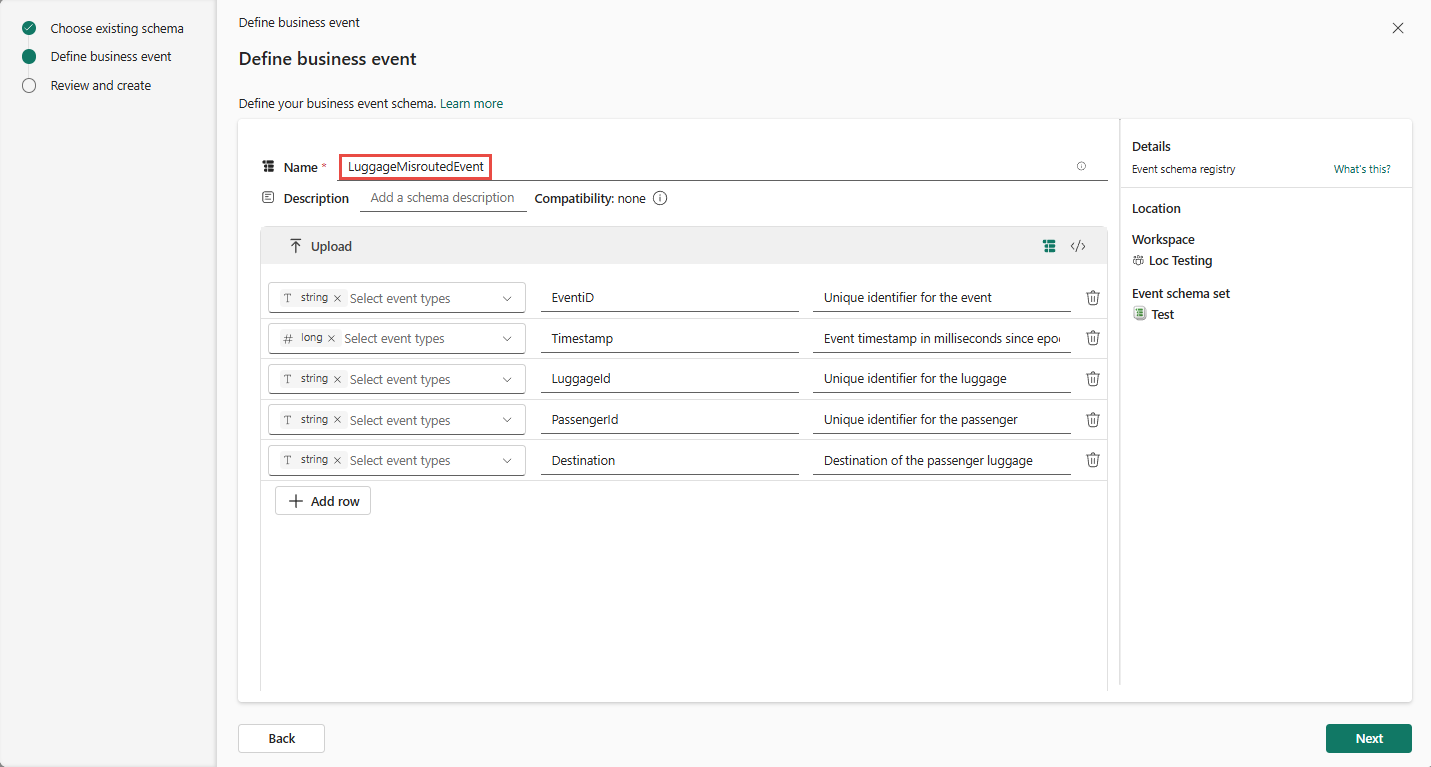
On the Define business event page, confirm that the schema details are correct, enter a name for your business event, and then select Next.
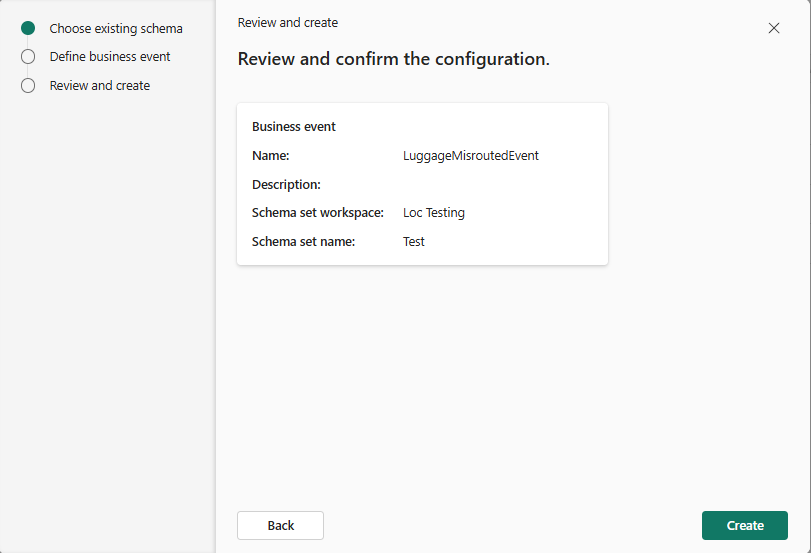
On the Review and create page, review the configuration, and then select Create to create your business event.
After you create your business event, you can manage its properties, assign roles and permissions, and monitor its usage from the Real-Time hub.
Manage business event schema in Real-Time hub
To manage a business event from the Real-Time hub, follow these steps:
Hover the mouse over the business event you want to manage, select the ellipsis (...) menu, and then select Manage event schema.
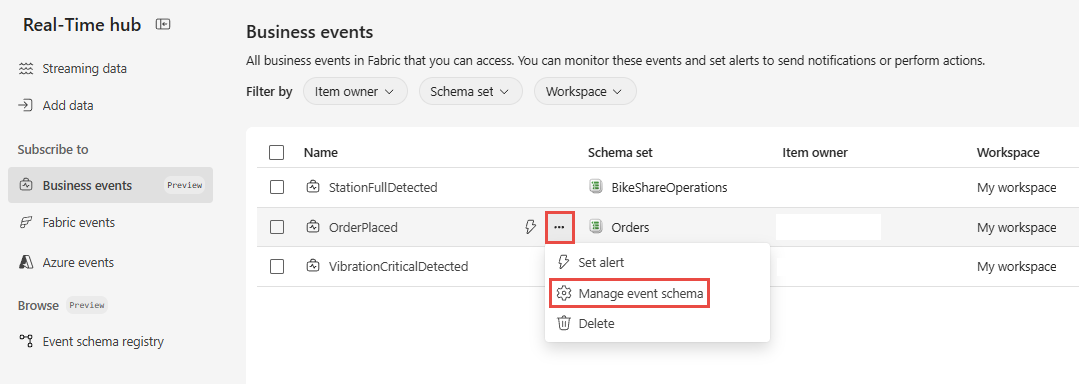
To update the schema as your business requirements change, follow steps from Update an event schema .
Manage business event schema in Schema Registry
In addition to the Real-Time hub, you can also manage business events through the Schema Registry. The Schema Registry acts as a centralized repository for all schemas used across your events and pipelines.
In the Schema Registry, you can create new schemas, update existing ones, and deprecate outdated definitions. Changes in the registry are reflected across all associated business events, making it easy to maintain consistency and compliance across your data ecosystem.
For more information about how to manage schemas in the Schema Registry, see Manage event schemas in Schema Registry.
Delete a business event
Go to Real-Time hub.
Select Business events under the Subscribe to category.
Hover the mouse over the business event you want to delete, select the ellipsis (...) menu, and then select Delete.
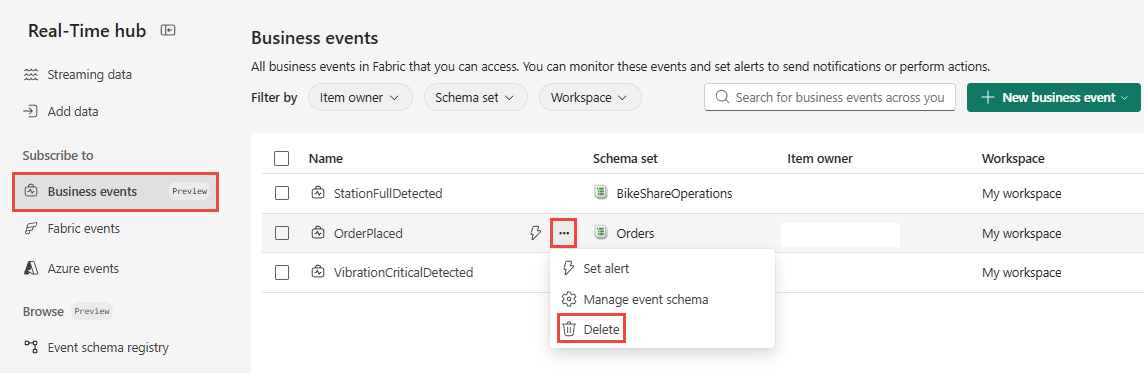
On the Delete business event confirmation dialog, select Delete to confirm the deletion.
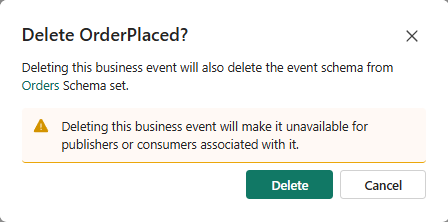
You can also delete a business event from the Details page for the business event.
In the Business events page of Real-Time hub, select the business event from the list to go to the Details page.
Select Delete on the ribbon at the top of the Details page.
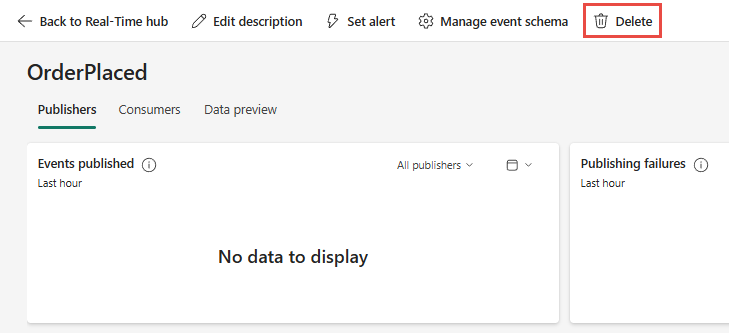
Confirm the deletion on the confirmation dialog by selecting Delete.
Related content
See the following end-to-end tutorials: