Bilješka
Pristup ovoj stranici zahtijeva provjeru vjerodostojnosti. Možete pokušati da se prijavite ili promijenite direktorije.
Pristup ovoj stranici zahtijeva provjeru vjerodostojnosti. Možete pokušati promijeniti direktorije.
You can configure a Real-Time Dashboard data source to use the dashboard editor's identity. This setup lets users view dashboard data without direct access to the underlying data source.
In this article, you learn how to create a cloud connection, apply it to a dashboard data source, validate access, and revoke access when needed.
Prerequisites
- A Real-Time Dashboard with at least one data source and one tile.
- Edit permissions on the Real-Time Dashboard.
- Access to the underlying data source.
- Permission to create and manage cloud connections.
Create a cloud connection
Create the cloud connection that the dashboard uses to access the data source with the dashboard editor's identity.
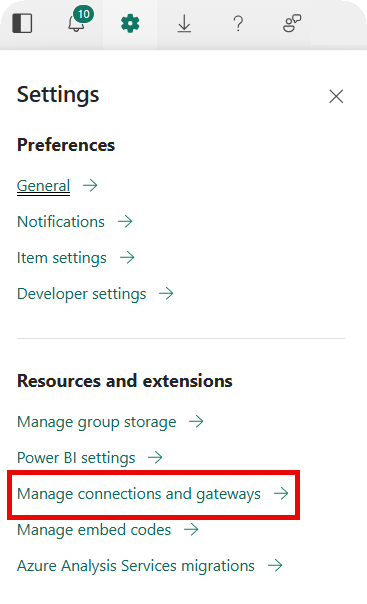
Open Fabric Settings > Manage connections and gateways.
On the Manage connections page, select + New.
Select Cloud connection and enter a connection name.
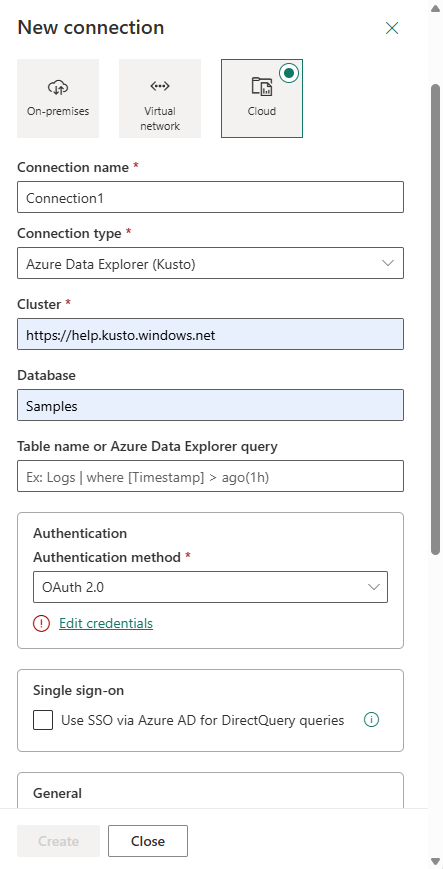
Under Connection type, select Azure Data Explorer (Kusto).
Under Cluster, paste the cluster URI for the cluster that contains the data source. The cluster URI is in the format
https://<clustername>.<region>.kusto.windows.netand can be found in the database details side pane.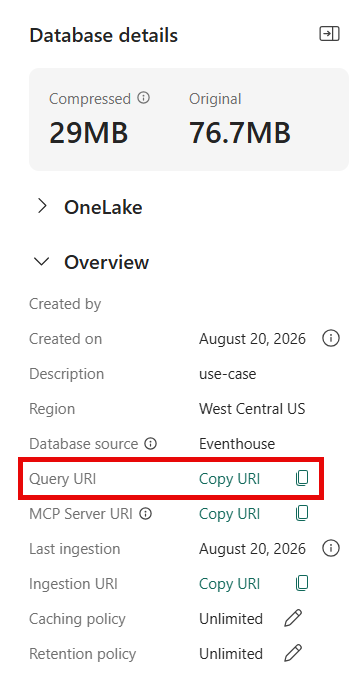
Under Authentication method, select OAuth 2.0.
Select Edit credentials and complete the verification steps.
Select Create, and then select Close.
Note
Create a separate connection for each data source that requires dashboard editor identity.
Configure the data source to use dashboard editor's identity
Open the Real-Time Dashboard.
In the upper-right corner, select Editing.

In the Data sources side pane, select the settings icon next to the data source name you want.
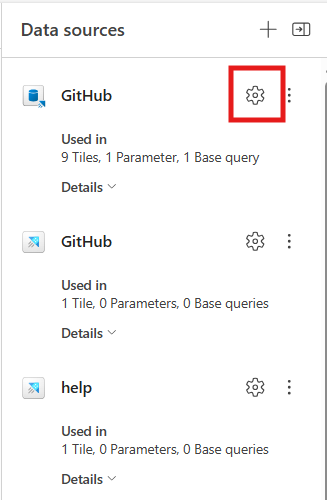
In the Data source settings pane, select Dashboard editor's identity, and select the cloud connection that you created.
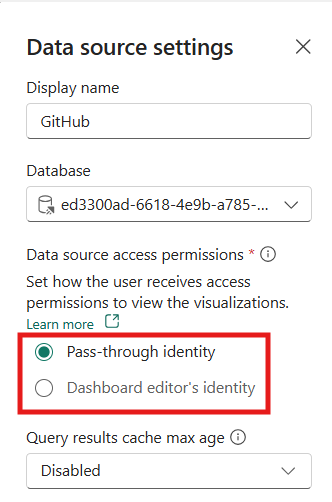
Select Apply.
Note
If you don't configure a cloud connection or data source access permissions, the default identity model is pass-through identity.