Note
Access to this page requires authorization. You can try signing in or changing directories.
Access to this page requires authorization. You can try changing directories.
Use Azure Stream Analytics tools for Visual Studio Code to test your Stream Analytics jobs locally with sample data. Testing locally lets you validate your query logic quickly before you run the job in Azure. Visual Studio Code saves the output results as JSON files in the LocalRunOutputs folder of your project.
Prerequisites
Completion of the Create a Stream Analytics job by using Visual Studio Code quickstart.
The .NET SDK installed. Restart Visual Studio Code after you install the SDK.
Prepare sample data
Prepare sample input data files first. If you already have sample data files on your machine, you can skip this step.
To validate your query against a live streaming source instead of saved sample data, see Test Stream Analytics queries locally against live stream input by using Visual Studio Code.
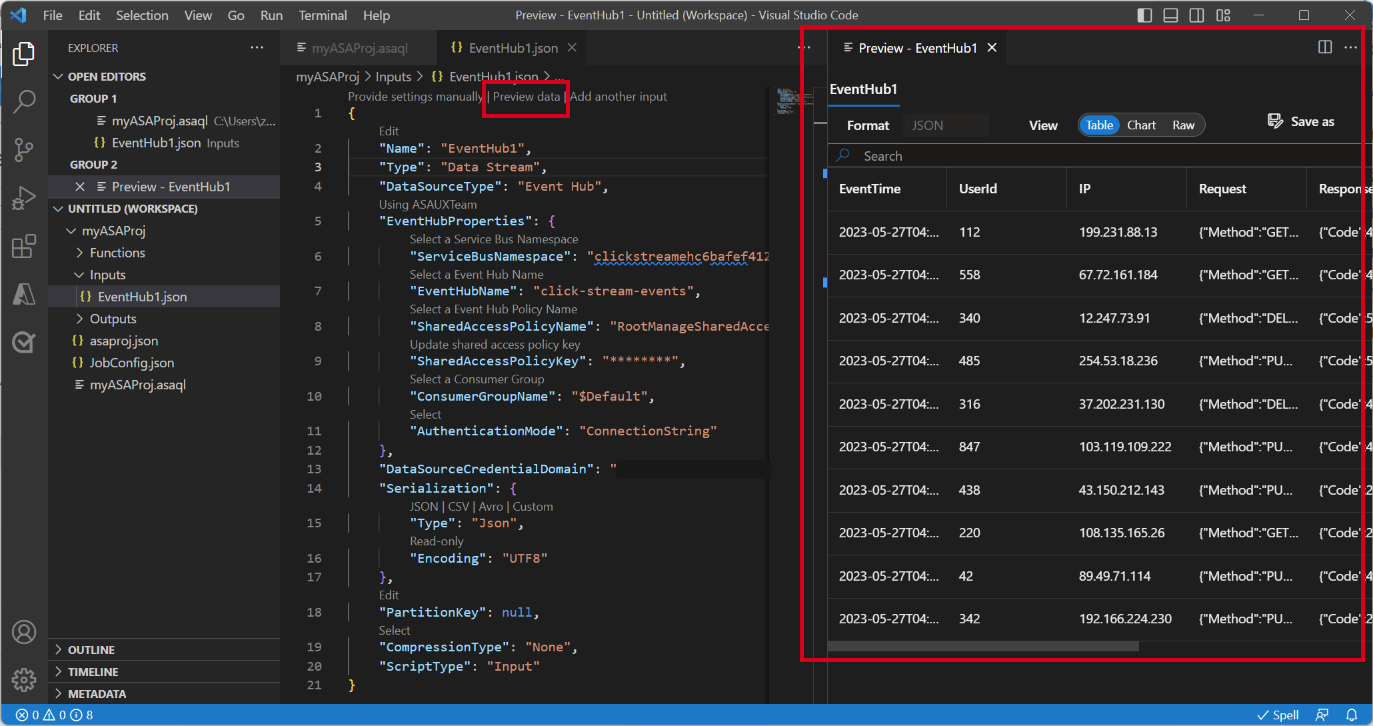
Select Preview data in your input configuration file from the top line. Visual Studio Code fetches some input data from IoT Hub and shows it in the preview window.
After the data appears, select Save as to save it to a local file.
Define a local input
Define a local input in your Stream Analytics project so that your query can read from the sample data file instead of a live source. Use the following steps to add and configure the local input:
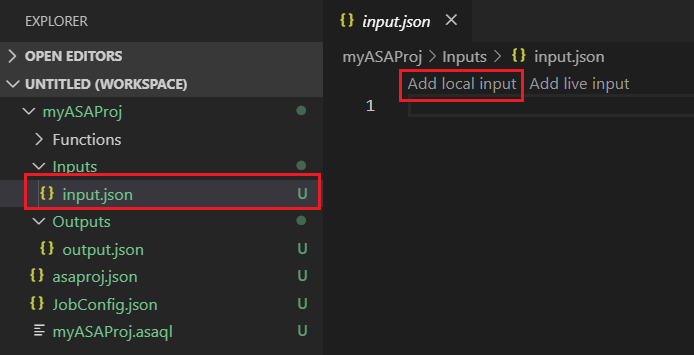
Select input.json under the Inputs folder in your Stream Analytics project. Then select Add local input from the top line.
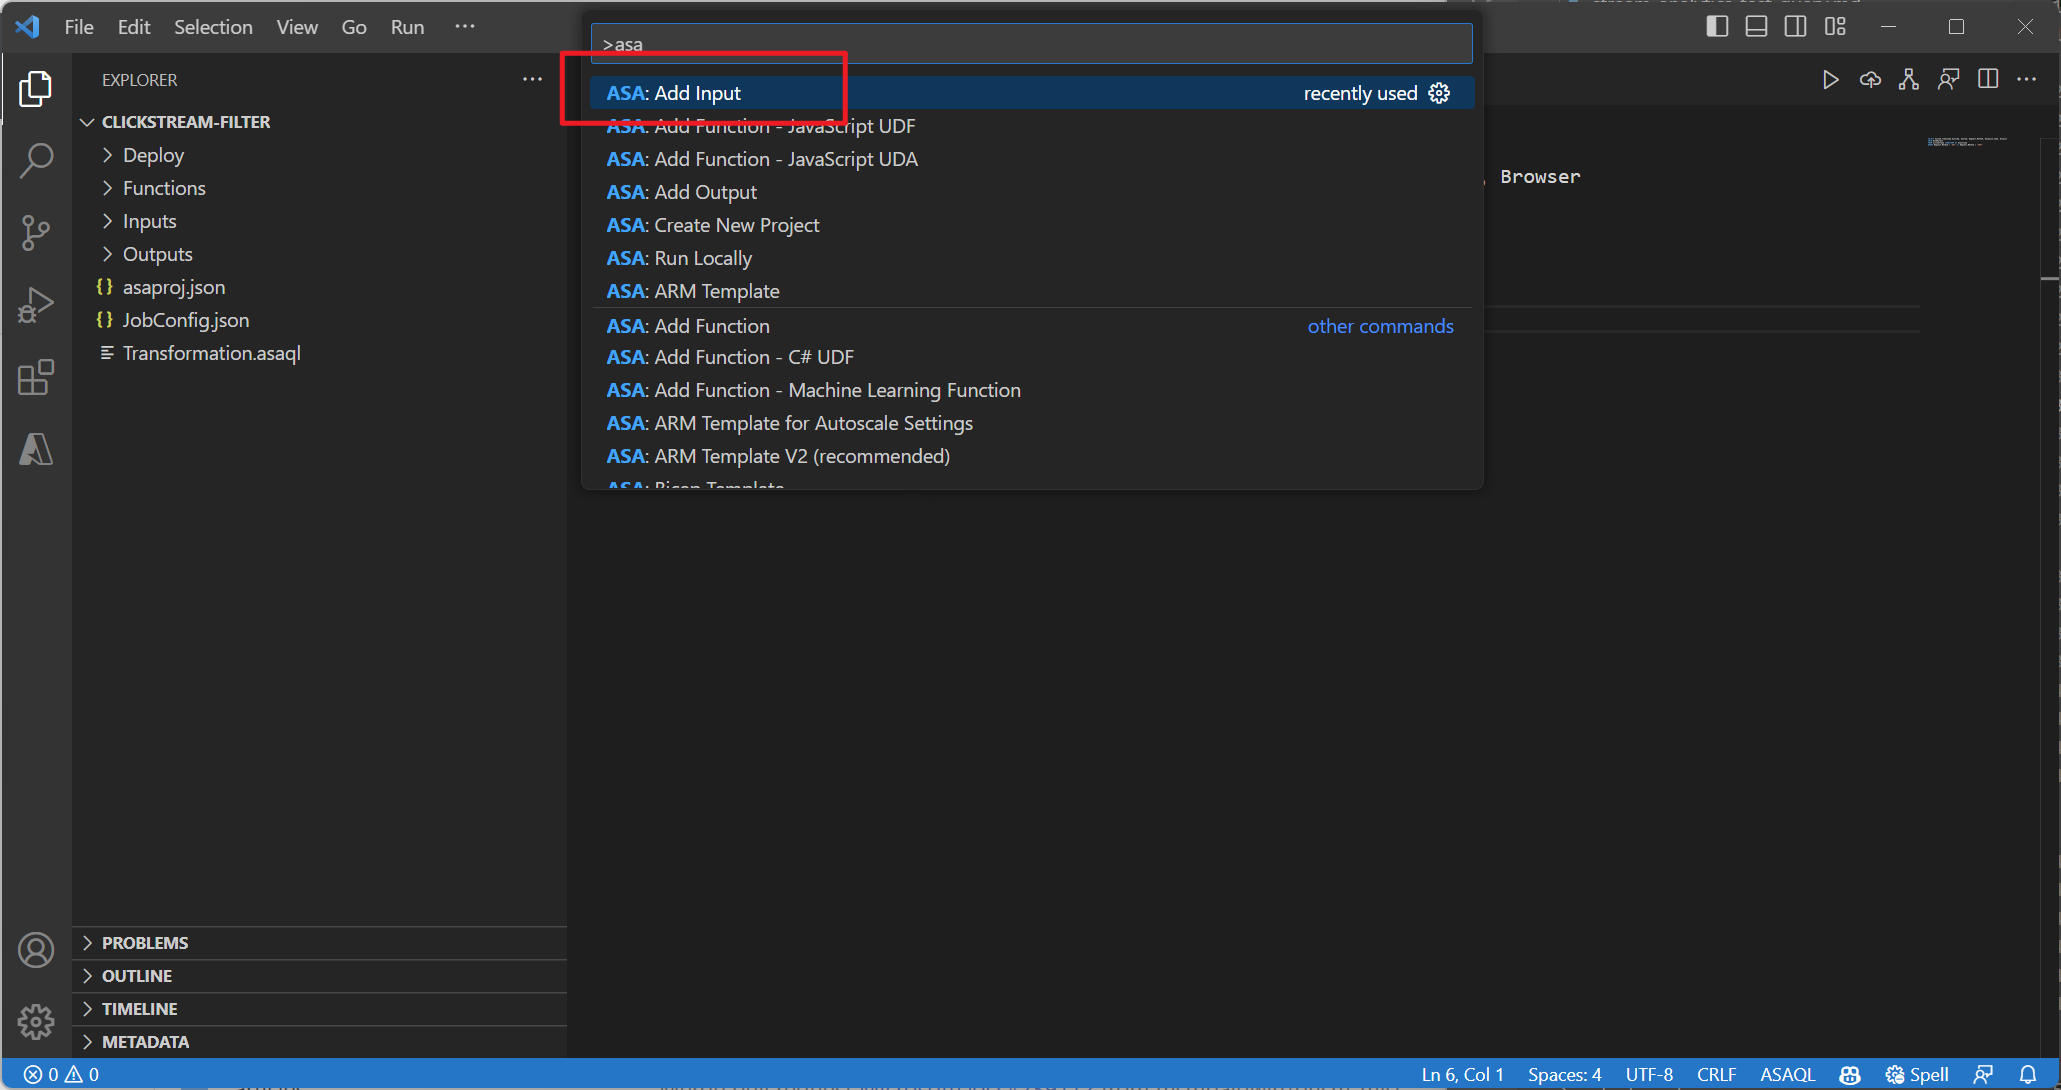
You can also use Ctrl+Shift+P to open the command palette and enter ASA: Add Input.
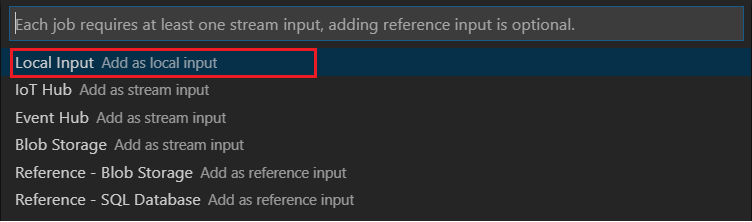
Select Local Input.
Select + New Local Input.

Enter the same input alias that you used in your query.

In the newly generated LocalInput_Input.json file, enter the path to your local data file.

Select Preview Data to preview the input data. Visual Studio Code automatically detects the serialization type (JSON or CSV) for your data. Use the selector to view your data in Table or Raw format. The following table is an example of data in the Table format:

The following table is an example of data in the Raw format:

Run queries locally
Run your query against the local input to validate the query logic before you run the job in Azure.
Return to your query editor, and select Run locally. Then select Use local input from the dropdown list.


Review the result in the right window. Select Run to test again, or select Open in folder to see the result files in the file explorer and open them with other tools. The result files are only available in JSON format.
