Note
Access to this page requires authorization. You can try signing in or changing directories.
Access to this page requires authorization. You can try changing directories.
Create a user-assigned managed identity to grant least privileges to specific service for actions like encryption at rest.
Create from the service catalog (quick)
- Quickly deploy a
userorsystemmanaged identity from the service catalogCommon Dependenciestemplate. You can also create a Key Vault from this template if you don't already have one. - Assign Role to Managed Identity.
Create from the portal
- From the portal, type "Managed Identity" in the search bar at the top of the Portal.
- Select
Managed Identities. - Select
Create. - Enter the workload resource group (RG) where you would like to store the Managed Identity resource.
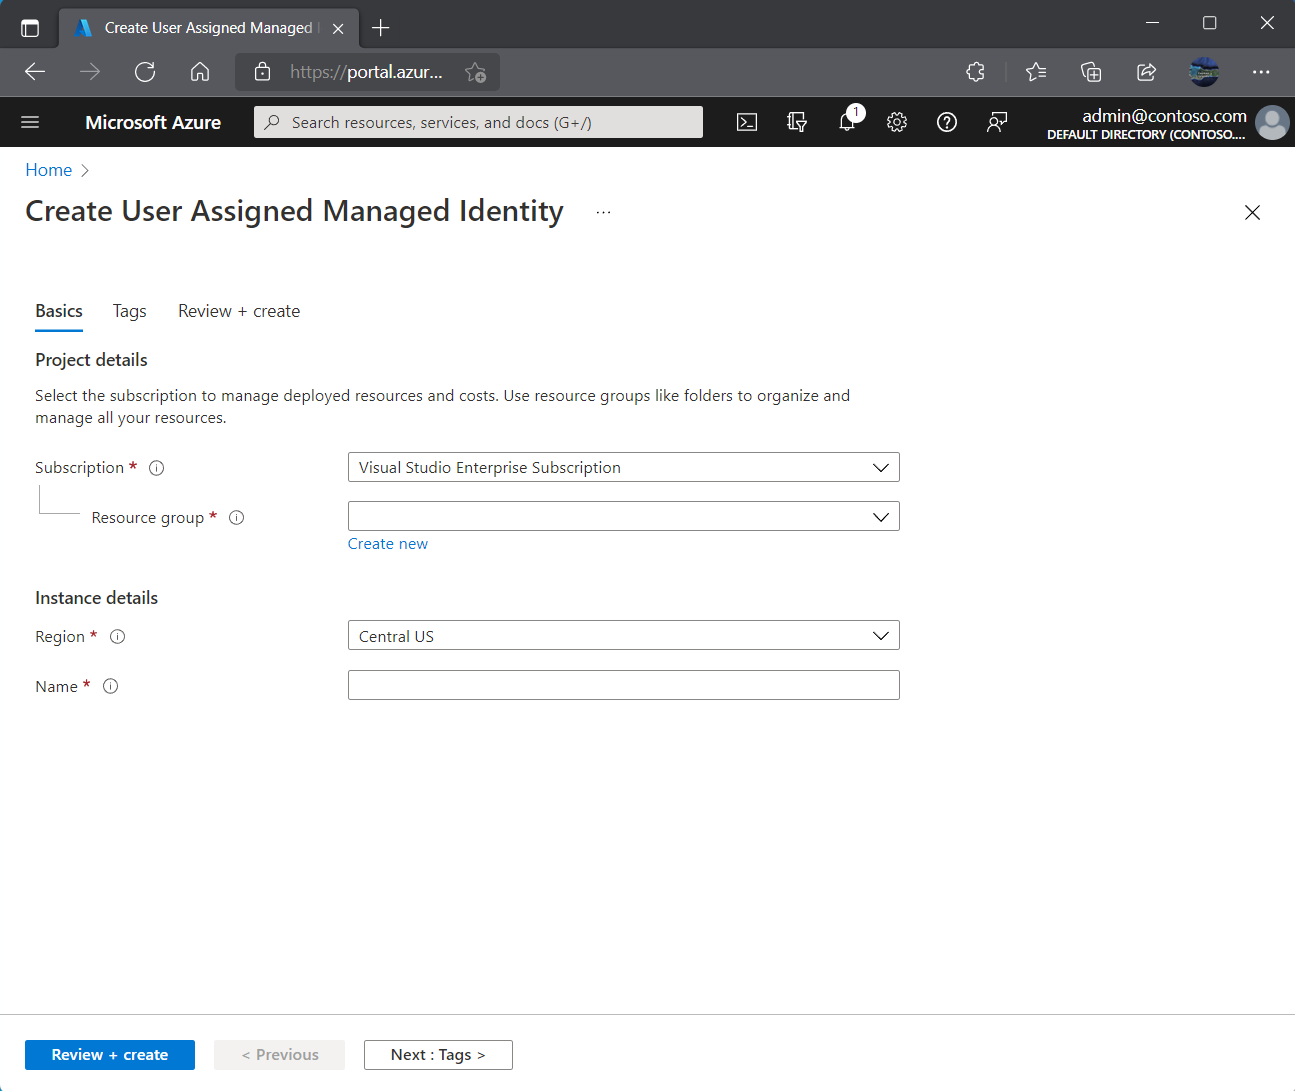
- Confirm the Region and enter a name for the managed identity resource.
- Select
Review + Createand then selectCreate. - Finally, copy the Managed Identity name into the service catalog deployment parameter or temporarily paste into notepad for use during deployment.
Assign role to Managed Identity
- From the Portal, navigate to the Managed Identity you created.
- Select the
Azure Role Assignmentson the left side. - Select
+Add Role Assignment. - For
ScopeselectKey Vault. - Confirm the subscription.
- For
Resourceenter the name of your Key Vault. The Common Dependencies template is a good quickstart for creating a key vault. You can also use the Key Vault template for more customizations. - The Key Vault should be using Role Base Access Control (RBAC), then select the
Key Vault Crypto Service Encryption Userrole.