Bilješka
Pristup ovoj stranici zahtijeva provjeru vjerodostojnosti. Možete pokušati da se prijavite ili promijenite direktorije.
Pristup ovoj stranici zahtijeva provjeru vjerodostojnosti. Možete pokušati promijeniti direktorije.
Transport Layer Security (TLS) inspection in Microsoft Entra Internet Access requires a certificate authority (CA) that client devices trust. With a Microsoft-managed certificate, Microsoft generates and operates a tenant-specific root CA for your organization. You don't need to provide your own public key infrastructure (PKI) or CA for TLS inspection.
Note
Microsoft-managed certificates for TLS inspection are currently in preview. This information relates to a prerelease product that might be substantially modified before release. Microsoft makes no warranties, expressed or implied, with respect to the information provided here. For more information, see the Microsoft Entra preview terms.
This article explains how to create a Microsoft-managed certificate, deploy the root CA certificate to client devices, and enable the certificate for TLS inspection. The private key is protected in Microsoft's secure key infrastructure and isn't exposed.
If your organization must use its own PKI, see Configure TLS inspection with your own certificate.
Prerequisites
To complete the steps in this article, you need:
- A trial license for Microsoft Entra Internet Access.
- Global Secure Access prerequisites.
- The Global Secure Access Administrator role.
Create a Microsoft-managed certificate
Sign in to the Microsoft Entra admin center as a Global Secure Access Administrator.
Browse to Global Secure Access > Secure > TLS inspection policies.
Select the TLS inspection settings tab.
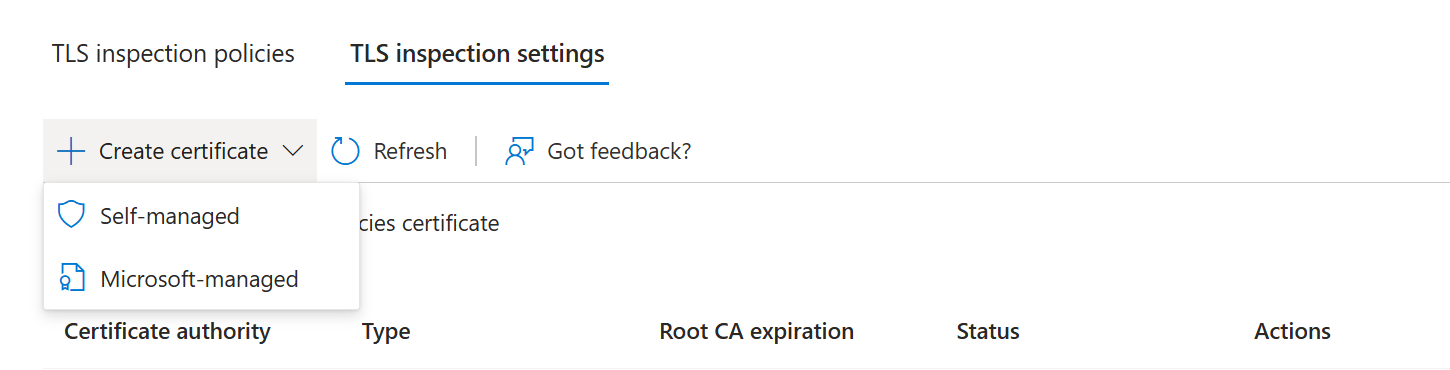
Select Create certificate, and then select Microsoft-managed.
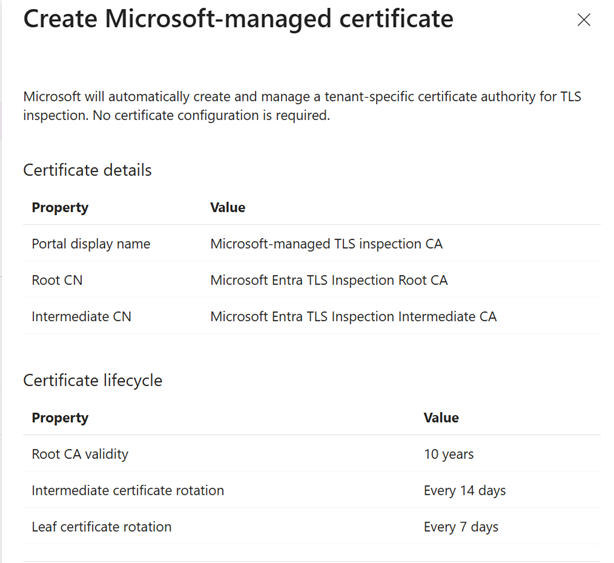
In the Create Microsoft-managed certificate pane, review the certificate details and lifecycle. Microsoft automatically configures the tenant-specific certificate authority. No certificate information is required.
Note
The default root CA validity period is 10 years. You can use the API to configure a shorter validity period if your organization requires one.
Select Create.
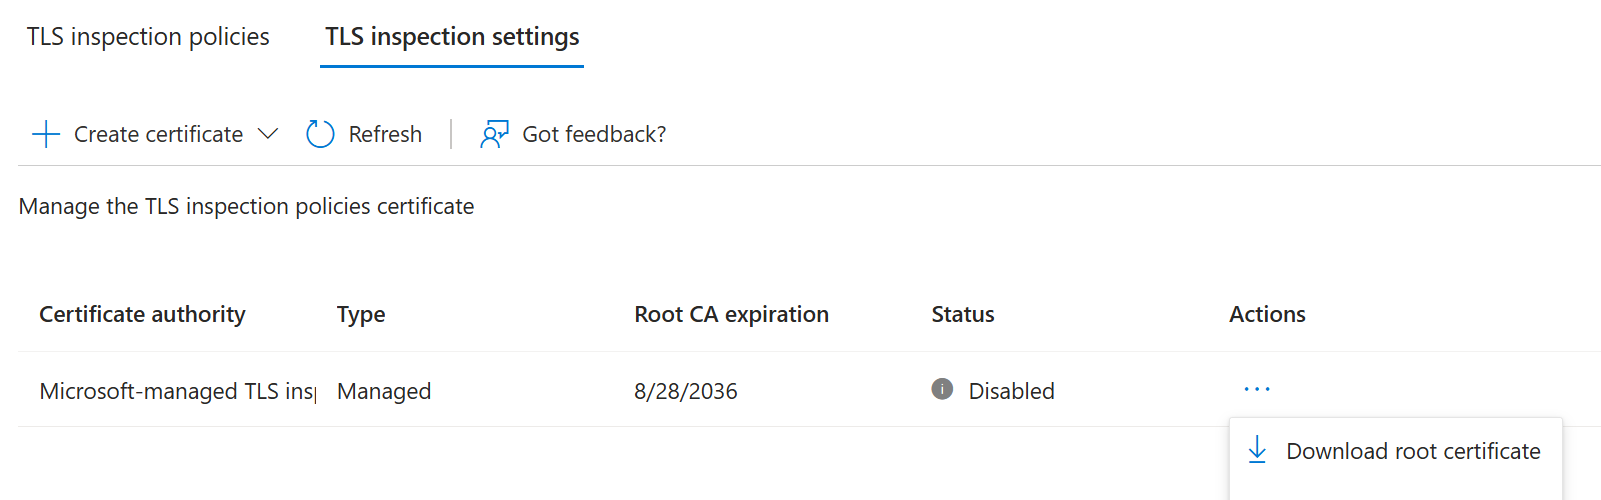
Confirm that the certificate appears in the list with Managed in the Type column and Disabled in the Status column.
Download and deploy the root CA certificate
Client devices must trust the managed root CA before you enable TLS inspection. If you apply a TLS inspection policy before distributing the root CA certificate, users can encounter certificate errors.
On the TLS inspection settings tab, find the managed certificate.
Select the actions menu (...), and then select Download root certificate.
Save the
.cerfile.Use your MDM solution to deploy the root CA certificate to client devices. For Microsoft Intune, see Trusted root certificate profiles for Microsoft Intune.
On a test device, confirm that the certificate is installed in the Trusted Root Certification Authorities store.
The downloaded file contains the public root CA certificate. It doesn't contain the private key.
Enable the managed certificate
After you deploy the root CA certificate to your client devices:
- On the TLS inspection settings tab, find the managed certificate.
- Select the actions menu (...), and then select Enable.
- Confirm that the certificate status changes to Active.
You can now create and assign a TLS inspection policy.
Manage the certificate
Use the actions menu (...) on the TLS inspection settings tab to manage a Microsoft-managed certificate:
- Disable: Temporarily stop using the certificate for TLS inspection.
- Enable: Enable a disabled certificate.
- Delete: Remove a certificate that you no longer need.
Rotate a Microsoft-managed certificate
Rotate a certificate before it expires:
- Create a new Microsoft-managed certificate.
- Download the new root CA certificate.
- Deploy the new root CA certificate to client devices.
- Enable the new certificate.
- Validate TLS inspection with the new certificate.
- After validation succeeds, delete the old disabled certificate.
Don't remove the old root CA certificate from client devices until you validate the new certificate and complete the transition.