Bilješka
Pristup ovoj stranici zahtijeva provjeru vjerodostojnosti. Možete pokušati da se prijavite ili promijenite direktorije.
Pristup ovoj stranici zahtijeva provjeru vjerodostojnosti. Možete pokušati promijeniti direktorije.
This article explains how to create an automation workflow. You learn how to configure workflow triggers and actions to automate tasks such as creating records and cascading updates across related tables.
Note
To learn about the concept of automation, see Automation.
Create an automation flow
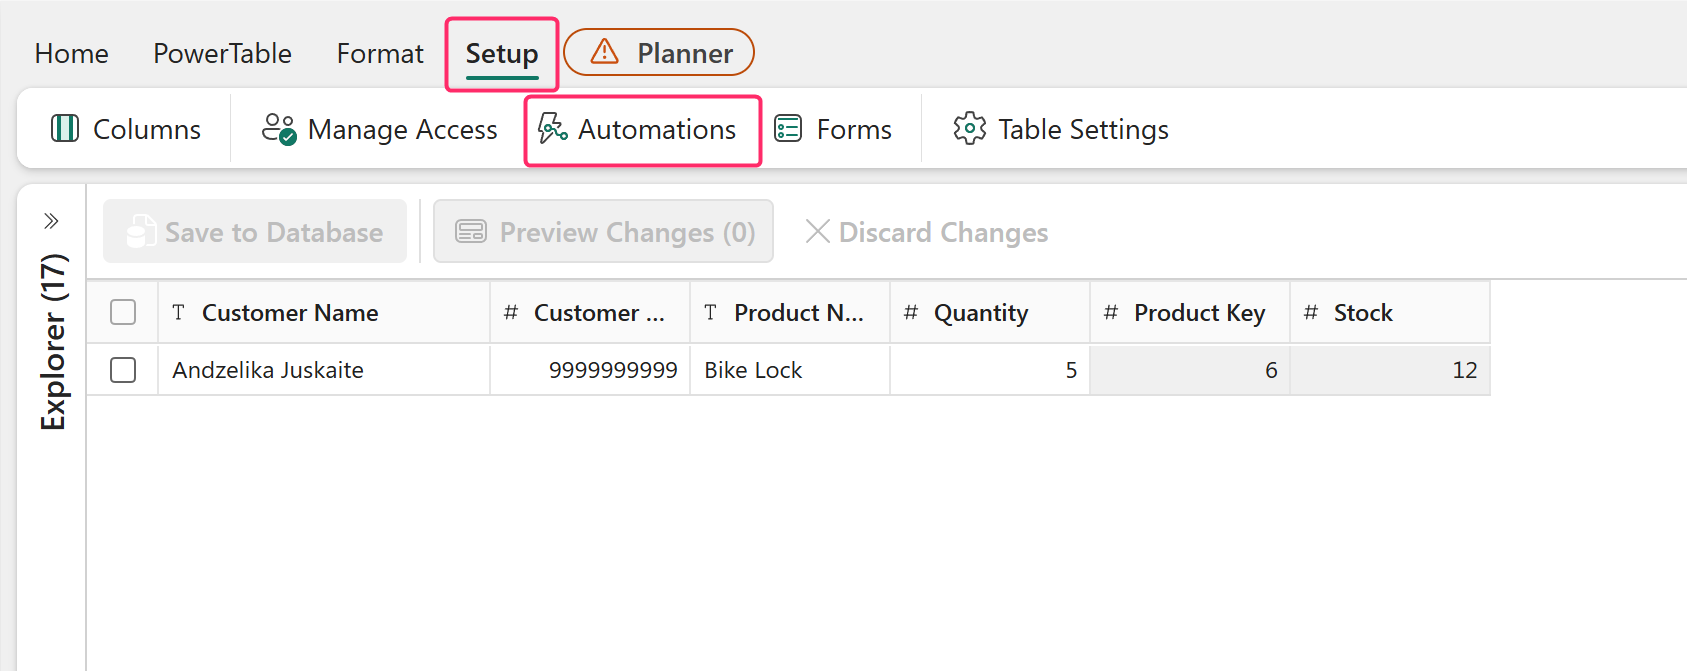
To create an automation for a table, go to Setup > Automations.
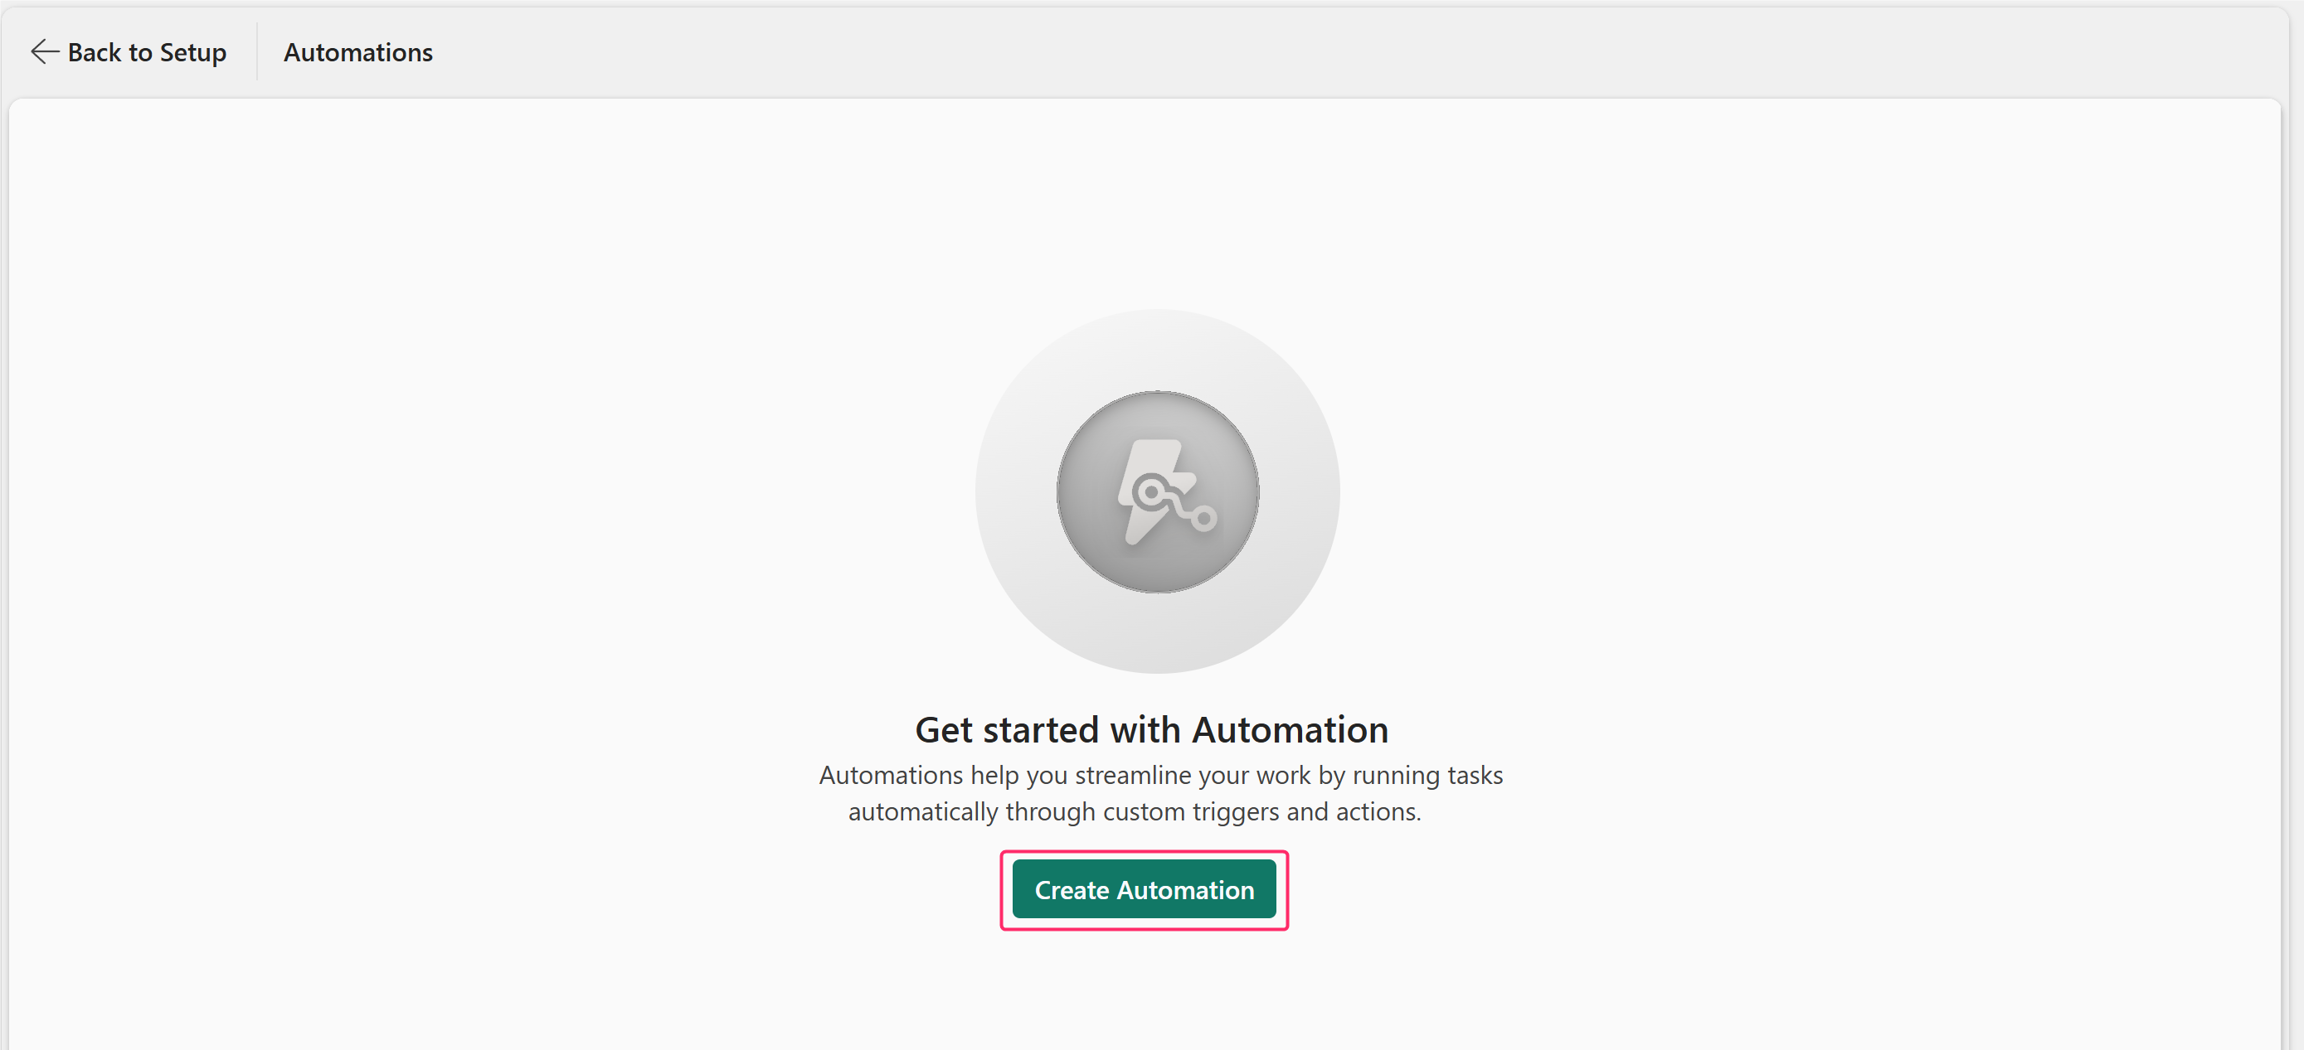
In the new window, select Create Automation to create a new automation flow.
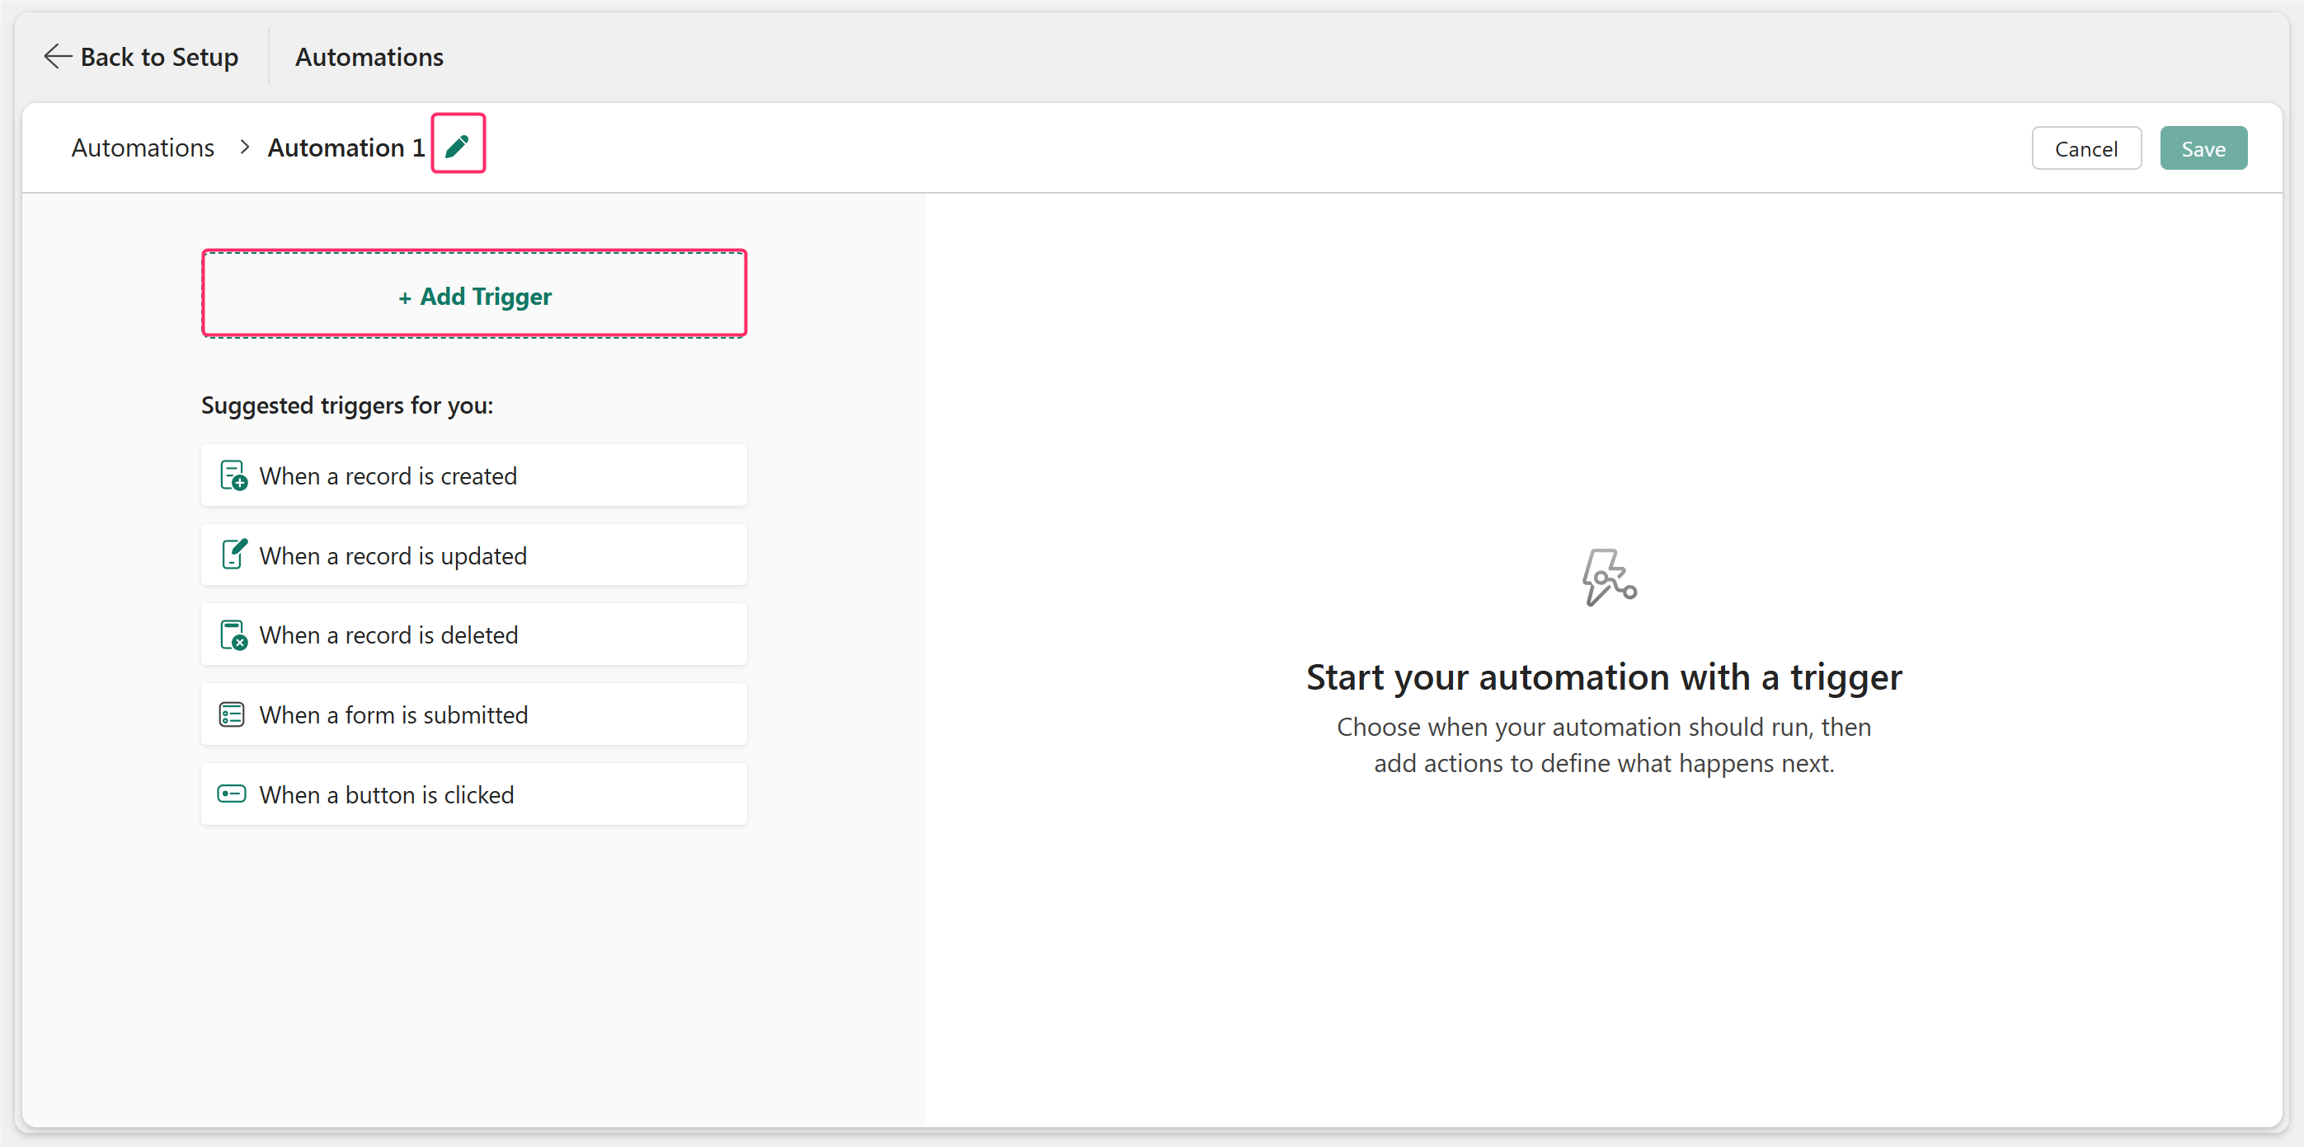
A new automation workflow is created for you to configure the trigger and actions. Name your automation flow by selecting the pencil icon.
Add trigger
Select Add Trigger and choose a trigger. Alternatively, select one of the suggested triggers directly.
- When a record is created: Triggers the workflow when a user creates a record.
- When a record is updated: Triggers the workflow when a user updates a record.
- When a record is deleted: Triggers the workflow when a user deletes a record.
- When a form is submitted: Triggers the workflow when a user submits a form that creates a record.
- When a button is clicked: Triggers the workflow when a user selects a button in a button column.
Note
All triggers monitor events in the current table where you configure the automation.
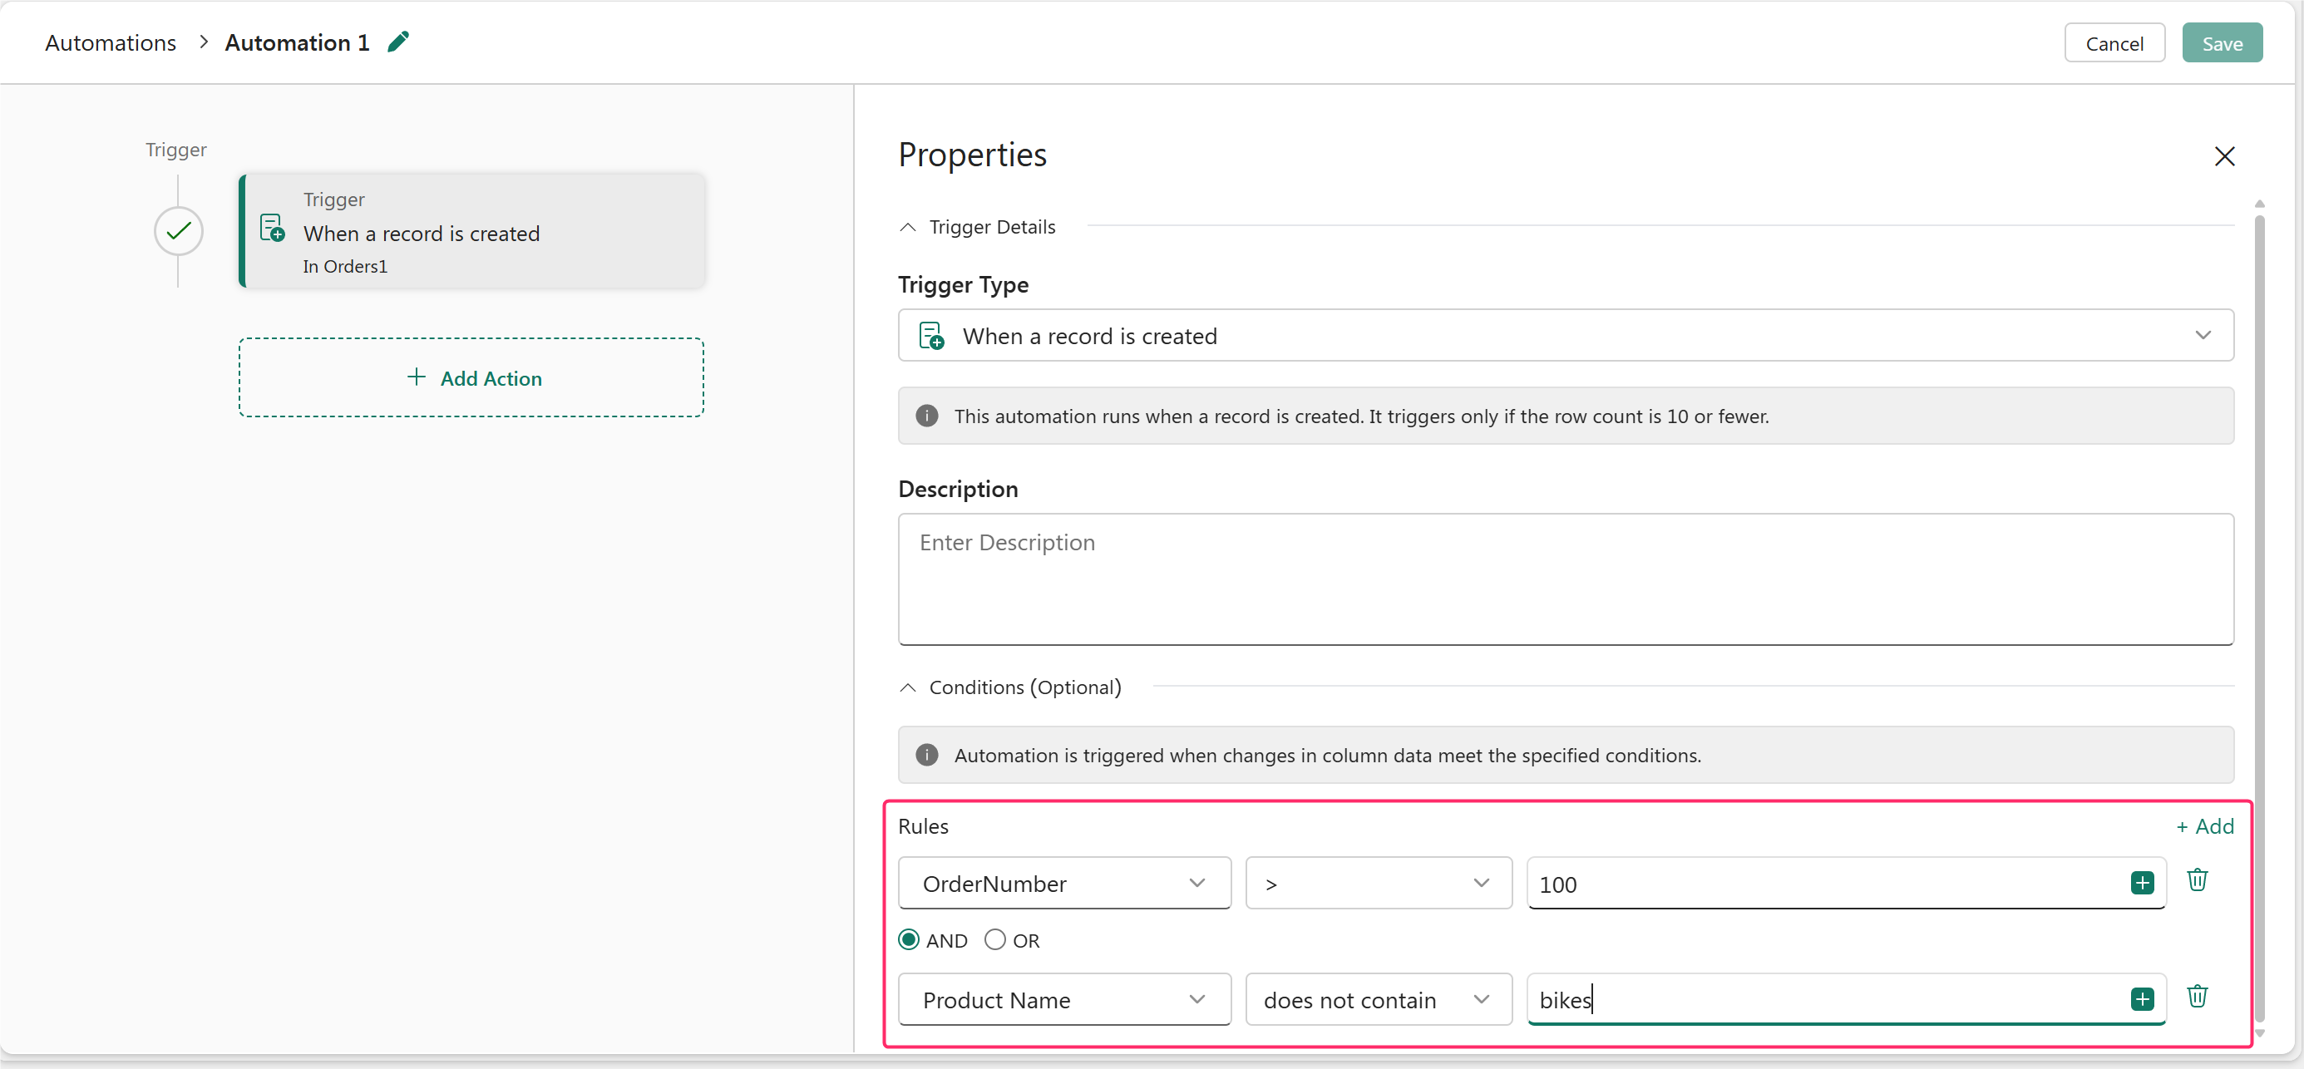
After you select a trigger, the Properties pane opens.
- Enter a description.
- Select + Add to add one or more rules that determine when the trigger starts.
- Use AND or OR to combine multiple rules. The trigger runs only when the specified record or the data changes meet the configured conditions.
- For Update Record trigger, you can specify which fields to monitor for data changes. If you specify all fields, the workflow includes any new fields that you add in the future.
- The available operators depend on the selected field's data type. You can use operators such as Equals, Less than, Greater than, Is, Is empty, and Contains, and more.
- The rules support using predefined built-in functions such as Current date, Current user email, and any field references that are available through forms or Find Record(s).
Add actions
Select Add Action to add one or more actions. Each action type is explained in the following sections.
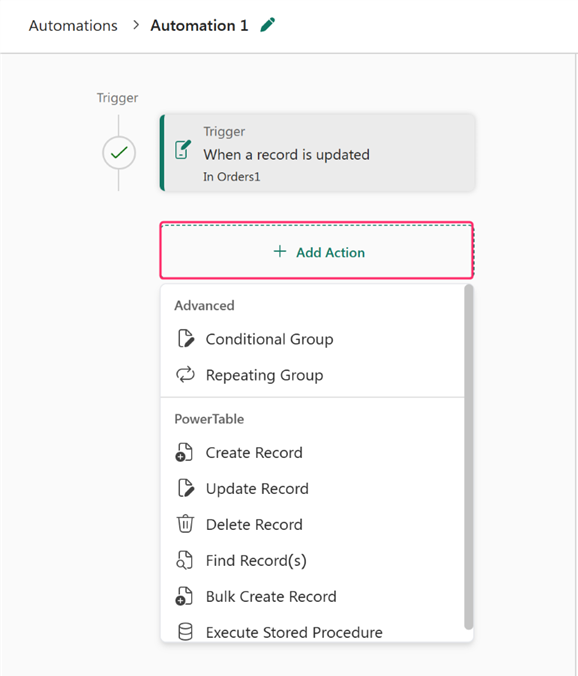
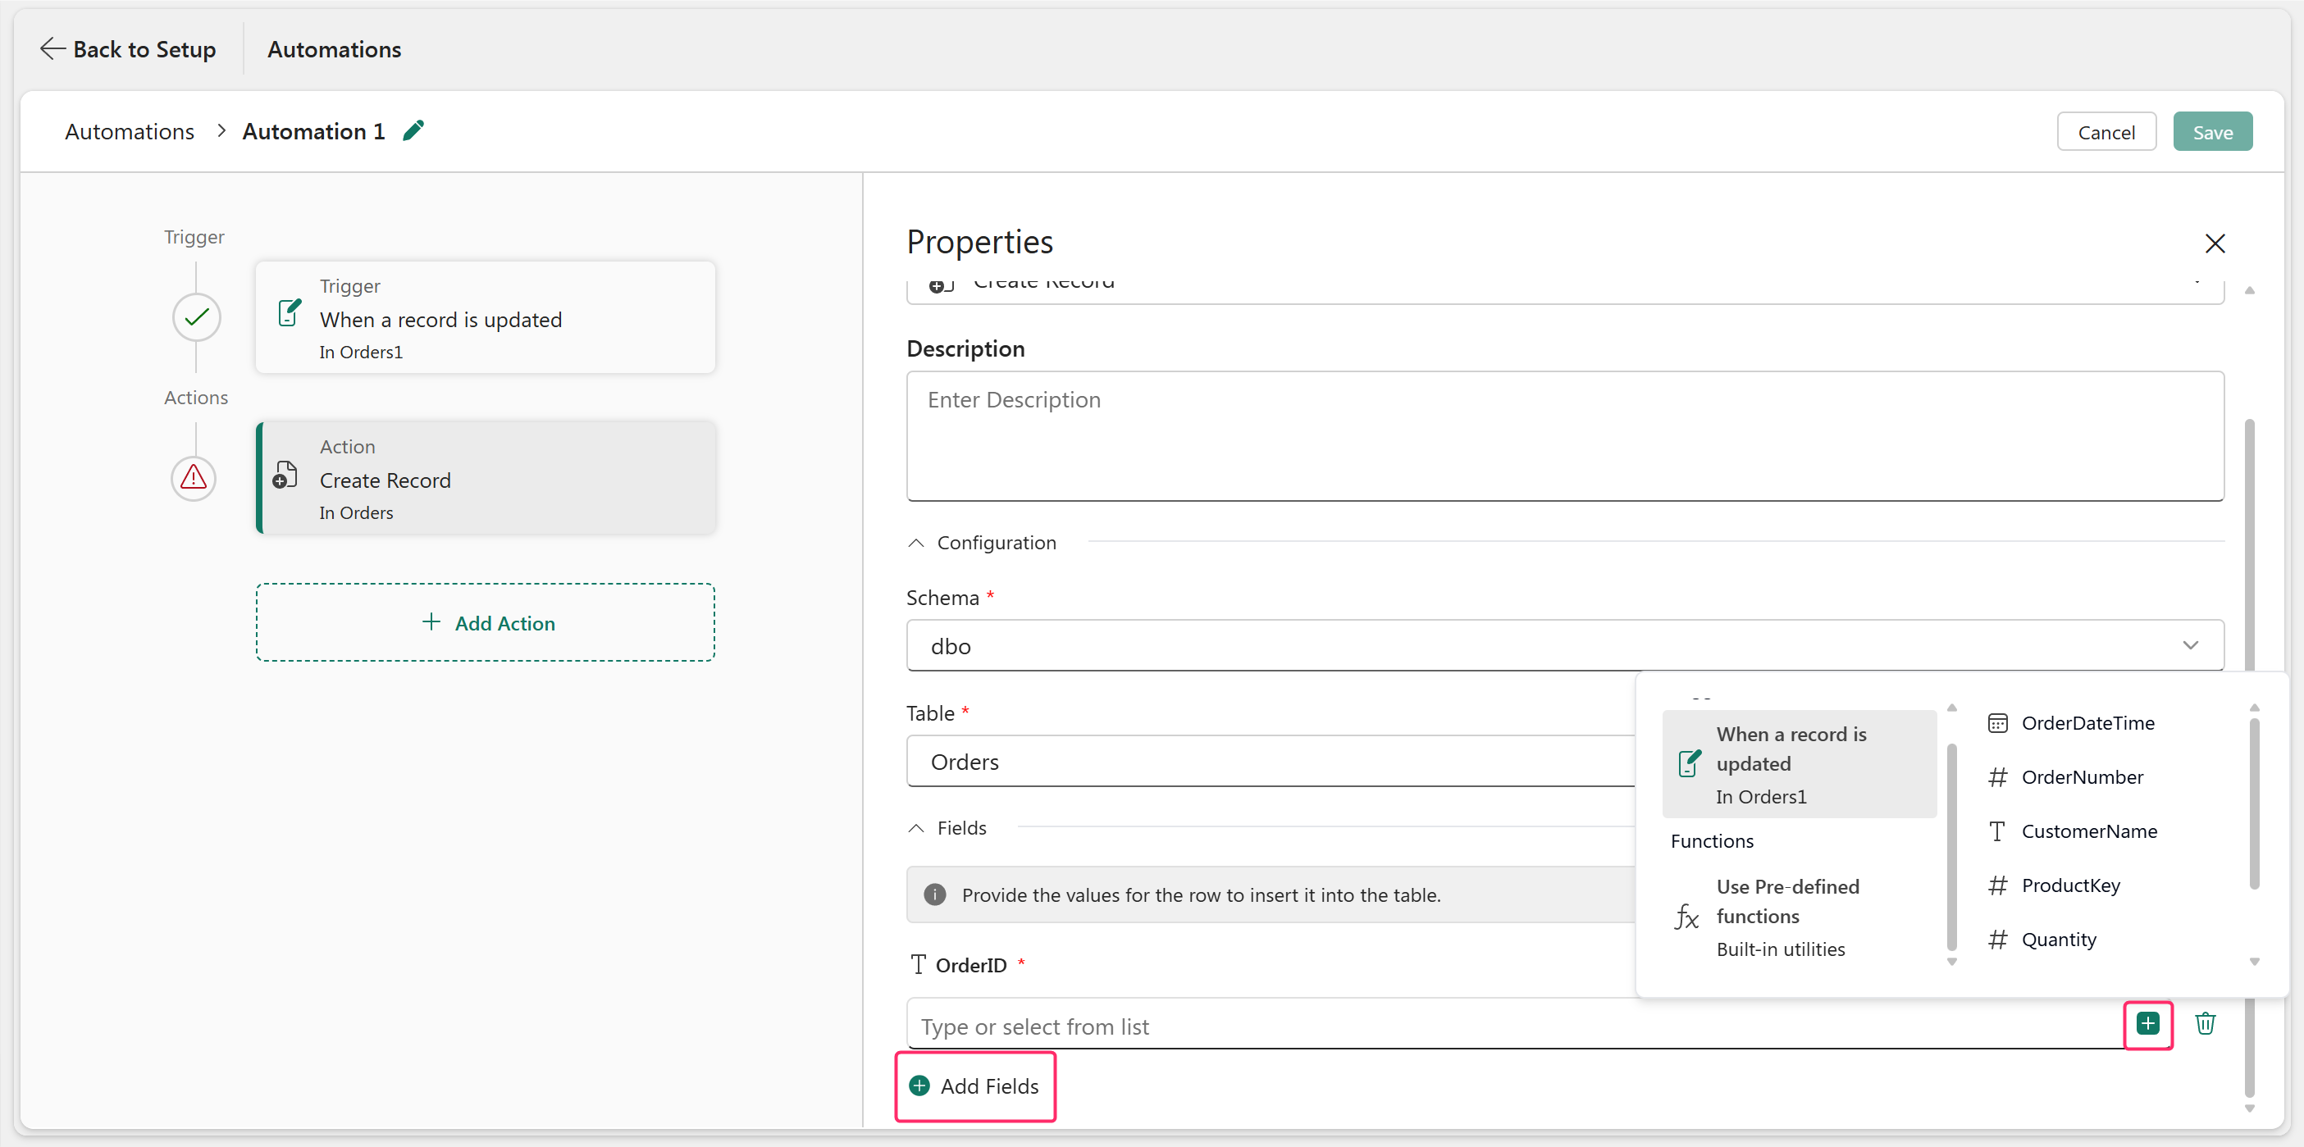
Create Record
This action creates a new record in the specified table.
Enter the schema and table name.
Select Add Fields to specify the fields for the new record.
Enter the field values or use predefined functions to fill in their corresponding values.
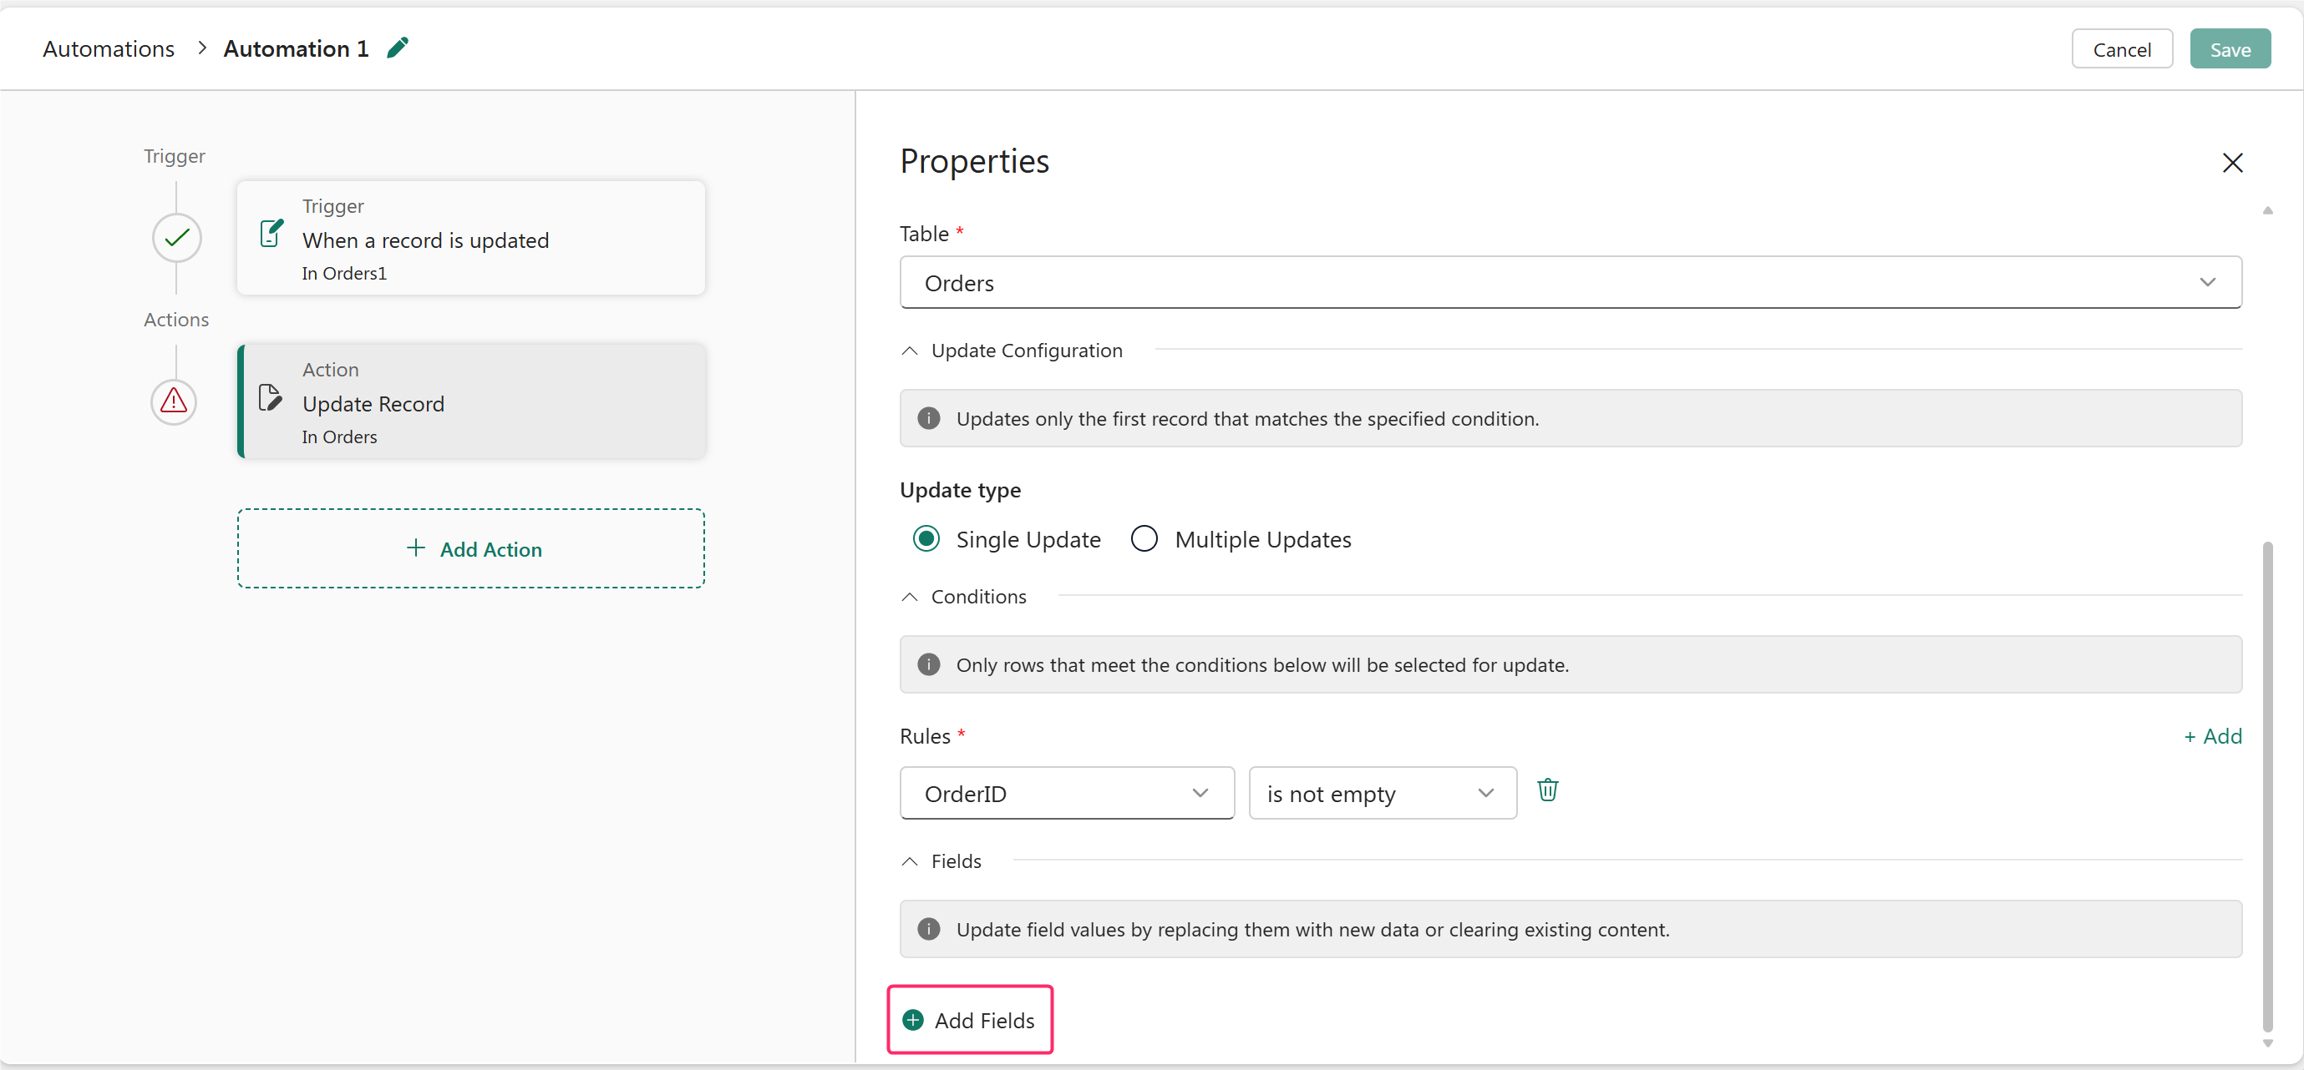
Update record
This action updates one or more records that meet the specified conditions.
Enter the schema and table name to update.
Select Update type.
- Single Update: Updates only the first record that matches the specified condition.
- Multiple Updates: Updates all records that match the condition.
Configure the conditions for update.
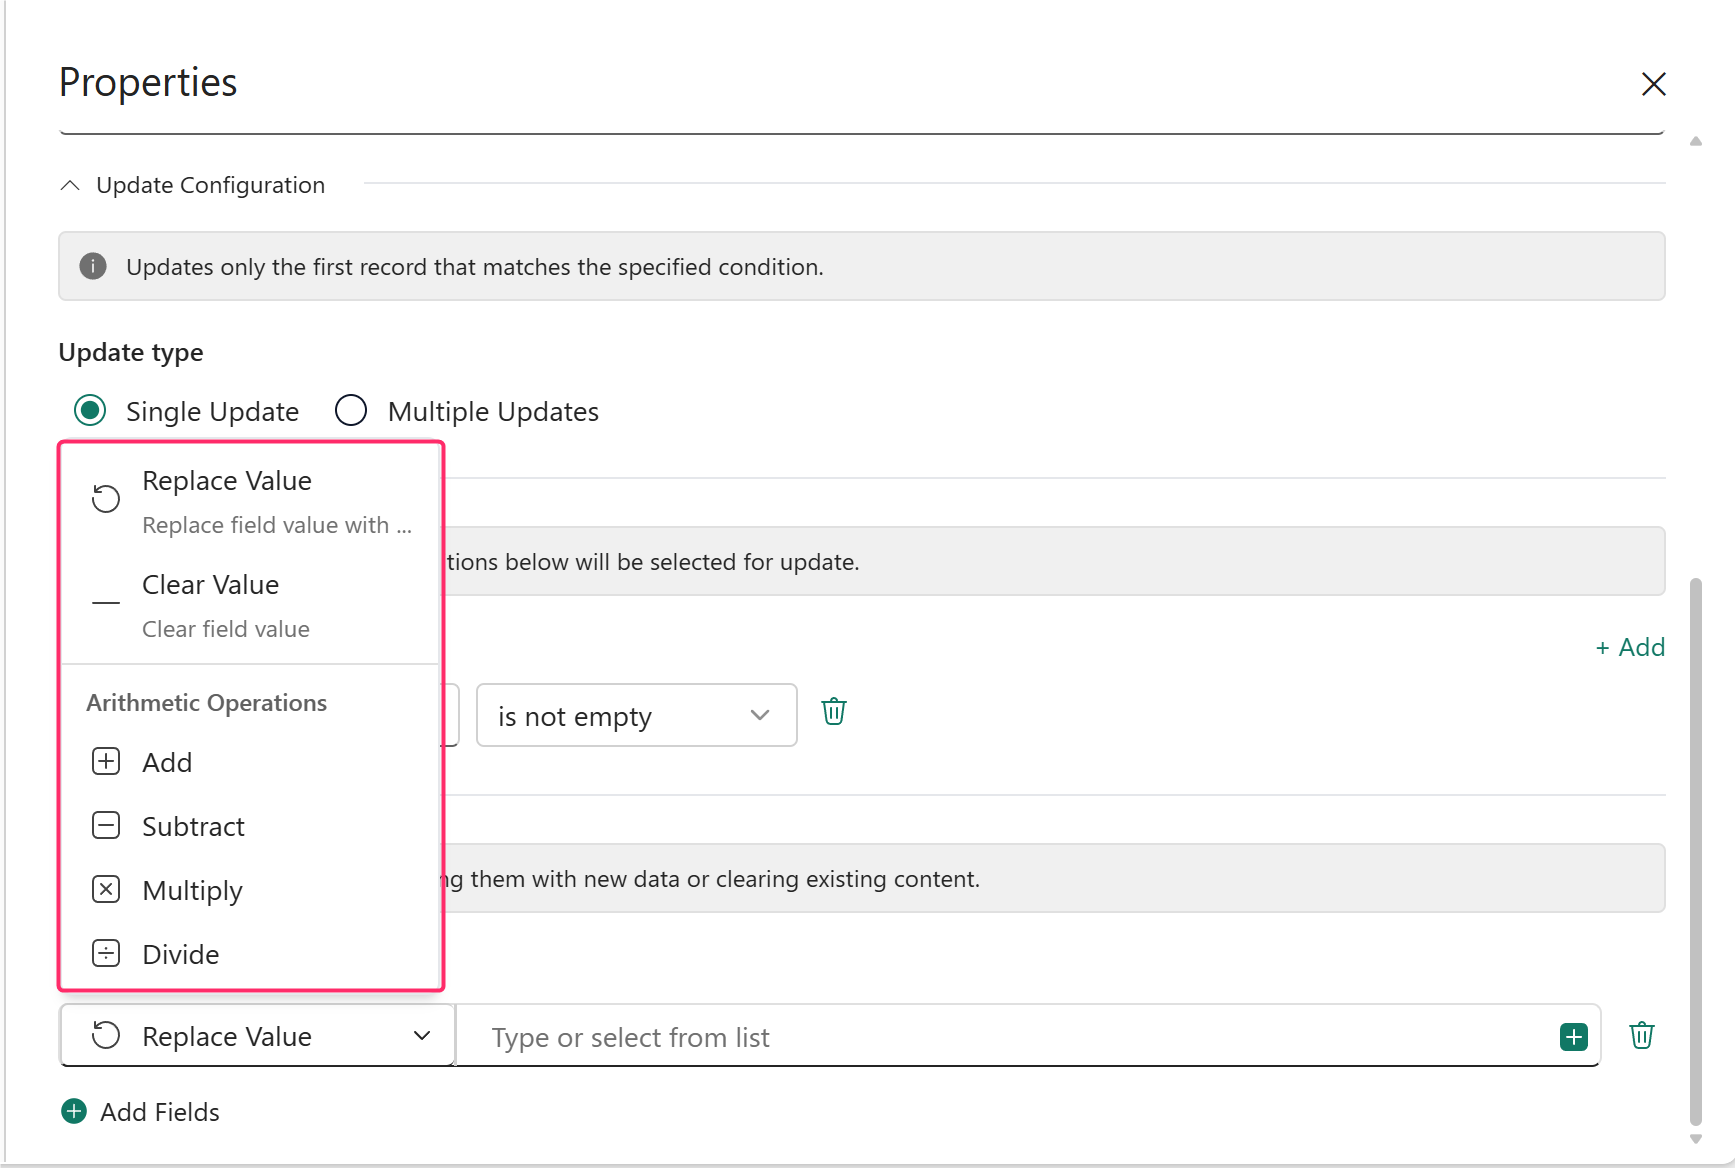
Select Add Fields to add the fields that you want to update.
Replace the existing values with static values or dynamically calculated values by using formulas, or clear the existing values.
Delete record
This action deletes one or more records from the specified table that meet the configured conditions.
- Enter the schema and the table name.
- Configure the rules to pick the records to delete.
Find records
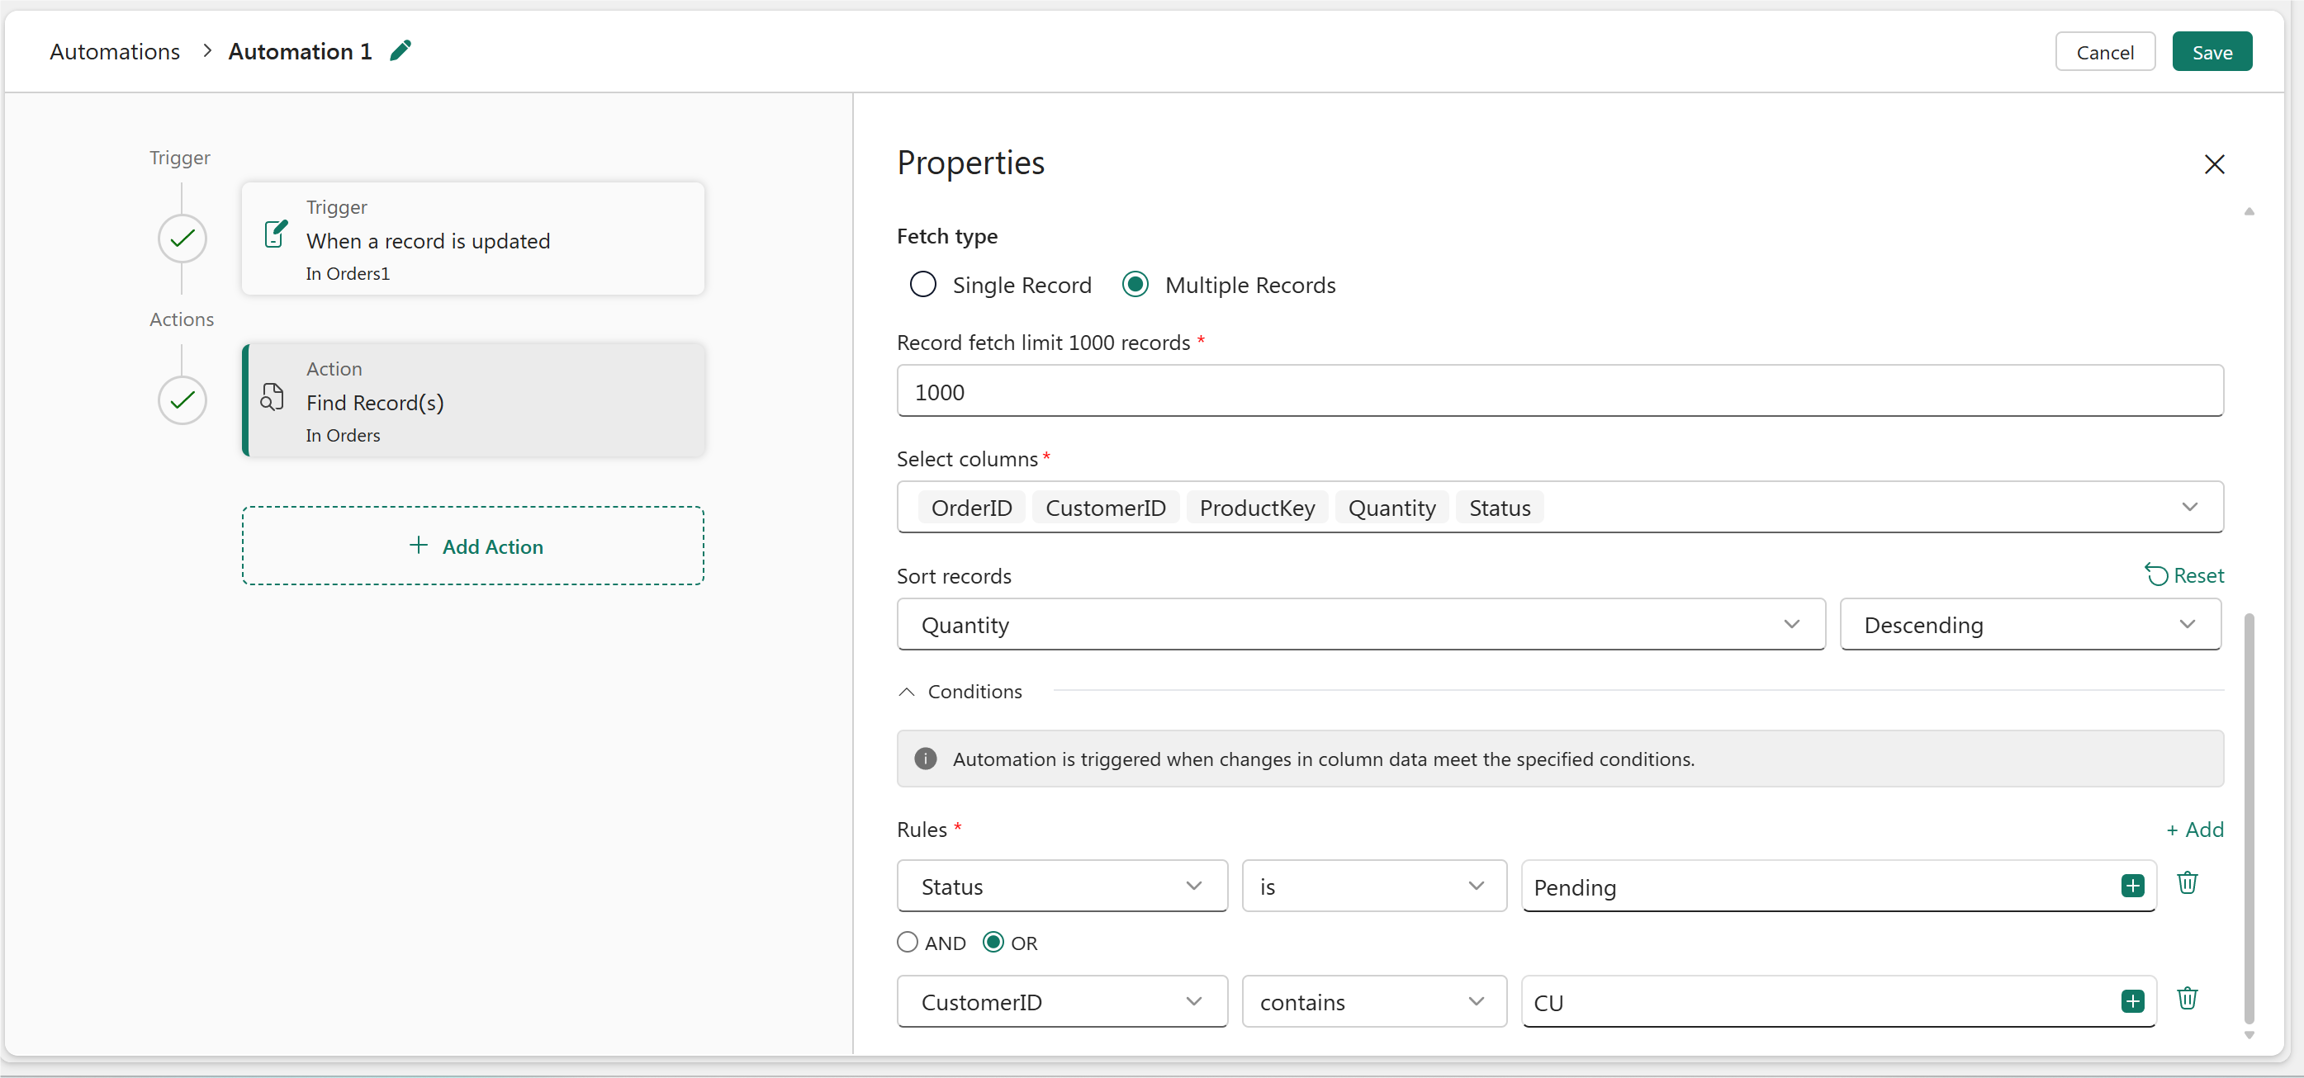
Use Find Record(s) to retrieve one or more records from the specified table that meet the configured conditions.
After entering the schema and table name, select the Fetch type.
- Select Single Record to retrieve a single record.
- Select Multiple Records to retrieve multiple records in a single action. You can retrieve up to 1,000 records. Configure the Retrieve Limit to specify the maximum number of records to return.
Select the fields to retrieve.
Optionally, sort the retrieved records in ascending or descending order. The action returns the records in the specified order.
Configure the conditions used to find the records.
Bulk create records
This creates multiple records in the specified table by using the records returned by the Find Record(s) action.
Include a Find Record(s) action in your flow before adding records in bulk.
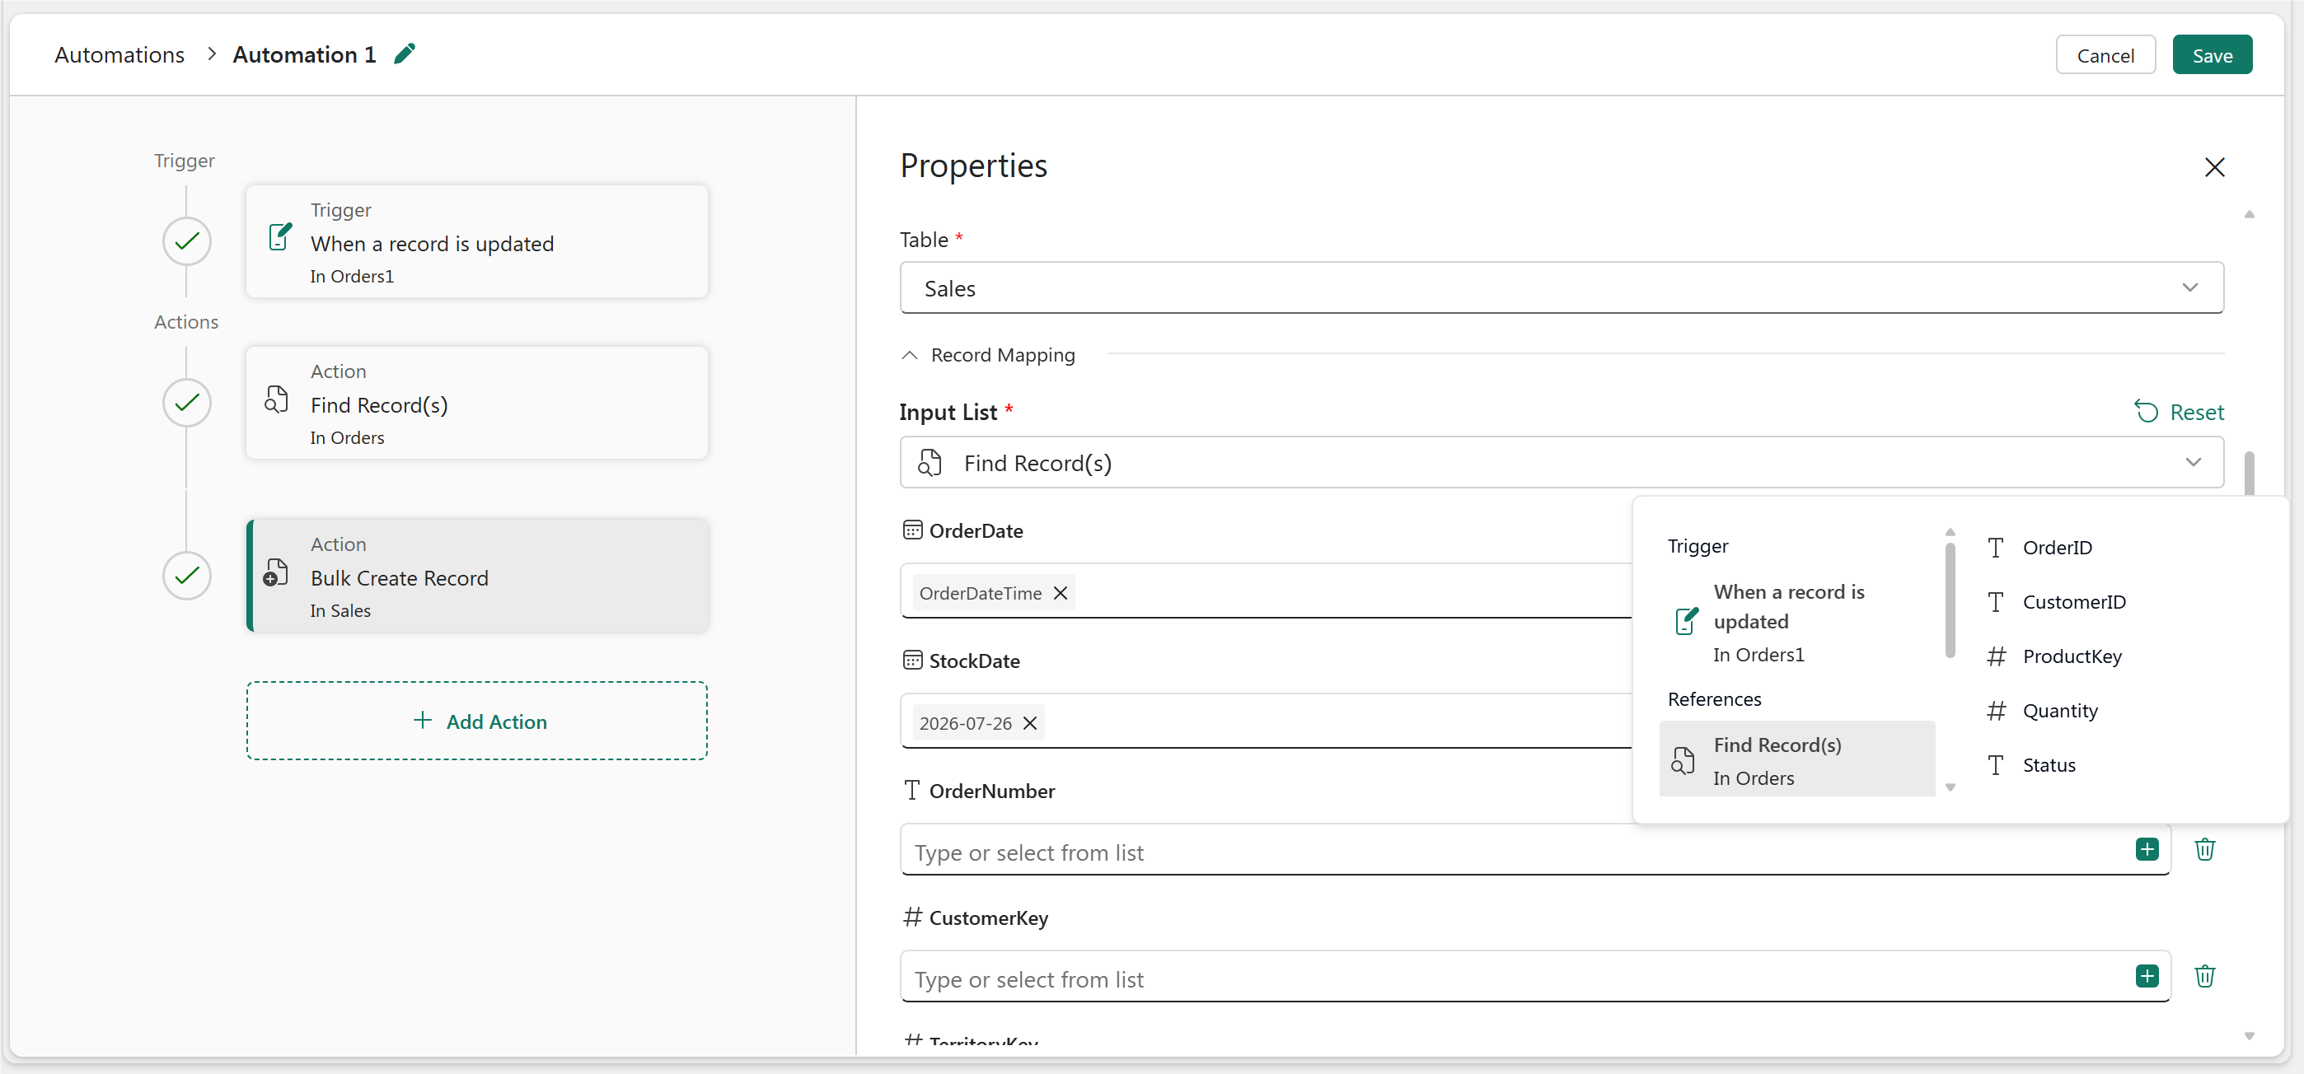
Select Add Action and select Bulk Create Record.
Specify the schema and table name where you want to create the records.
For Input List, select the records returned by the Find Record(s) action.
Select Add Fields to create the required destination fields.
Enter the field values or map each destination field to its corresponding field value from the records returned by the Find Record(s) action.
Note
An automation flow can include multiple Find Record(s) actions. If you include multiple Find Record(s) actions, select the action that returns the records you want to use as the input list.
Execute stored procedure
Use this action to run a stored procedure that you created in the database.
- Enter the schema and the table name.
- Configure the rules.
- Select the stored procedure that you want to run.
Conditional Group
Conditional Group defines If/Otherwise branching logic. It evaluates one or more conditions and runs the corresponding actions based on the conditions that are met.
Select Add Action, and then select Conditional Group.
In the Properties pane, add one or more conditions for the If branch.
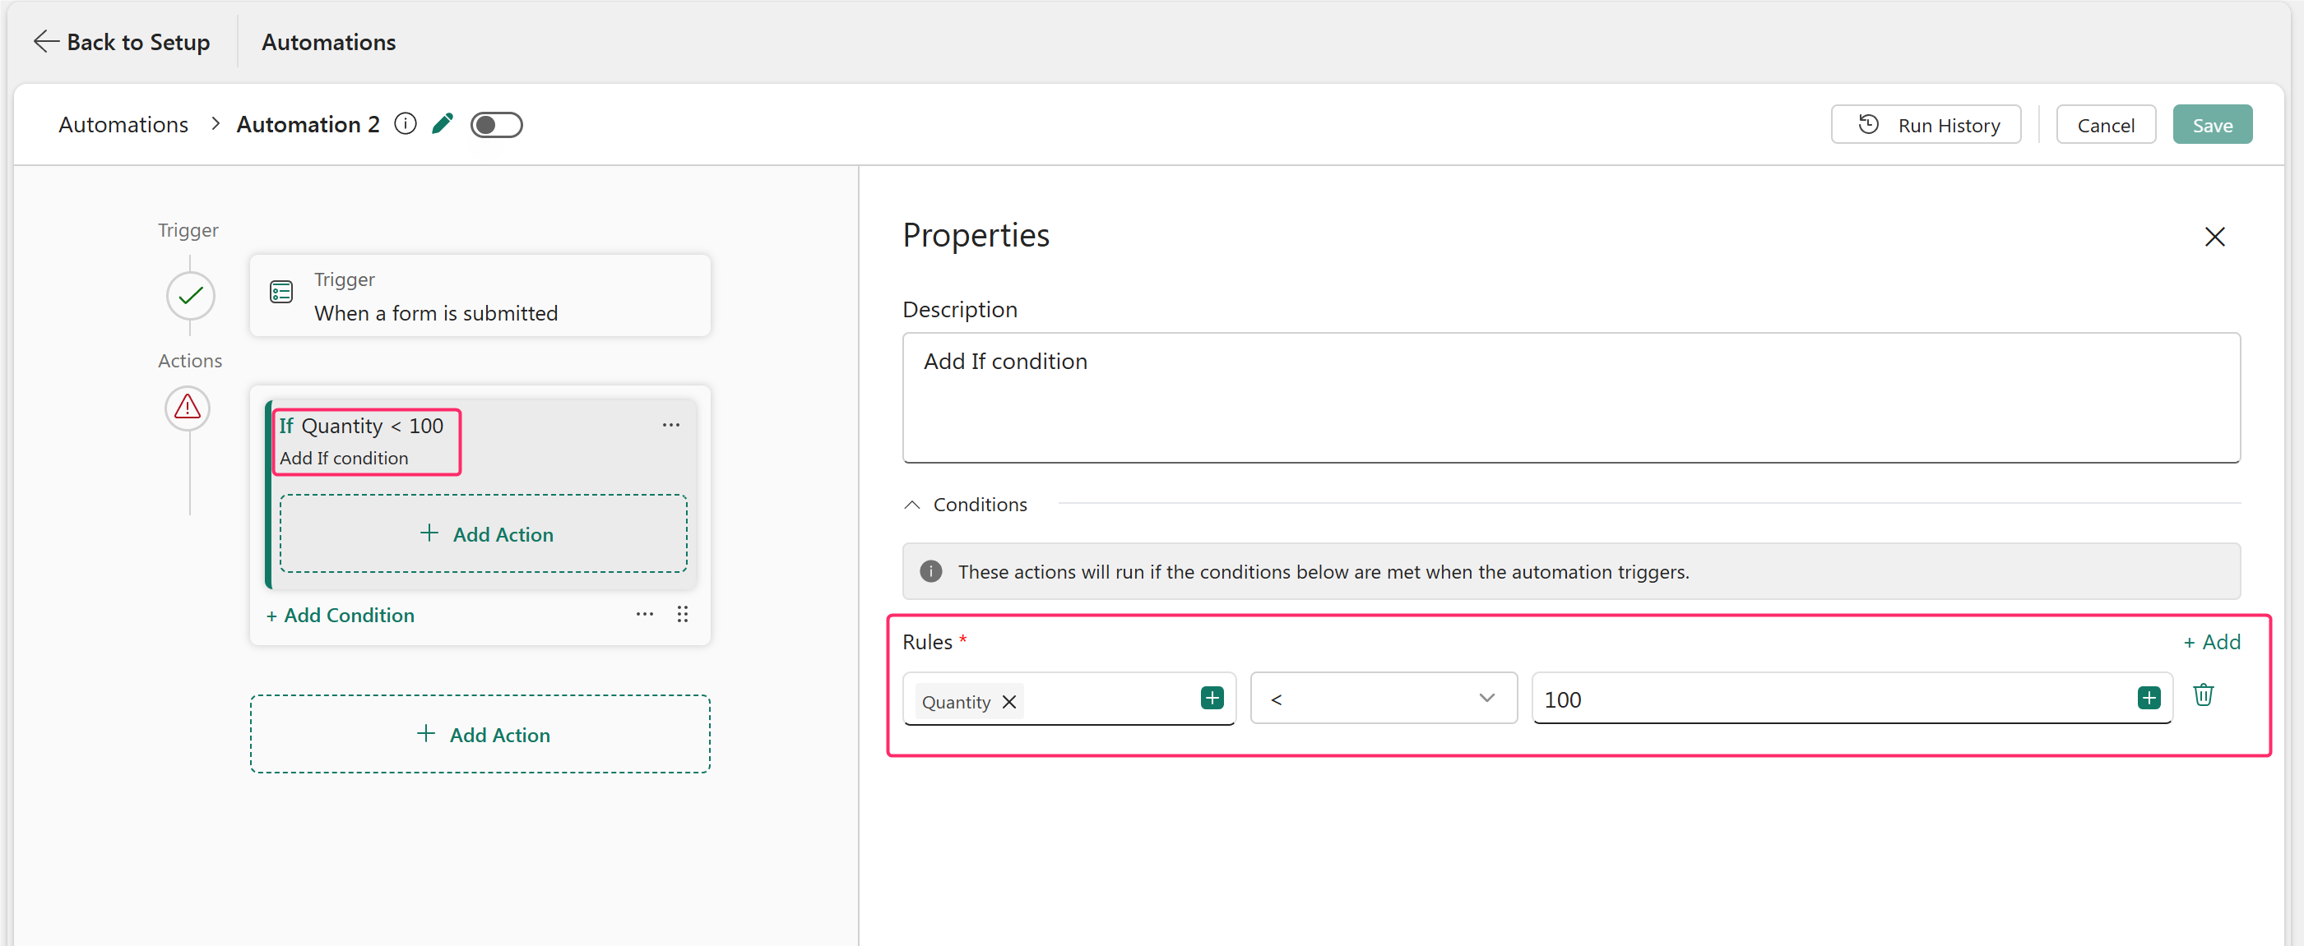
Select Add Action within the If branch to add an action to run when the conditions are met. Hover over to select + and add more actions if necessary.
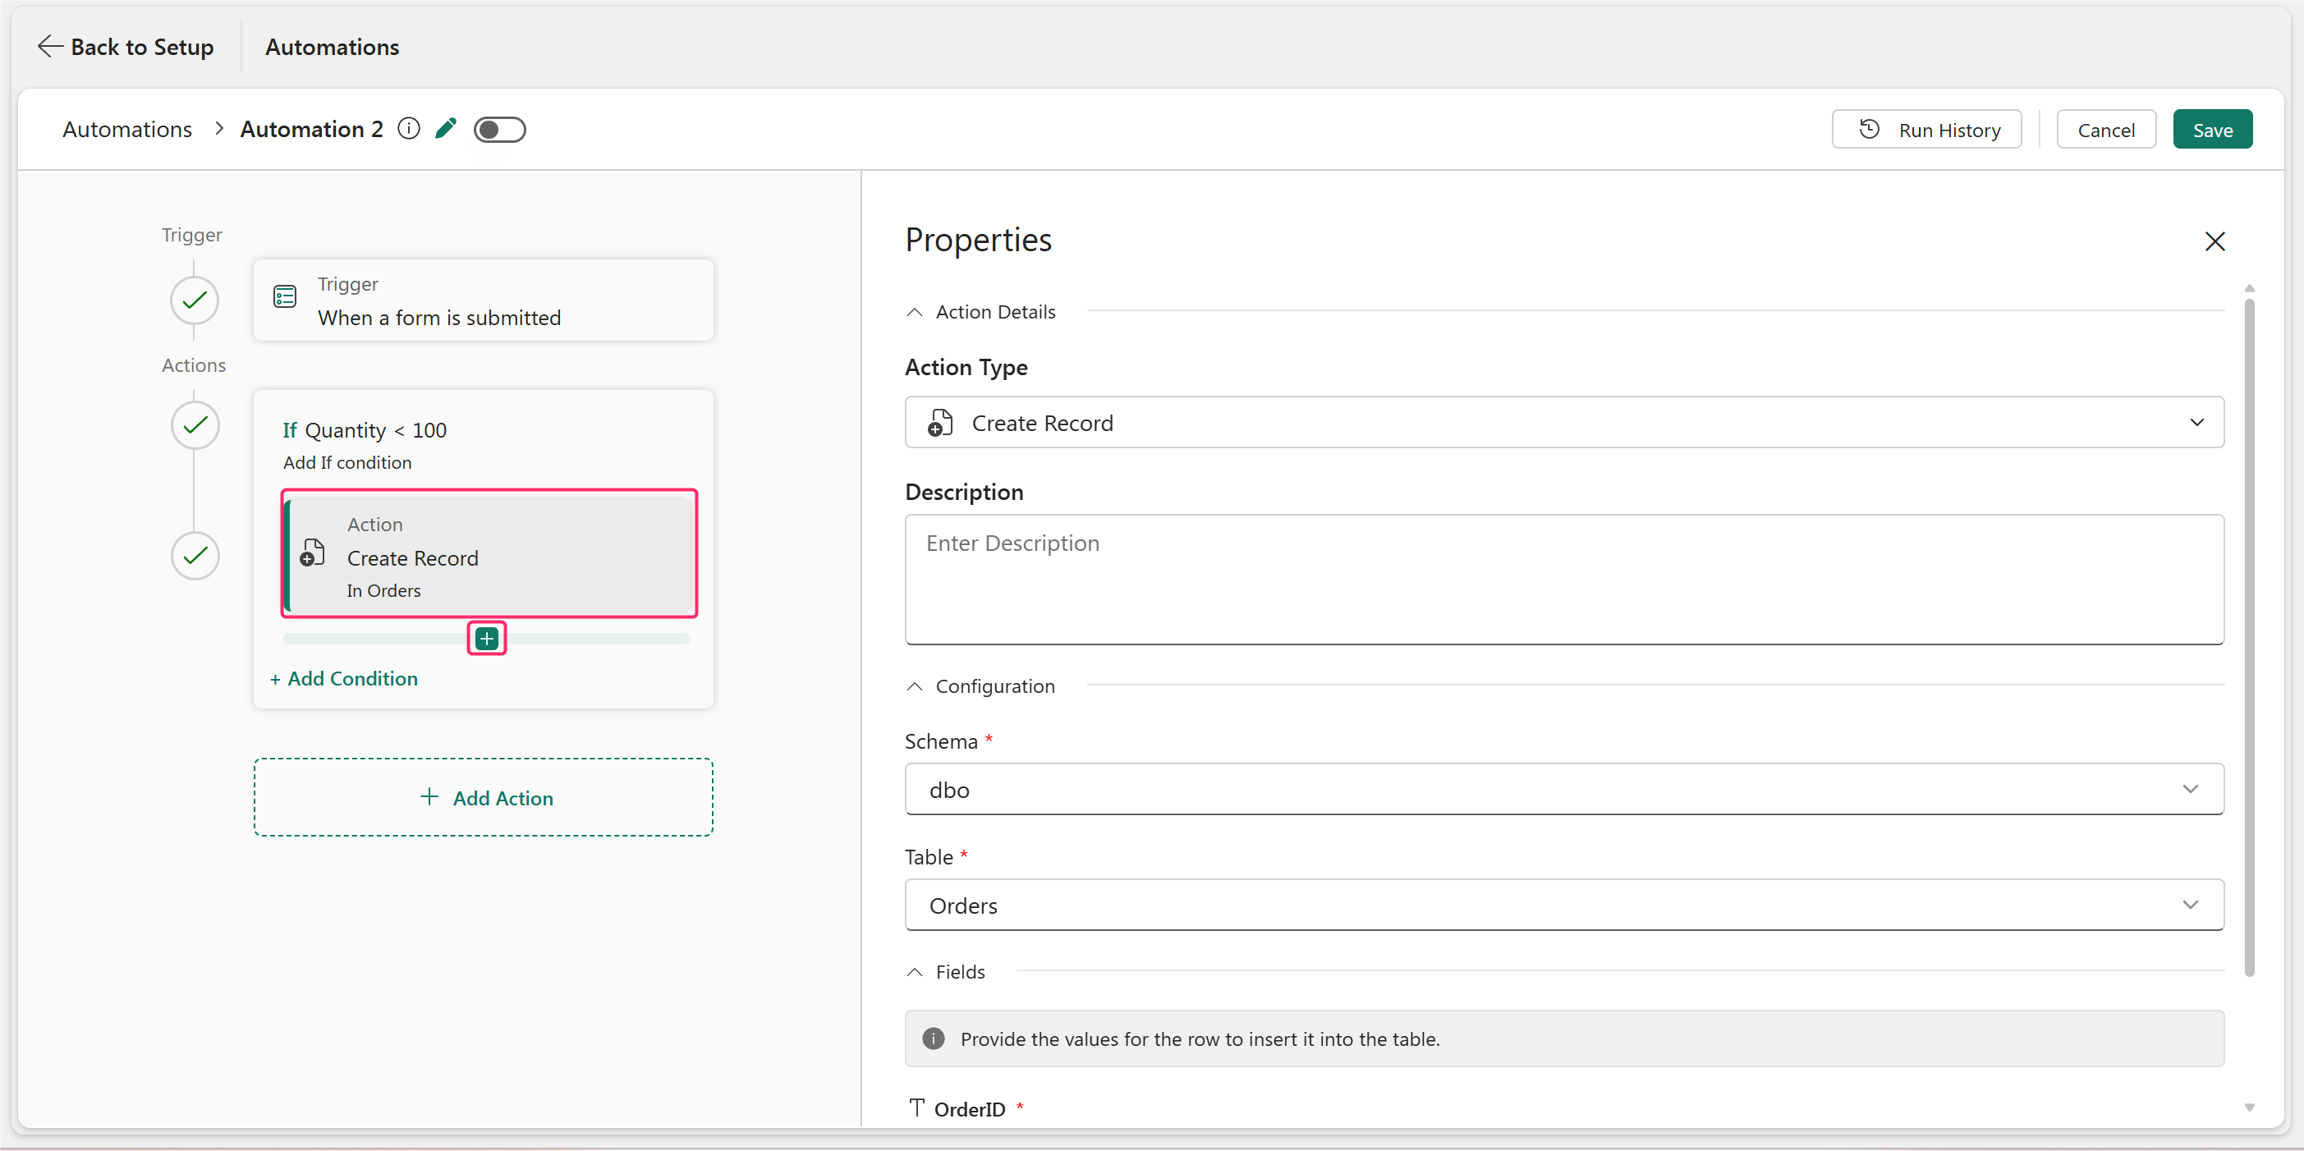
Select Add Condition to add an Otherwise If branch, and then configure its conditions.
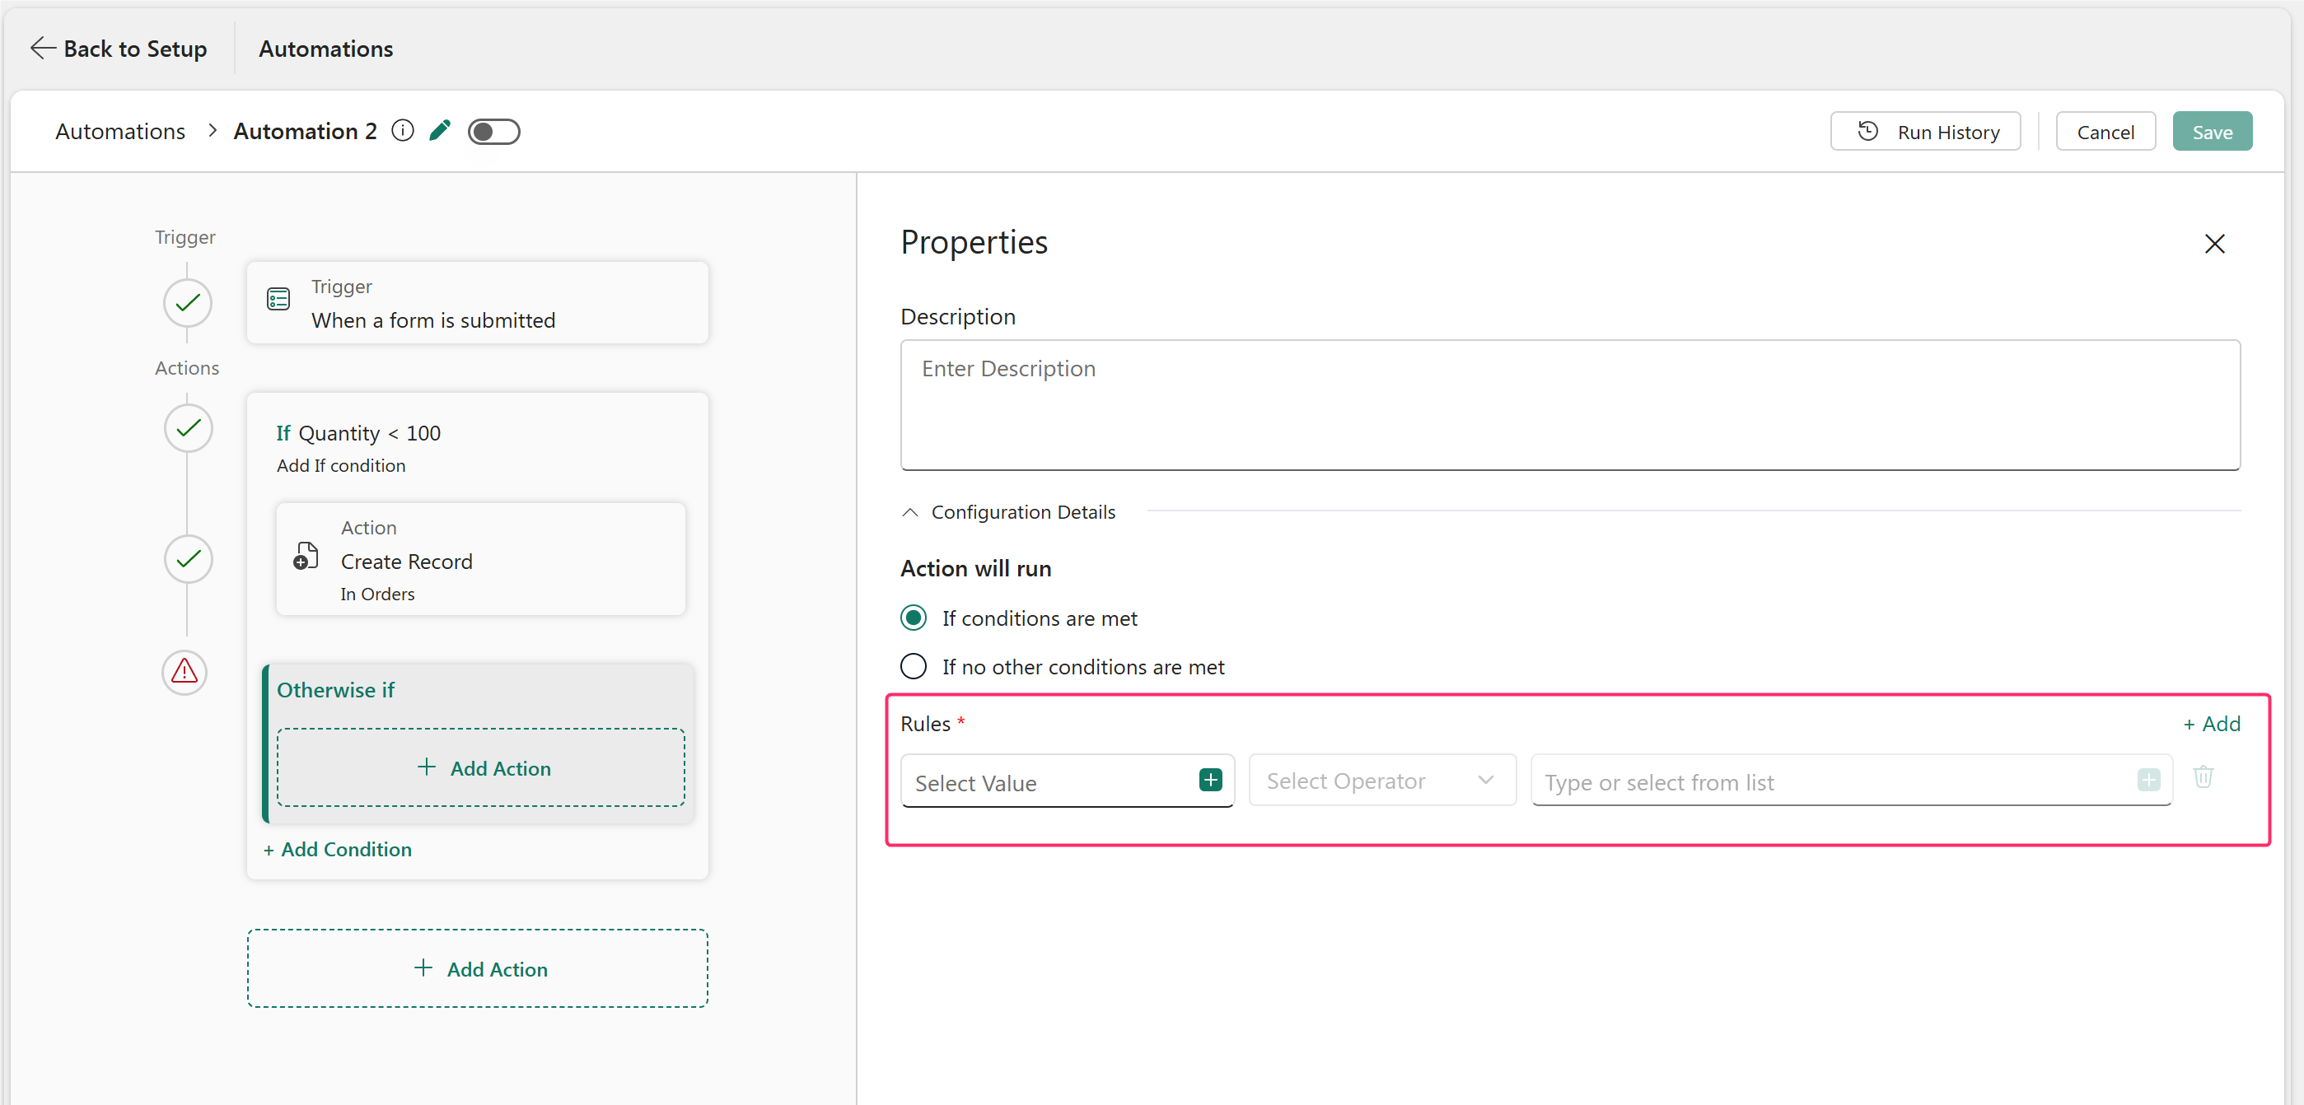
Select Add Action within the Otherwise If branch to add one or more actions when the conditions are met.
Repeat these steps to add additional Otherwise If branches and their corresponding actions.
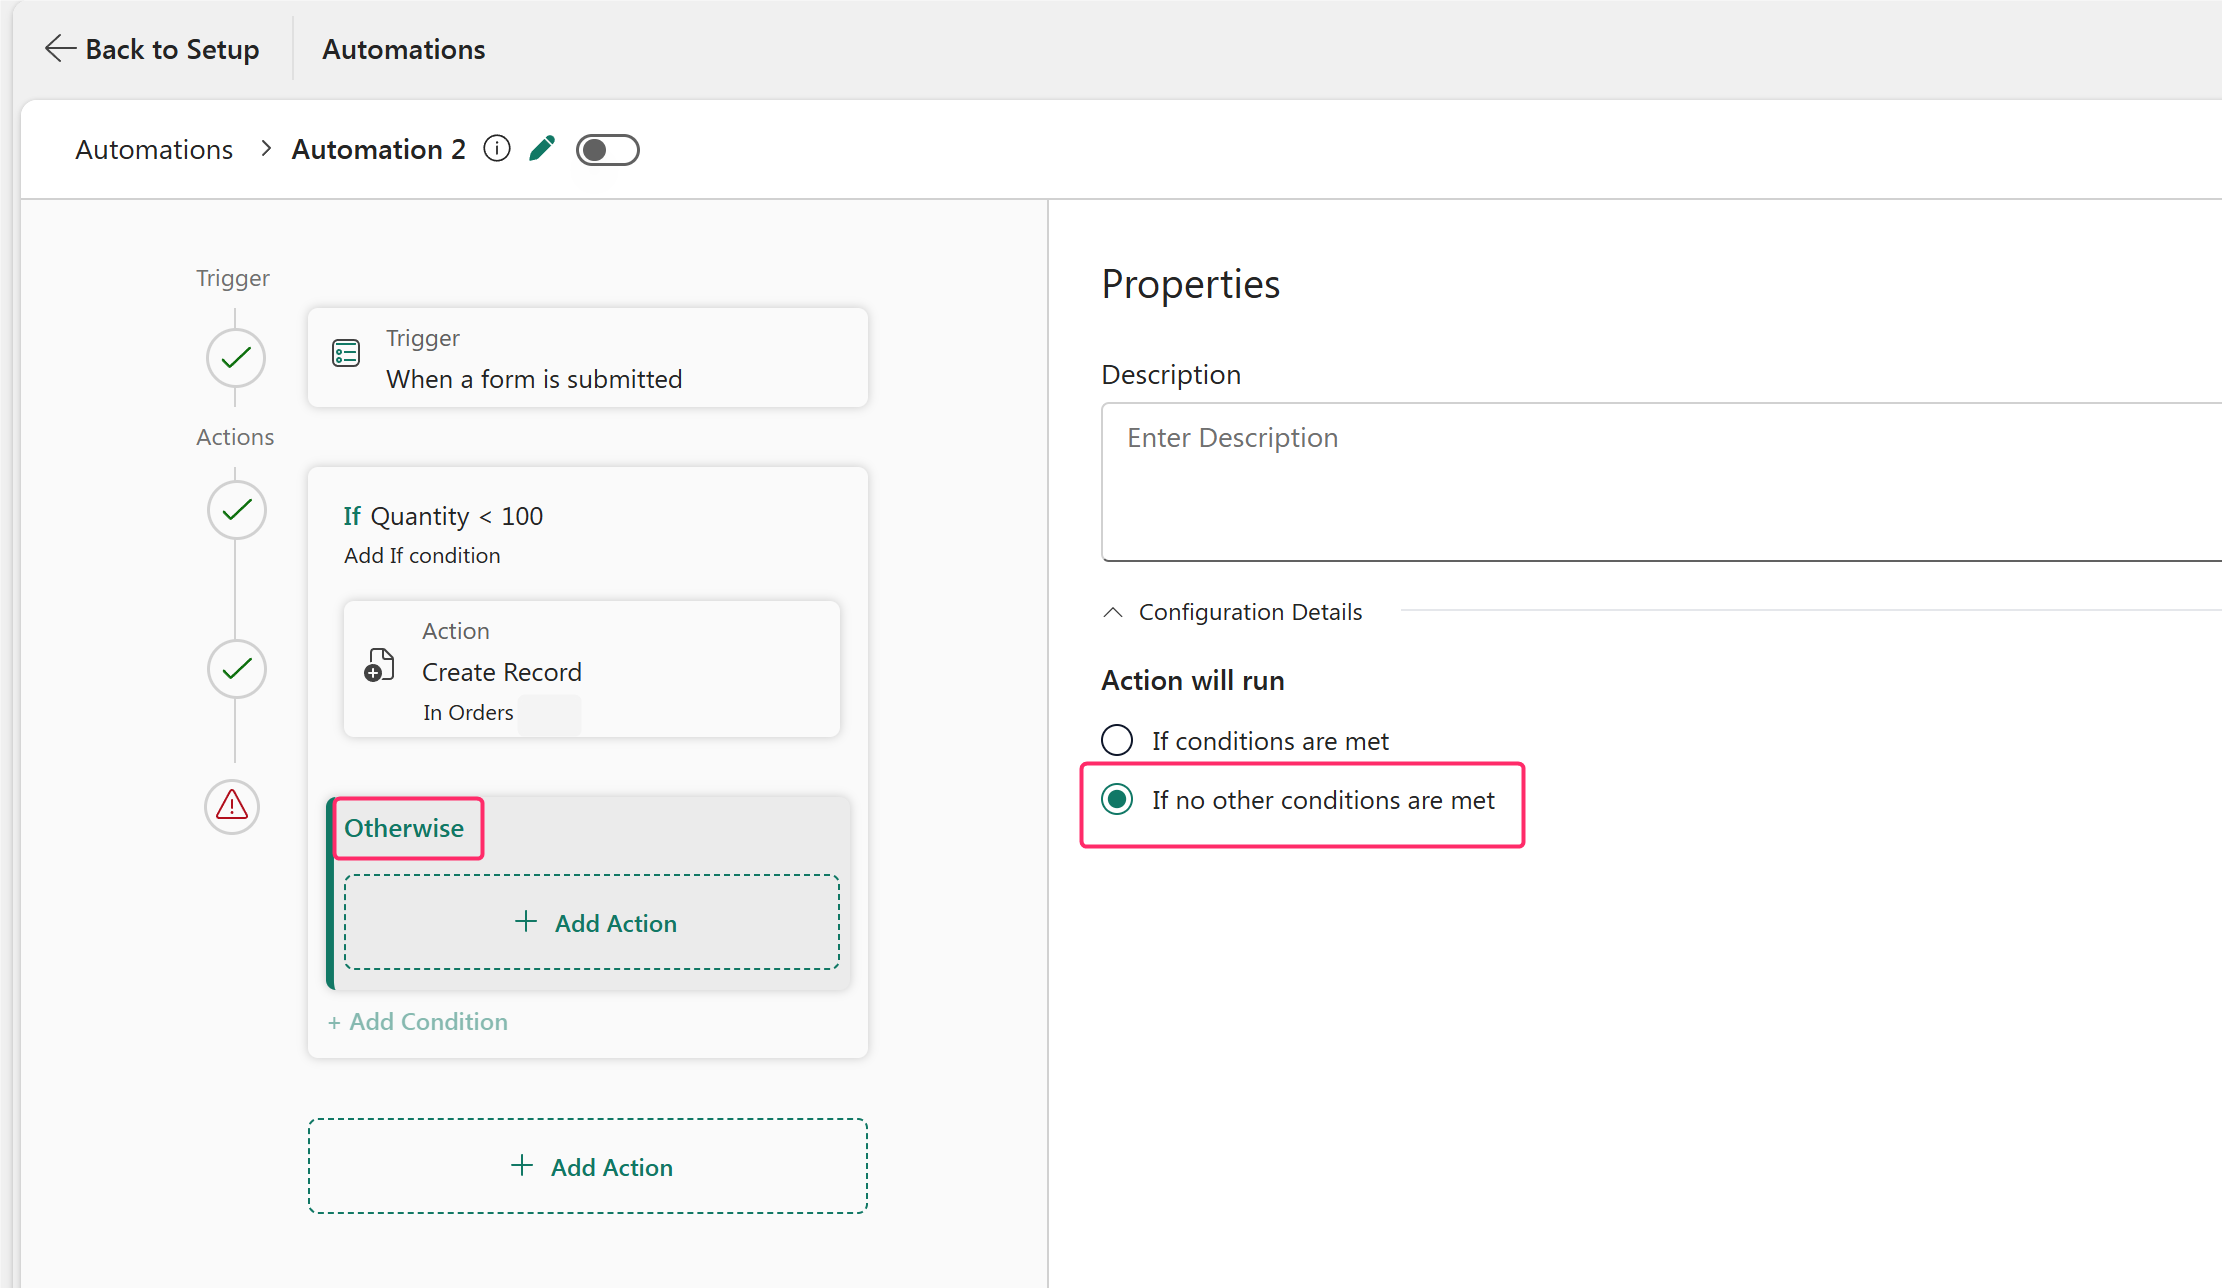
To add a final Otherwise branch, select If no other conditions are met in the Properties pane. The actions in this branch run only when none of the preceding conditions are met.
Repeating group
Repeating group repeats the same set of actions for each record that a Find Record(s) action returns.
Before adding a repeating group, include a Find Record(s) action in your flow.
Select Add Action, and then select Repeating Group.
Enter an optional description.
For Input List, select the records that the Find Record(s) action returns.
Note
An automation flow can include multiple Find Record(s) actions. If you include multiple Find Record(s) actions, select the action that returns the records you want to use as the input list.
If an iteration fails, select Continue to continue processing the remaining records or select Fail to stop the workflow.
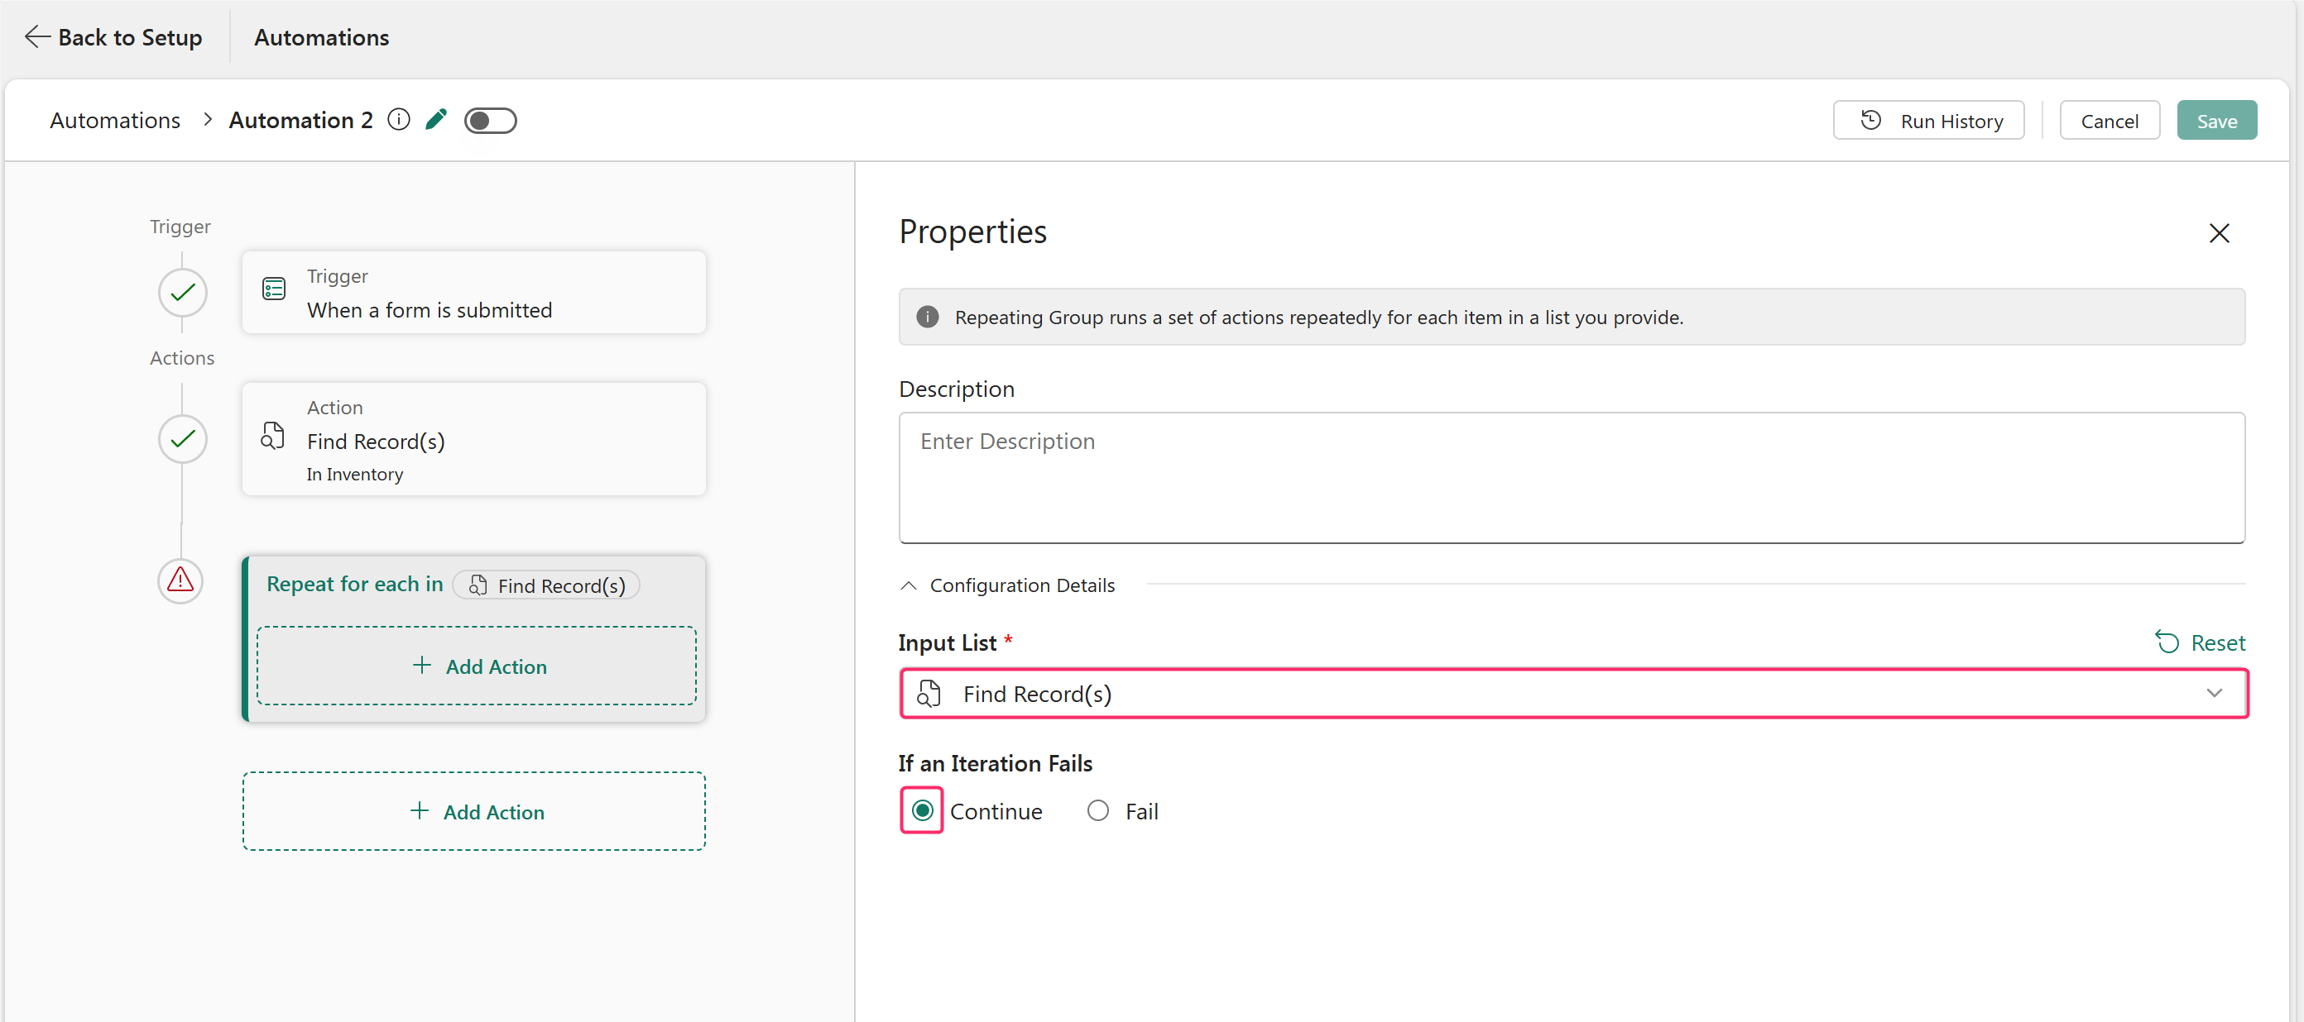
Within the Repeat for each block, select Add Action, and then select an action that runs for each record in the input list. Use + to include more actions.
Duplicate, delete, or rearrange actions
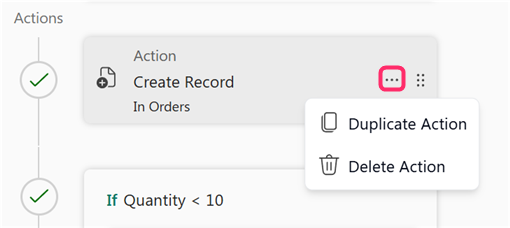
Use the More options (...) menu on an action to duplicate or delete it.
Use the drag handle (six-dot icon) to drag and drop the action and reorder the workflow.
To insert an action between existing actions, select the + icon at the required location in the workflow.
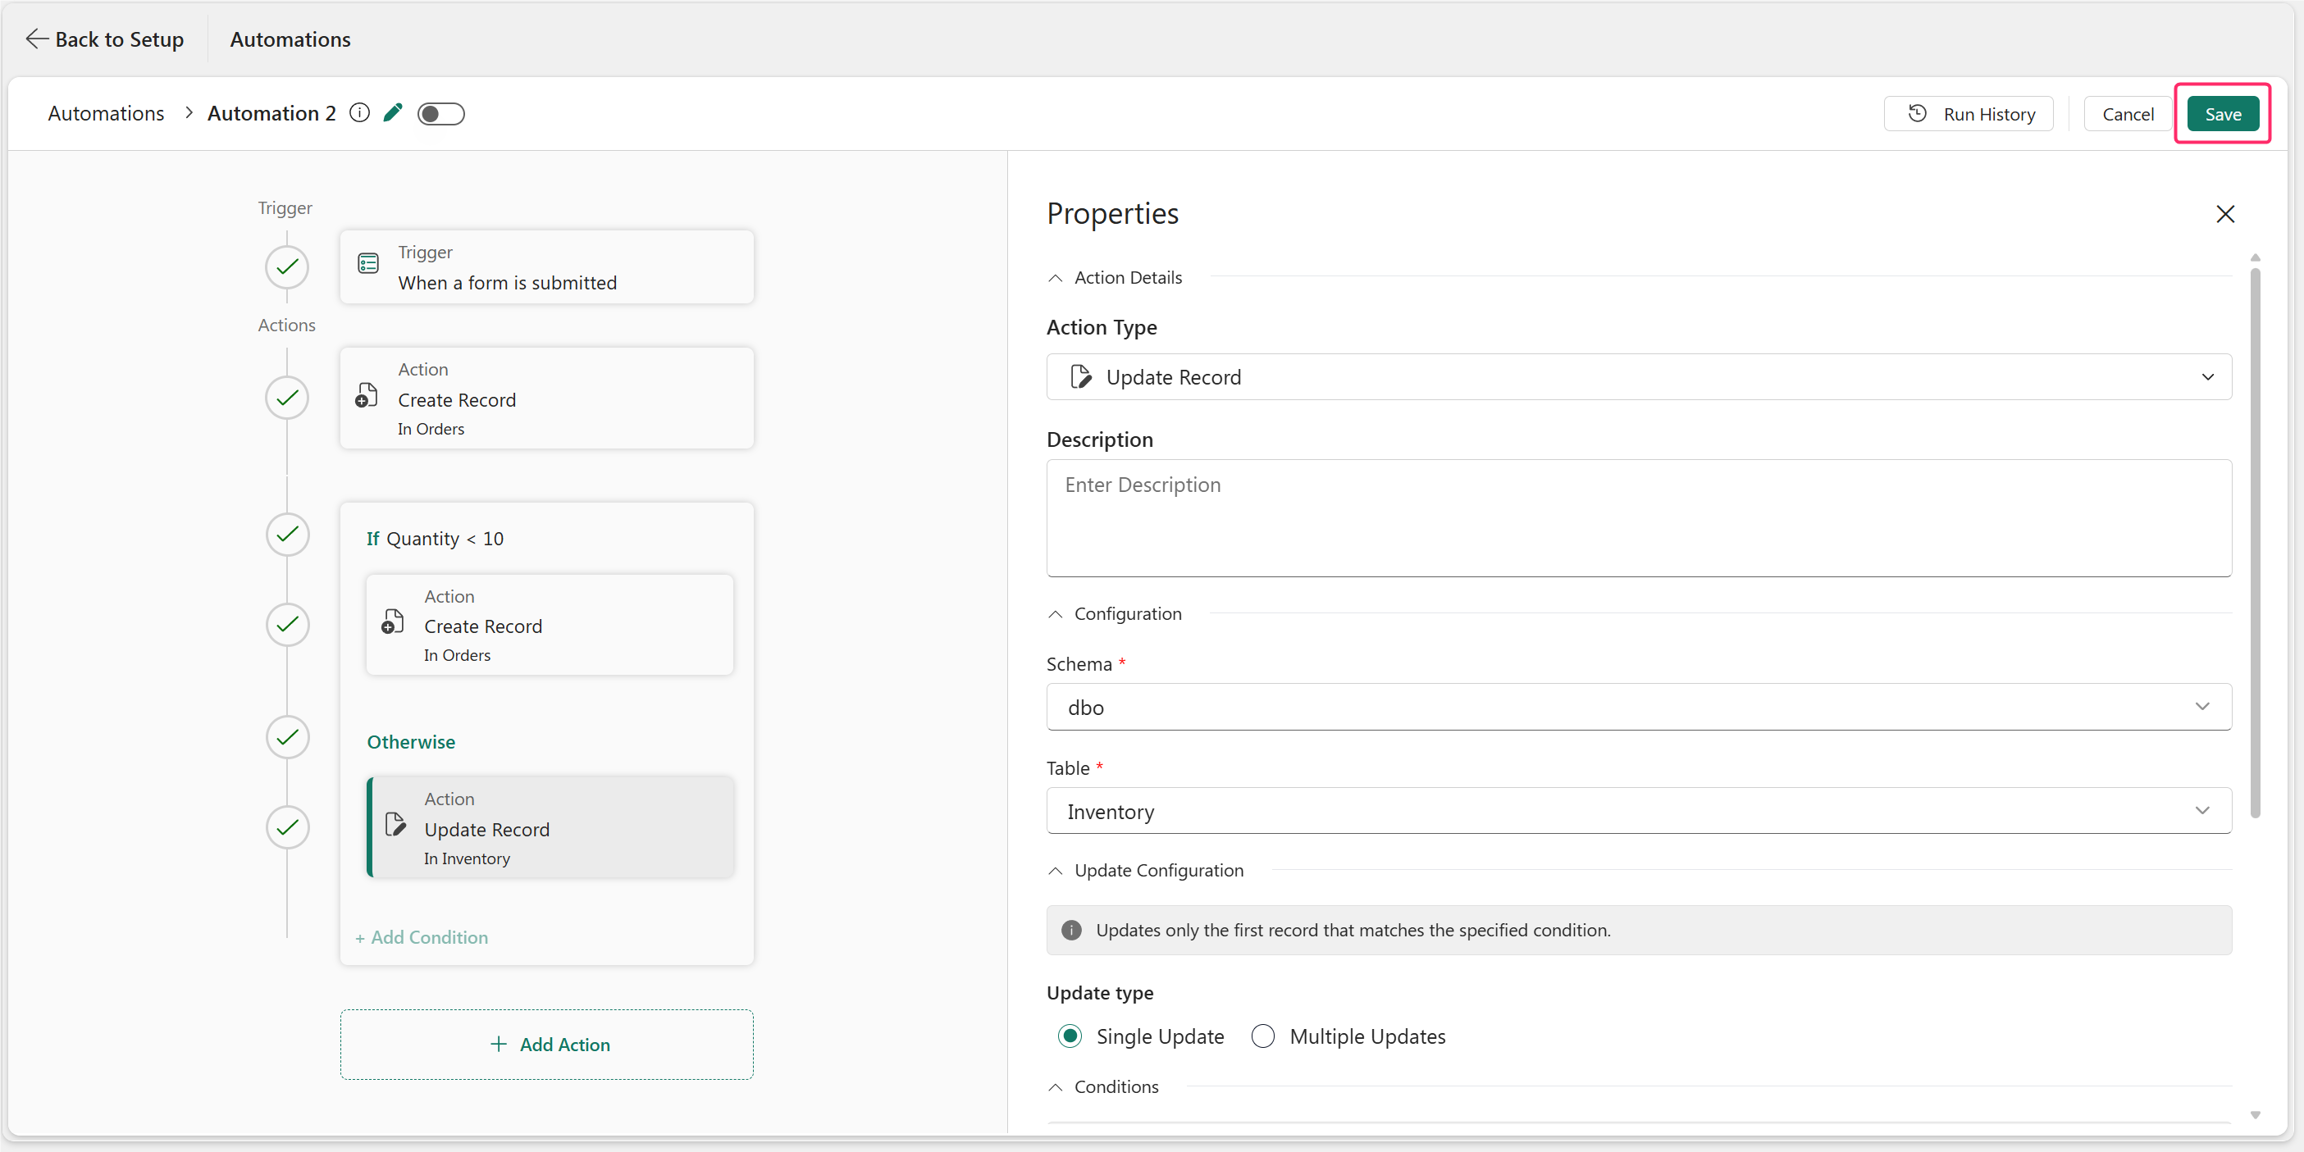
Save the workflow
After you complete all configurations, the Save option is enabled. Select Save to save the workflow. Select Back to Setup to return to the previous page.
Manage automations
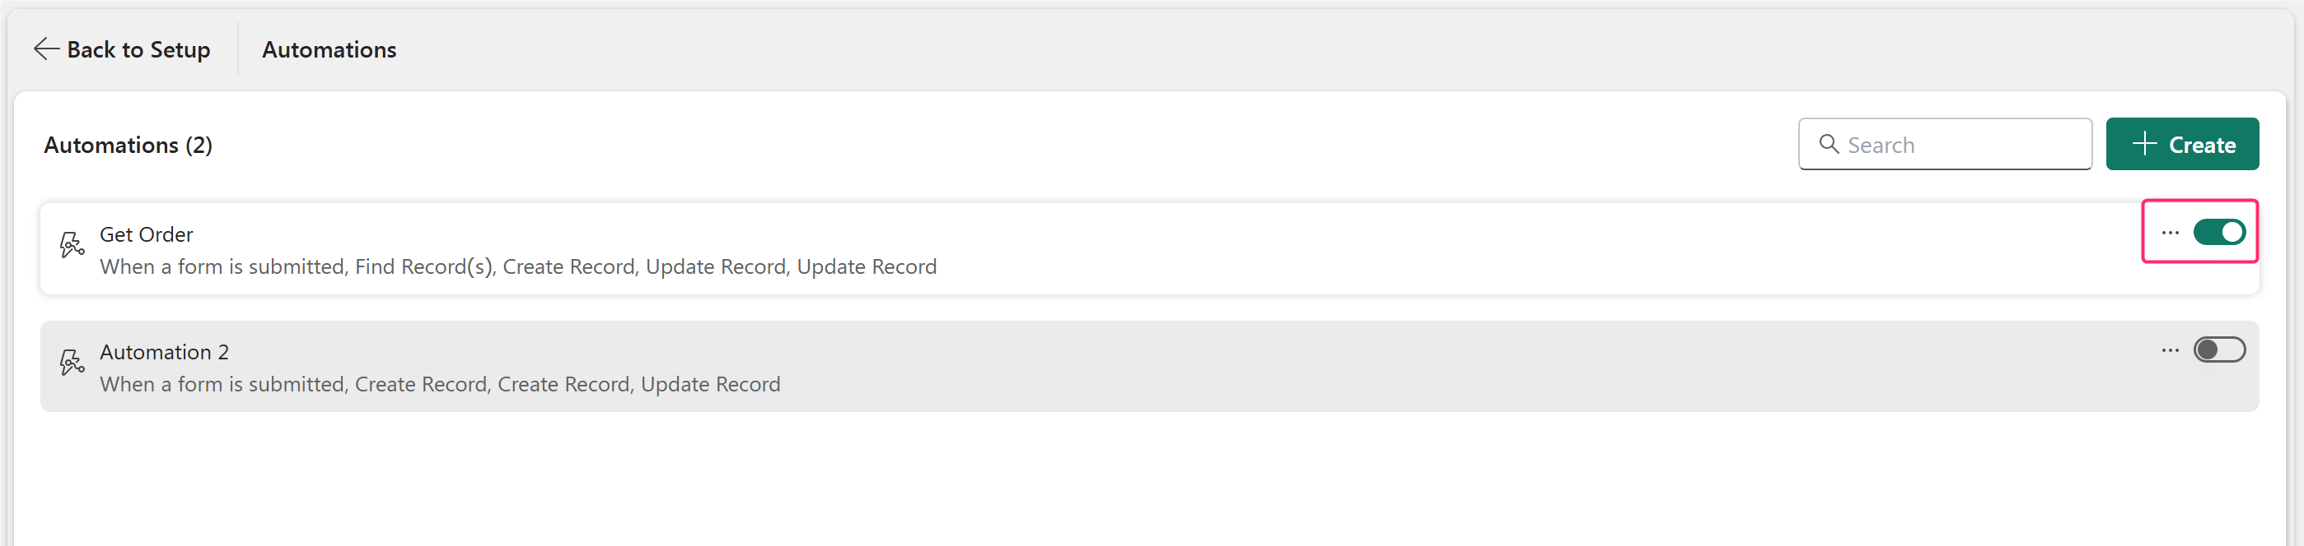
You can create multiple automation workflows for a table. To view the workflows that you created, select Setup > Automations.
Enable or disable a workflow: Use the toggle to enable or disable a workflow.
Duplicate a workflow: Select More options (...), and then select Duplicate to create a copy of a workflow. Modify the copied workflow as needed instead of creating one from scratch.
Delete a workflow: Select More options (...), and then select Delete to permanently remove a workflow. You must disable a workflow before you can delete it.
Search: Use the search box to find a specific automation flow by name.
View run history
Use the Run History pane to monitor workflow executions and review the status of each run.
Open the required automation workflow and select Run History.
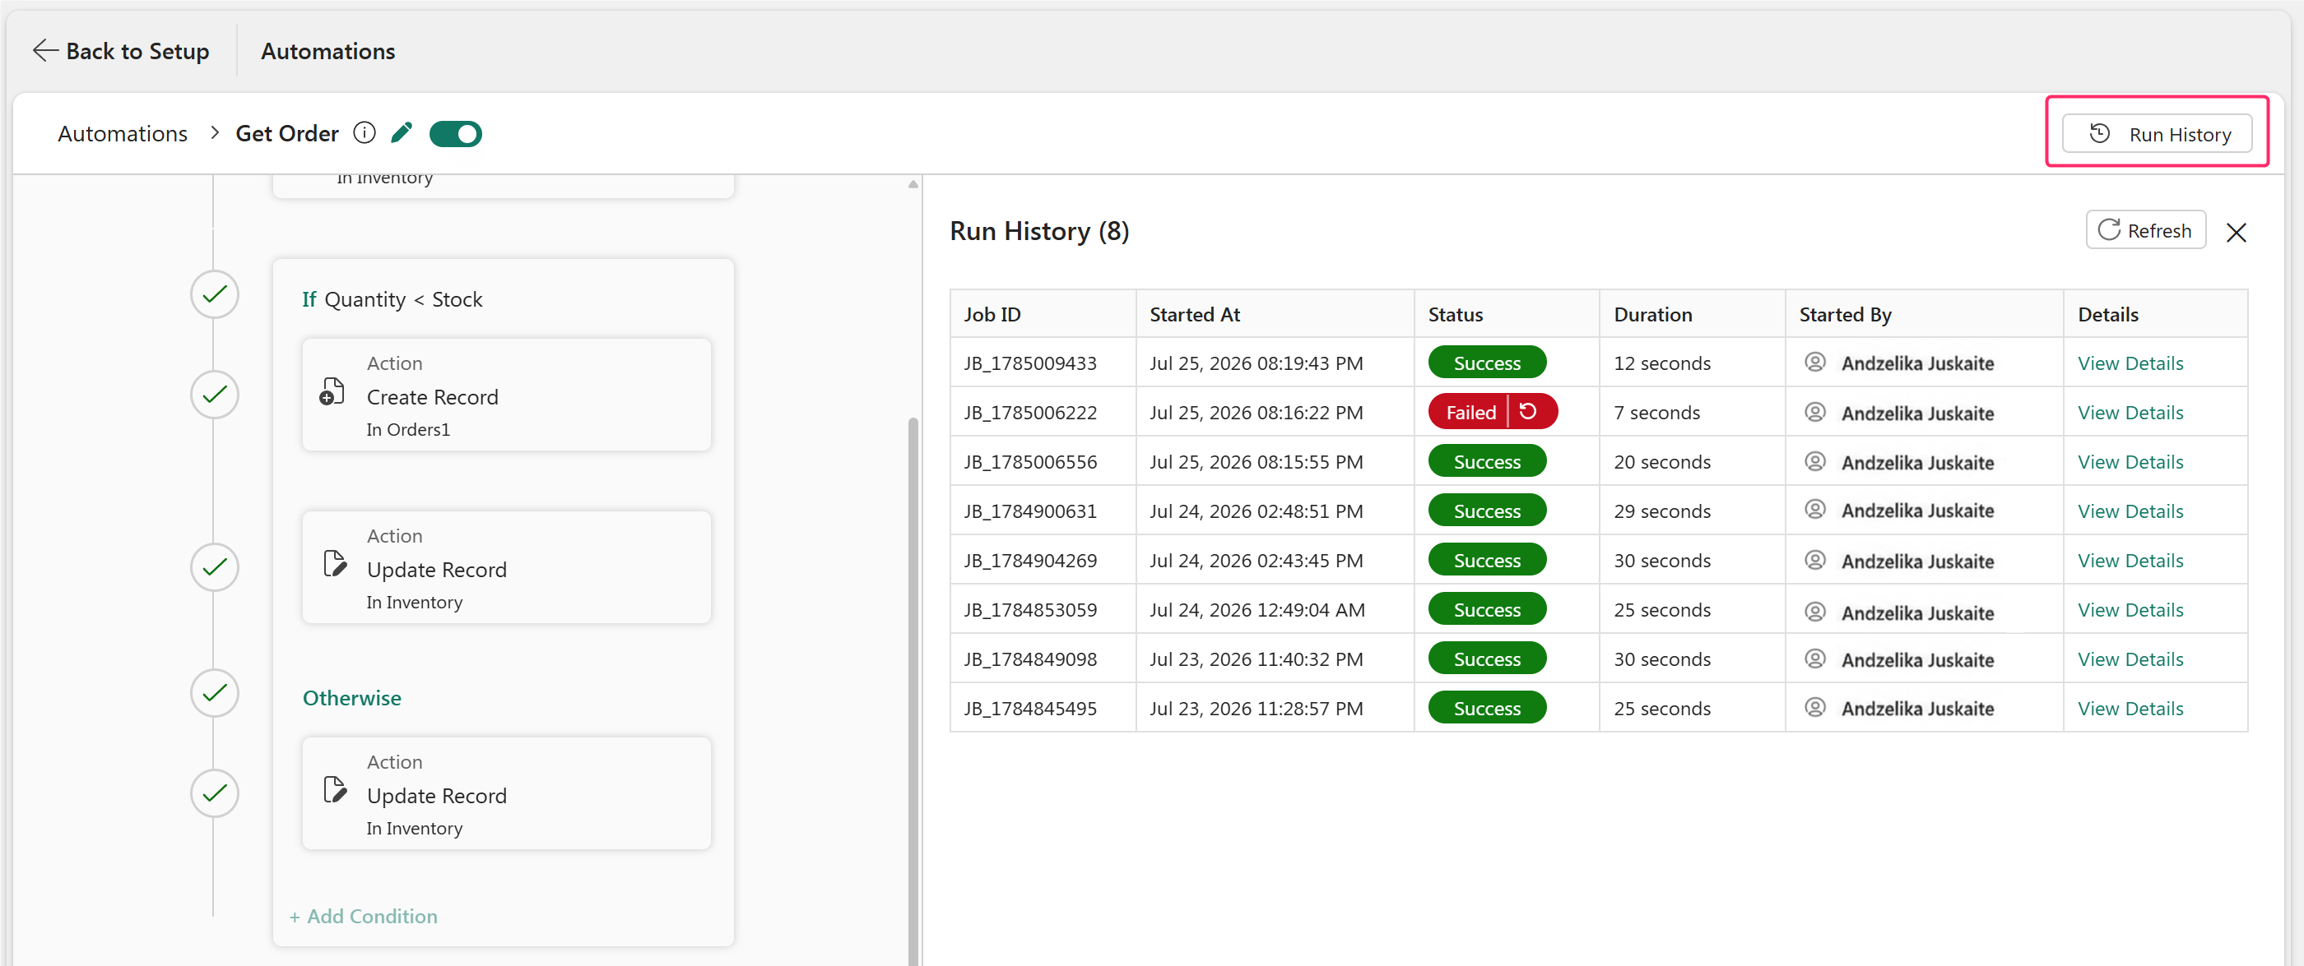
The pane lists all workflow runs along with details such as:
| Column | Description |
|---|---|
| Job ID | Unique identifier for the workflow run. |
| Started At | Date and time when the workflow started. |
| Status | Current execution status, such as Success or Failed. |
| Duration | Total time taken to complete the workflow run. |
| Started By | User who triggered the workflow. |
| Details | Select View Details to view the full execution details for the workflow run. |
You can also use the following options:
- Retry: Failed runs display a Retry option. Select it to rerun the workflow after resolving the issue.
- Refresh: Use Refresh to refresh the run history and display the status of latest workflow runs.