Note
Access to this page requires authorization. You can try signing in or changing directories.
Access to this page requires authorization. You can try changing directories.
An enclave is an isolated Azure Virtual Network that's part of a community and hosts one or more workloads.
In this tutorial, part two of eight, you create two enclaves in the community that you deployed in the previous tutorial. The enclaves become spokes in the community hub-and-spoke network topology.
In this tutorial, you:
- Create the
Enclave-WebAppenclave. - Create the
Enclave-DMZenclave. - Validate that both enclaves are deployed successfully.
- View and manage enclaves in the Azure portal.
Before you begin
Complete Tutorial 1-1: Deploy a community before you start this tutorial. You need:
- An existing Azure Enclave community named
fabrikam. - A resource group named
myResourceGroupfor the enclave resource. - Permissions to create Azure Enclave resources in the target subscription and resource group.
- Access to the Azure portal.
For more information about enclave settings, see Create an enclave in the Azure portal and What is an enclave?.
Create enclaves using Azure Enclave
Before creating an enclave instance, you need a resource group. An Azure resource group is a logical container into which you deploy and manage Azure resources. Azure Enclave also creates managed resources for each enclave in a managed resource group.
Important
This tutorial uses myResourceGroup as a placeholder for the resource group name. If you want to use a different name, replace myResourceGroup with your own resource group name.
Enclave deployments can take around 30-45 minutes to complete. After deployment completes, open your enclave and verify that Status is Succeeded.
- In the
Azure Enclavepage, selectEnclavesin the left menu.

On the
Enclavespage, selectCreate.Enter the basic details for your first enclave:
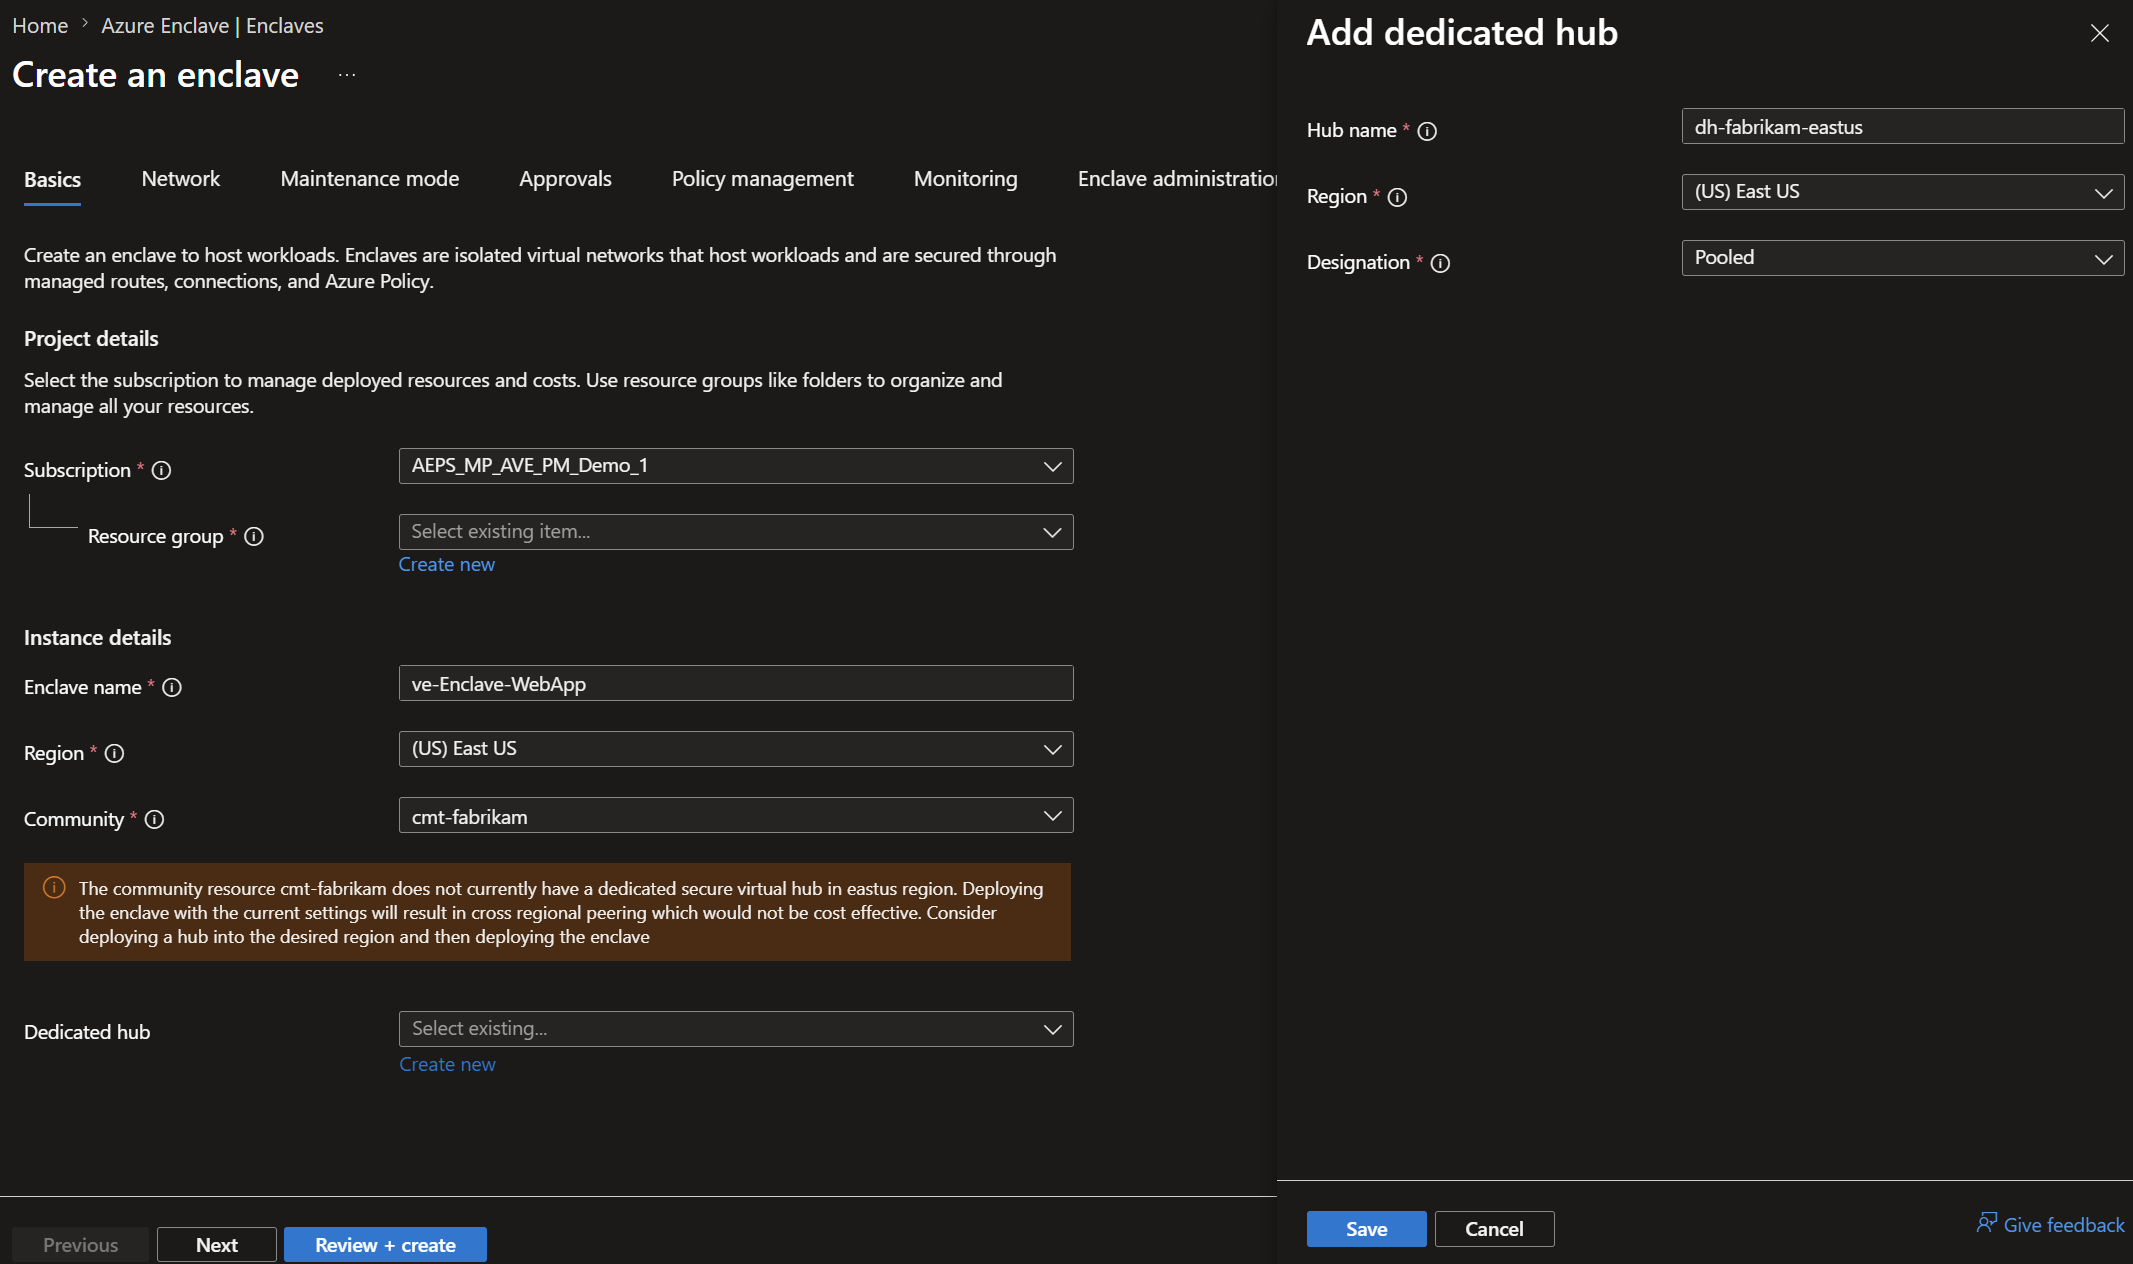
Subscription: Select an existing subscriptionResource Group:myResourceGroupEnclave name:ve-Enclave-WebAppRegion:East USCommunity: Select thefabrikamcommunity that you created in Tutorial 1-1: Deploy a community.Dedicated hub: SelectCreate newHub name: Enterdh-fabrikam-eastusand then selectSave
Create the enclave subnets:
Select
Nextand select+ Subnet.Create a subnet delegated to App Service:
Name:common-subnetSize:/26Delegate subnet to a service: SelectMicrosoft.Web/serverFarms

Select
Save.Create a second subnet for other resources:
Name:common-subnetSize:/26
Select
Save.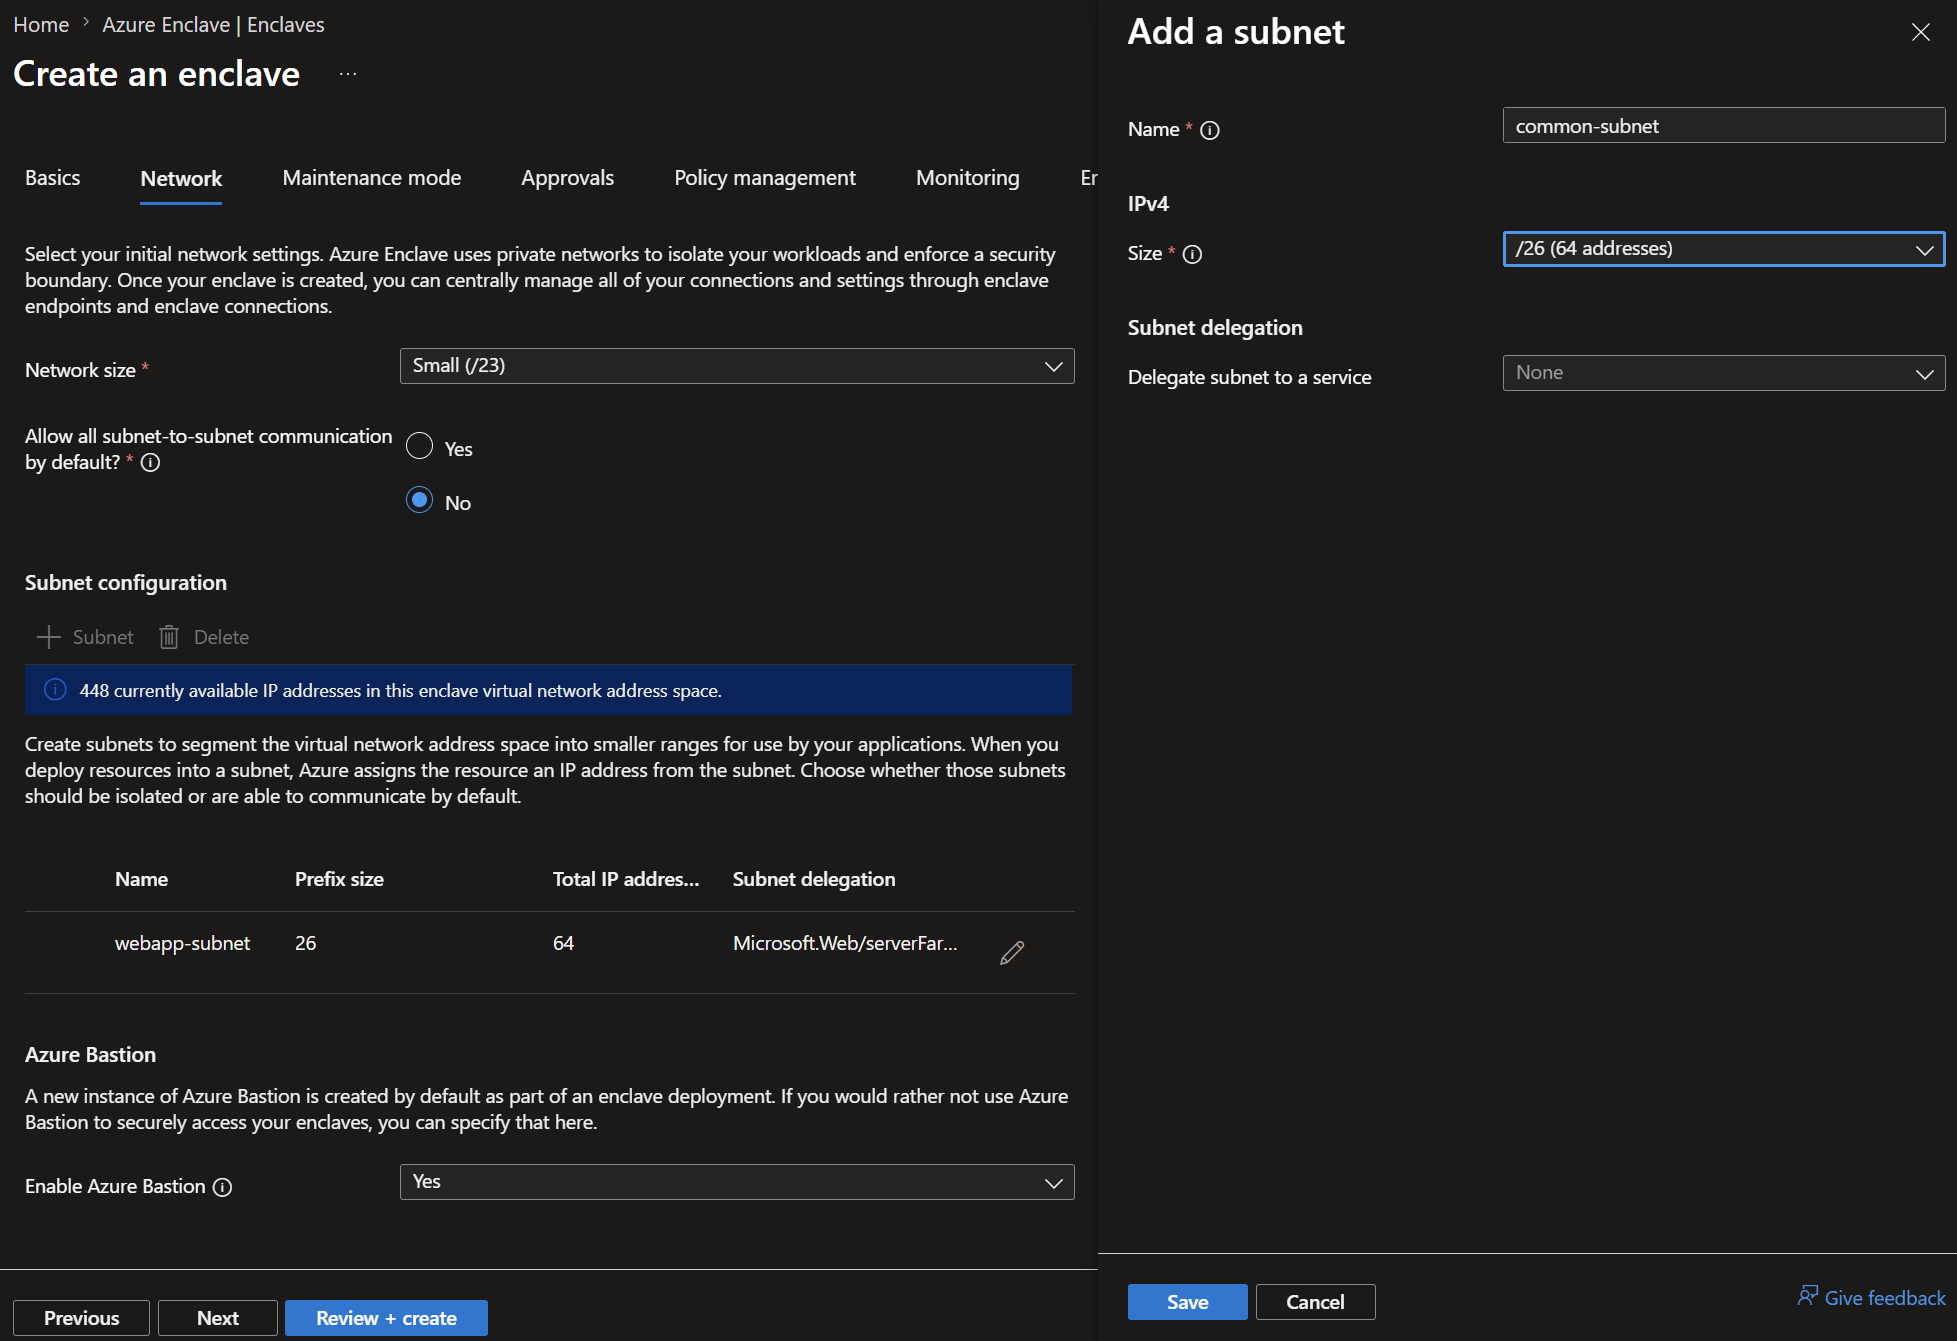
Select
Next.Enter the maintenance mode details for your first enclave:
Maintenance mode: SelectGeneralPrincipals: Select your nameJustification: SelectNetworking

In this tutorial, you don't change the approvals settings at the enclave review. For more options, see configure approvals article.
The policy management tab also shows the options as unavailable because at the community you didn't allow the enclave owners to override policy.
Select the
Enclave administrationtab.- Select
+. - For
Role, selectContributor. - For
Principals, selectChoose Microsoft Entra principaland select your name.
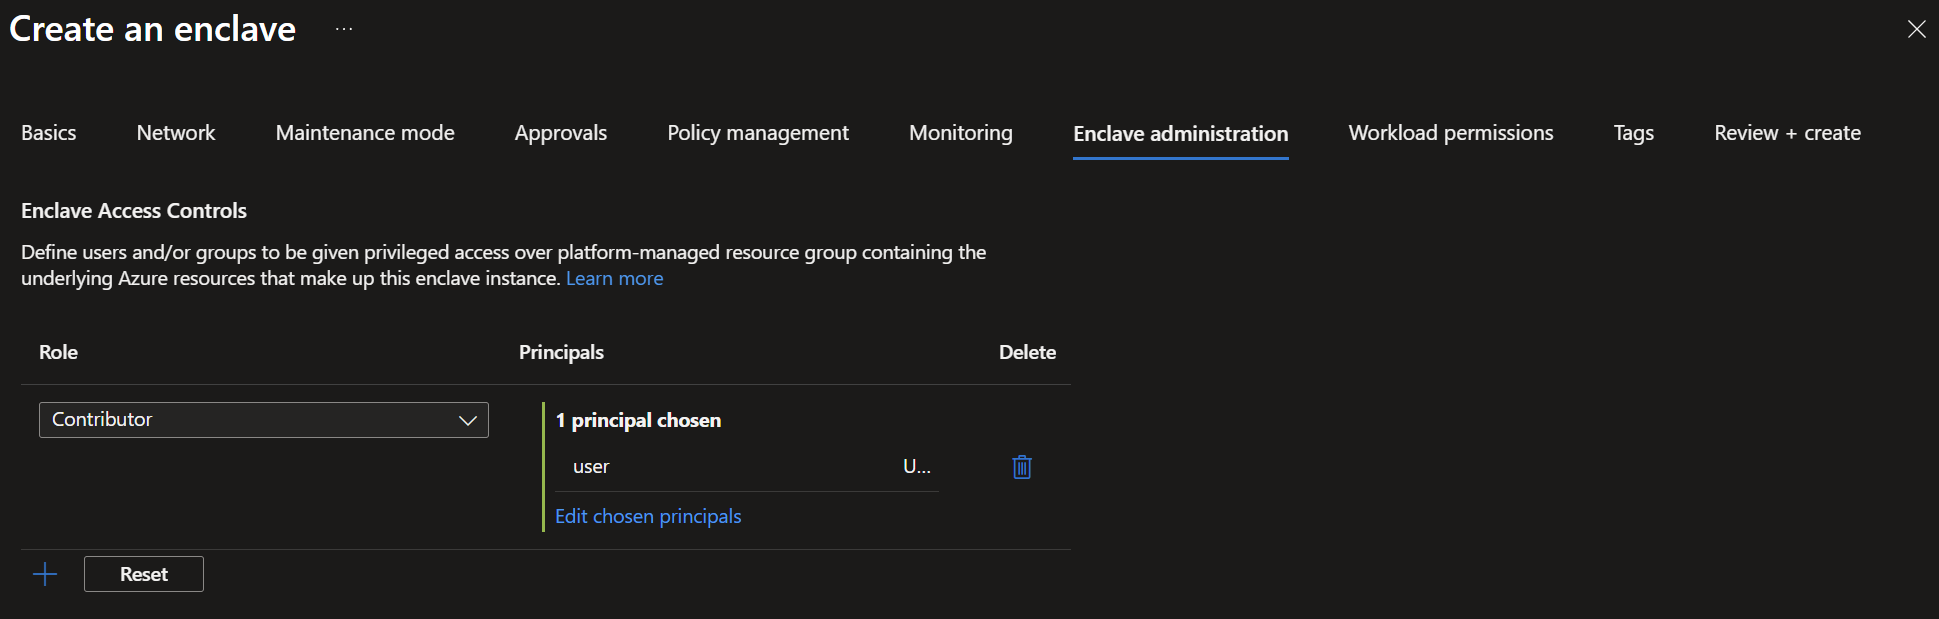
If you select the
Workload permissionstab, you see that workload permissions are inherited so you'recontributoron the enclave and that permission is inherited on the workloads too.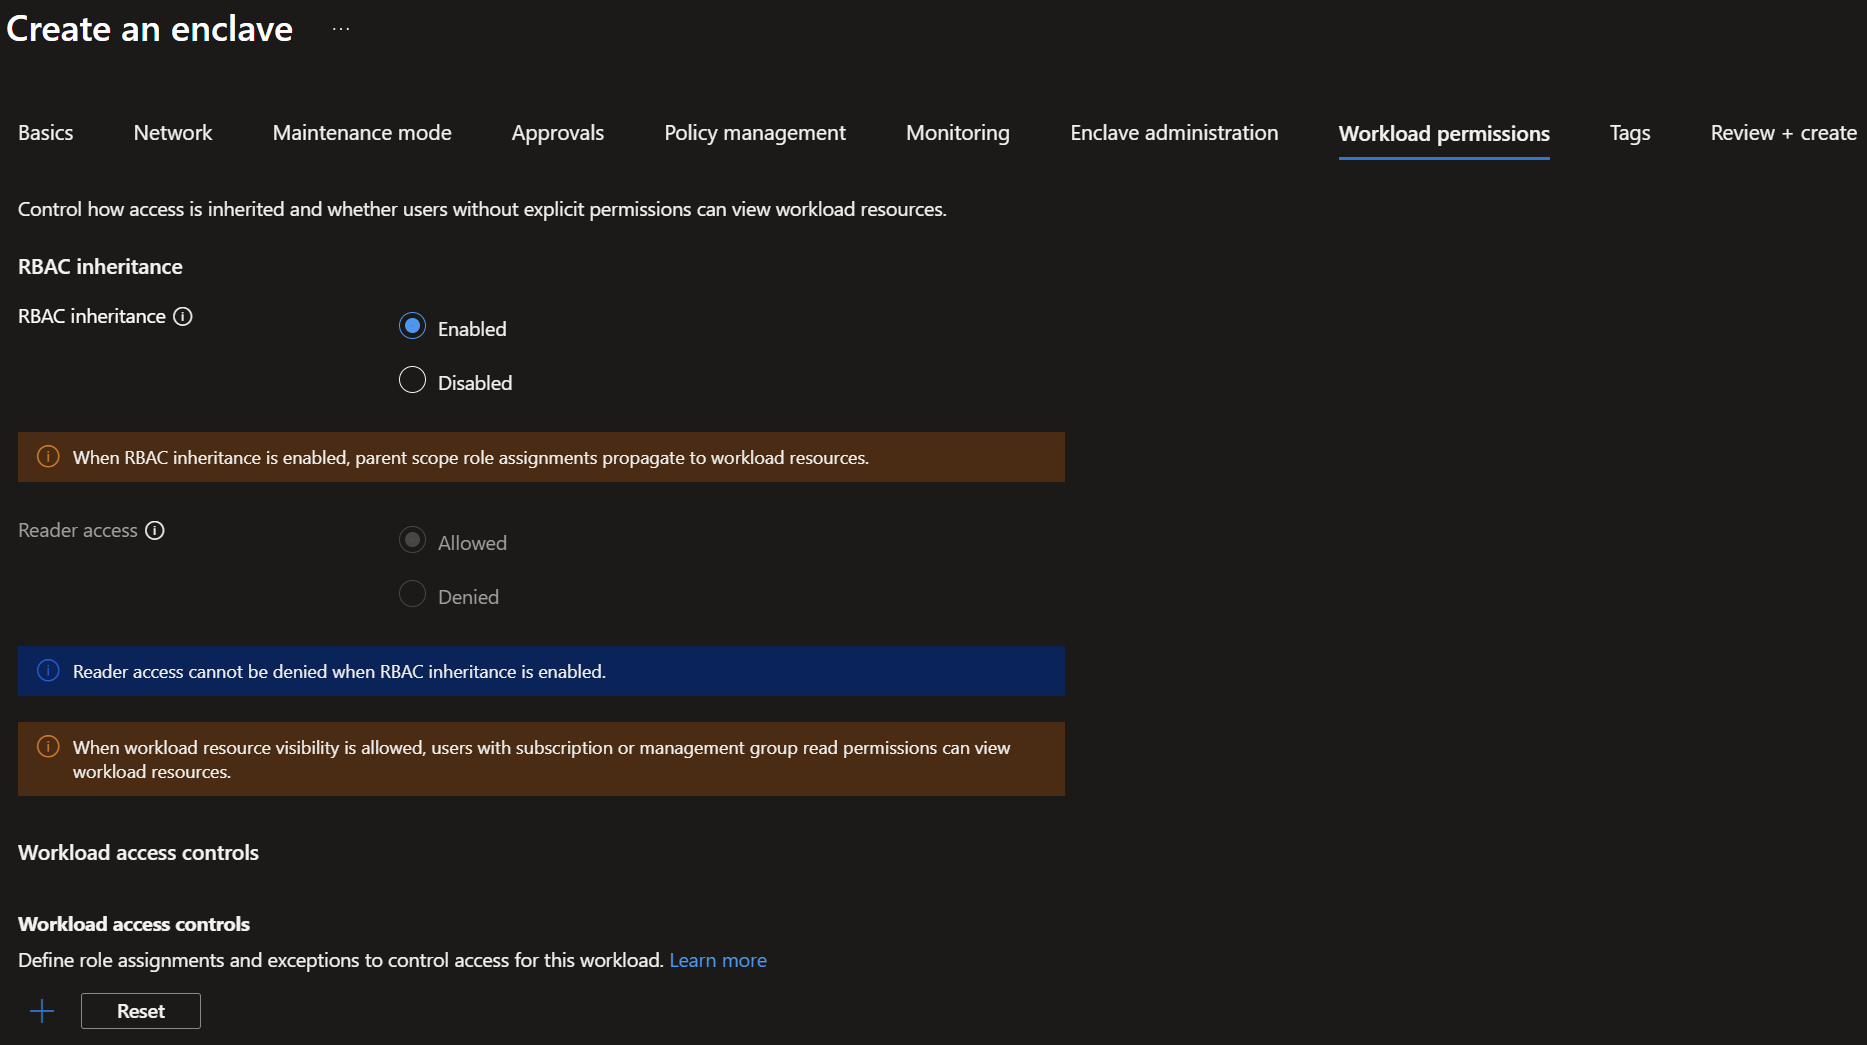
- Select
Select
Review + create, verify the settings, and then selectCreate.To deploy the second enclave, repeat steps 1 and 2. On the
Create enclavepage, enter these basic details:Subscription: Select an existing subscriptionResource Group:myResourceGroupEnclave name:ve-Enclave-DMZ.Region:East USCommunity: Select thecmt-fabrikamcommunity that you created in Tutorial 1-1: Deploy a community.Dedicated hub: Select the hub you already created nameddh-fabrikam-eastusand then selectSave.
Note
If the dedicated hub doesn't appear in the list, make sure the first enclave was created since that step creates the dedicated hub.
Keep the other settings as their defaults for this tutorial.
Select
Review + create, verify the settings, and then selectCreate.


Validate the deployment
After the enclave resources are created, you can view them in the Azure portal from the fabrikam community.

Confirm that:
Enclave-WebAppandEnclave-DMZappear on theEnclavespage.- Each enclave shows
StatusasSucceeded. - Each enclave is associated with the
fabrikamcommunity.
Select an enclave name to view and manage the enclave.

Clean up resources
If you're continuing to the next tutorial, keep both enclaves. The next tutorial uses these enclave resources.
If you don't need the resources from this tutorial, delete Enclave-WebApp and Enclave-DMZ from the Azure portal.
Next steps
In this tutorial, you created two sample enclaves by using the Azure portal. In the next tutorial, you learn how to create workloads within your enclave.