Note
Access to this page requires authorization. You can try signing in or changing directories.
Access to this page requires authorization. You can try changing directories.
An enclave is an isolated Azure Virtual Network that belongs to a community and hosts one or more workloads. Workloads in an enclave are isolated from other enclaves in the same community unless you explicitly enable connectivity by creating endpoints and connections.
In this how-to guide, you create an enclave in the Azure portal.
Prerequisites
- To access Azure Enclave, you need an Azure subscription. If you don't already have a subscription, create a free account before you begin.
- Before you can create an enclave, you must create a community using the Azure portal.
- If you use on-premises or custom DNS, plan how resources in the enclave resolve private endpoints for Azure Storage, Key Vault, and Log Analytics.
Sign in to Azure
Sign in to the Azure portal.
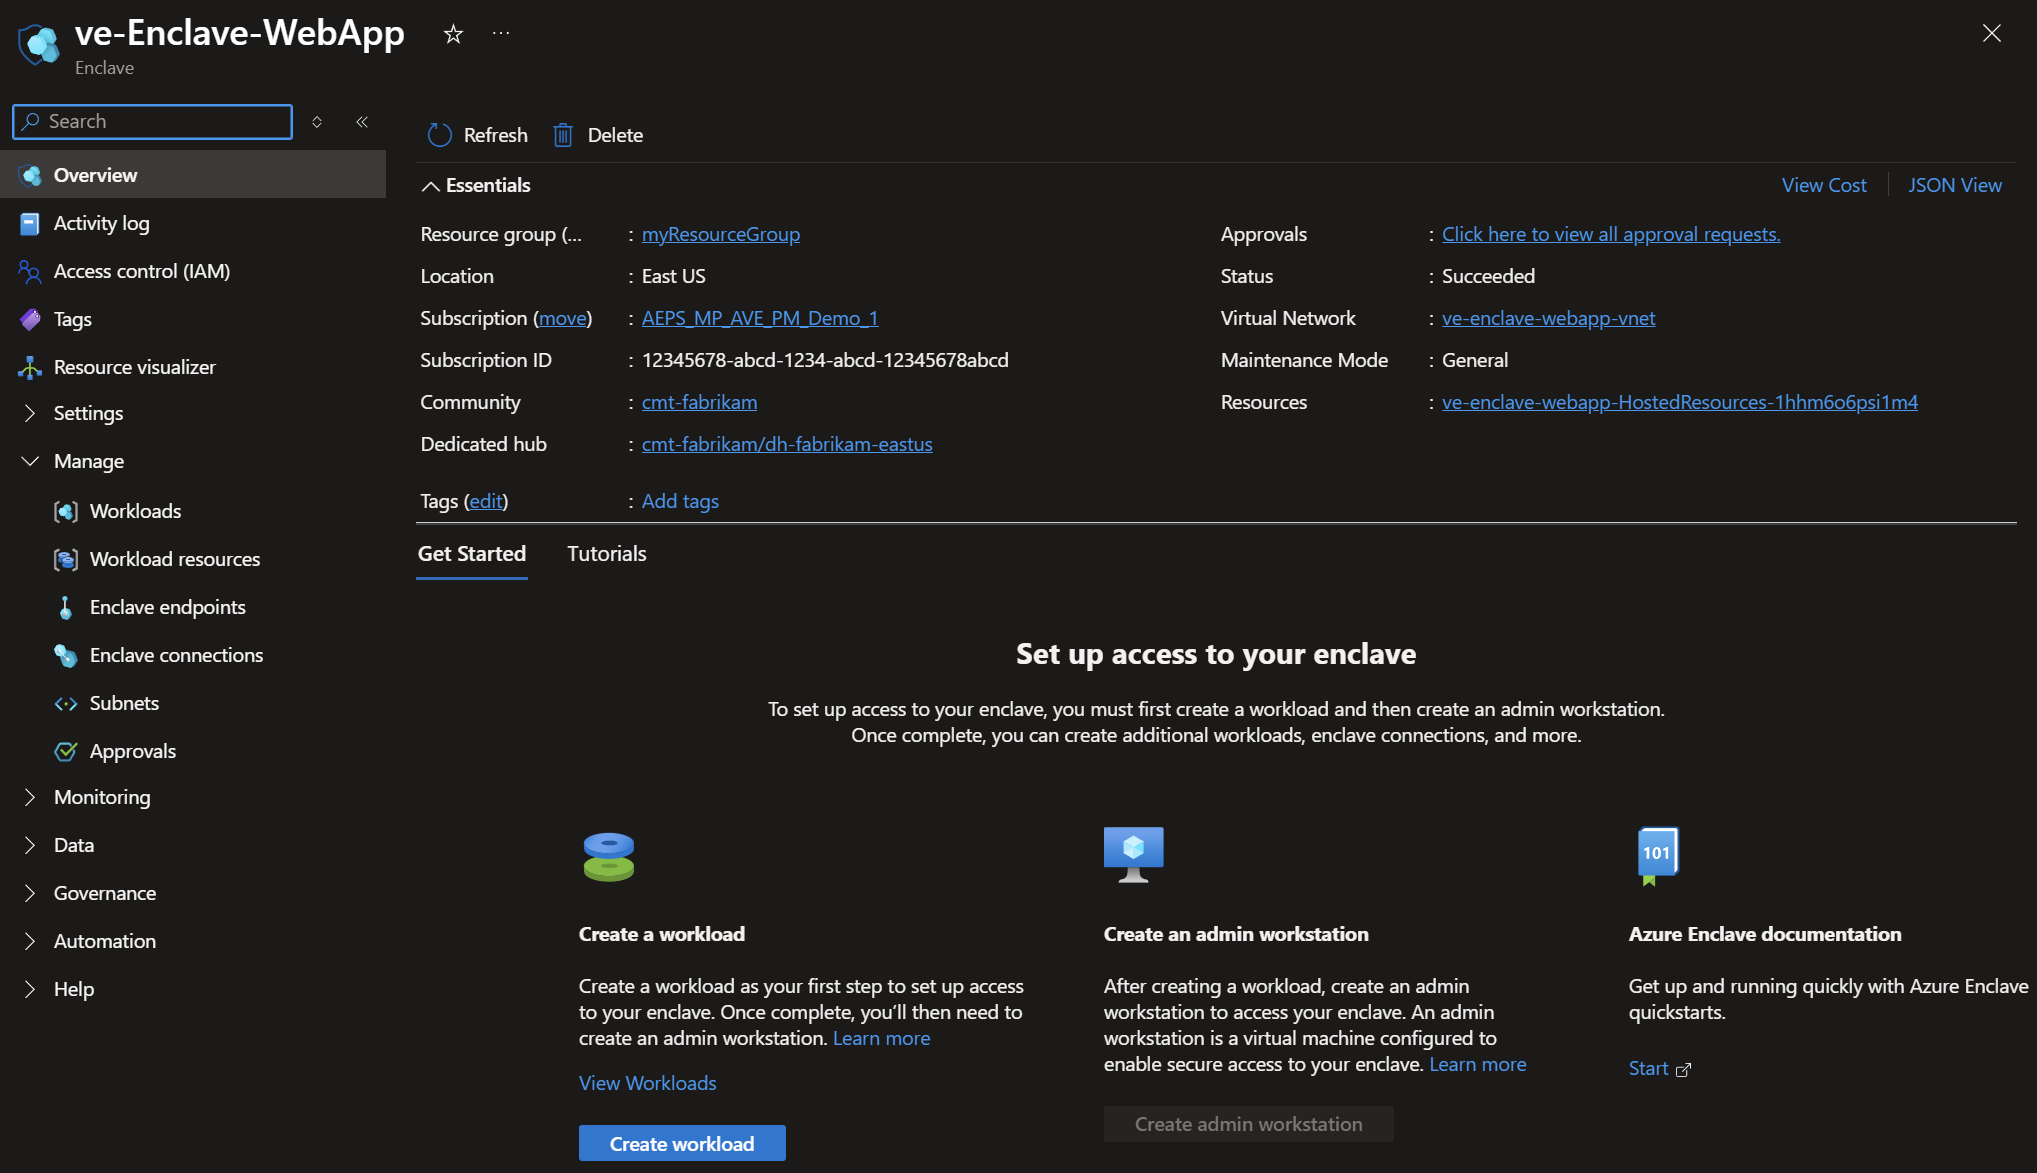
Create an enclave
Enclave deployments can take several minutes to complete. After deployment completes, open your enclave and verify that Status is Succeeded.
Enter
Azure Enclavein the search.Under
Services, selectAzure Enclave.In the
Azure Enclavepage, selectEnclavesin the left menu.
On the
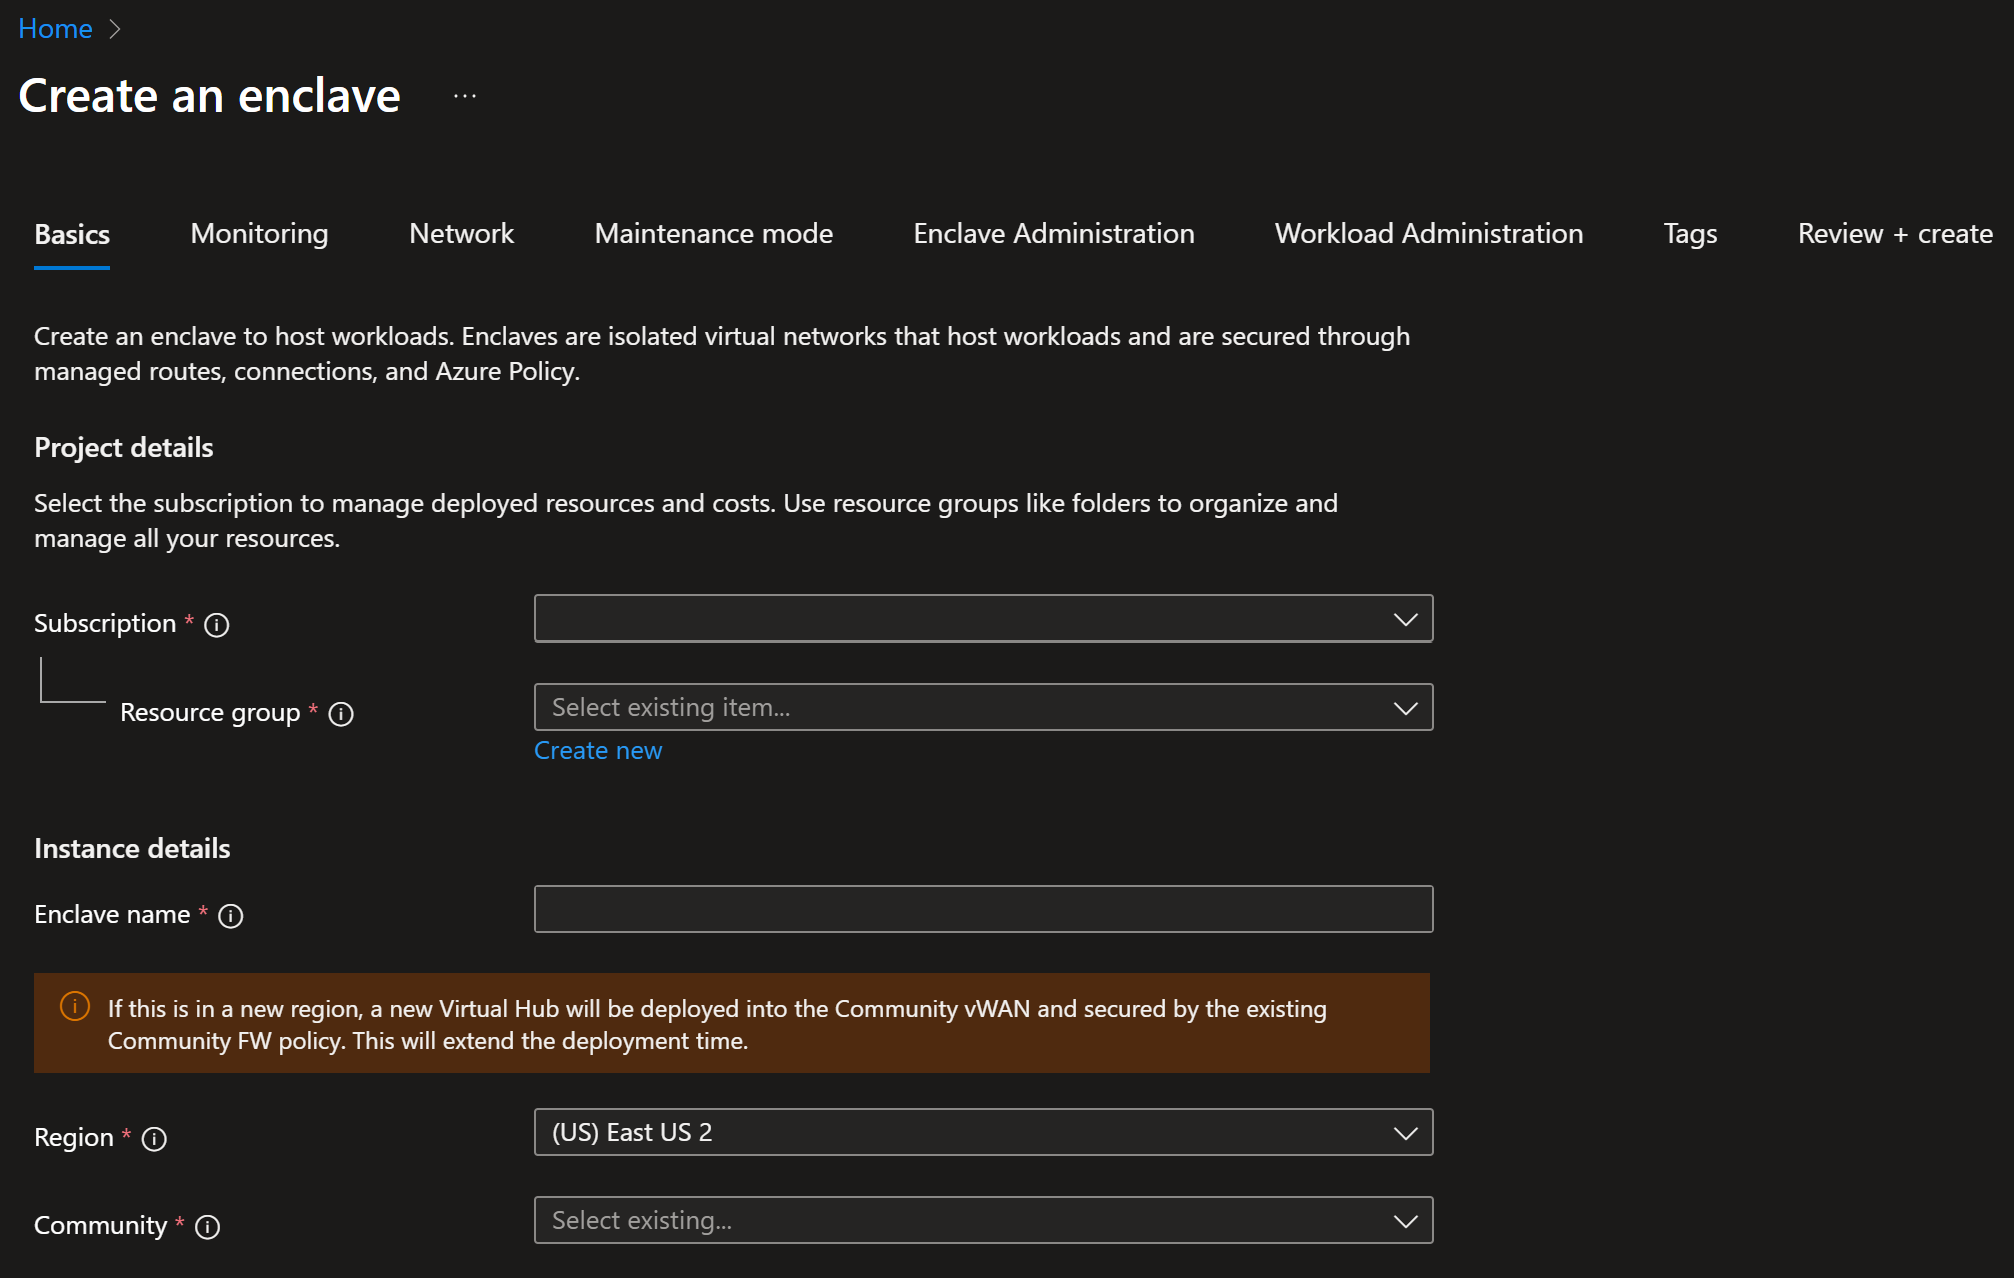
Enclavespage, selectCreate.Enter details for your enclave on the
Basicstab:Subscription: Select an existing subscription.Resource group: Create a new resource group or select an existing resource group.Enclave name: Enter a name for the enclave, for example,My-Enclave.Region: Select the Azure region where the enclave is created.Select a community: Select an existing community.Dedicated hub: Select the dedicated hub to use for this enclave.
Select
Next. On theNetworktab, select the network size, choose whether enclave subnet communication is allowed by default, create subnets, and enable Azure Bastion as needed. For planning guidance, see Azure Virtual Network concepts and best practices and Plan virtual networks.
Note
Azure Enclave automatically allocates the next best-fit block of network address space based on the existing networks allocated to the target community.
Select
Next. On theMaintenance modetab, choose whether to request maintenance mode when the enclave is created. Maintenance mode allows privileged changes to managed resources that are critical to enclave security. Learn more about maintenance mode.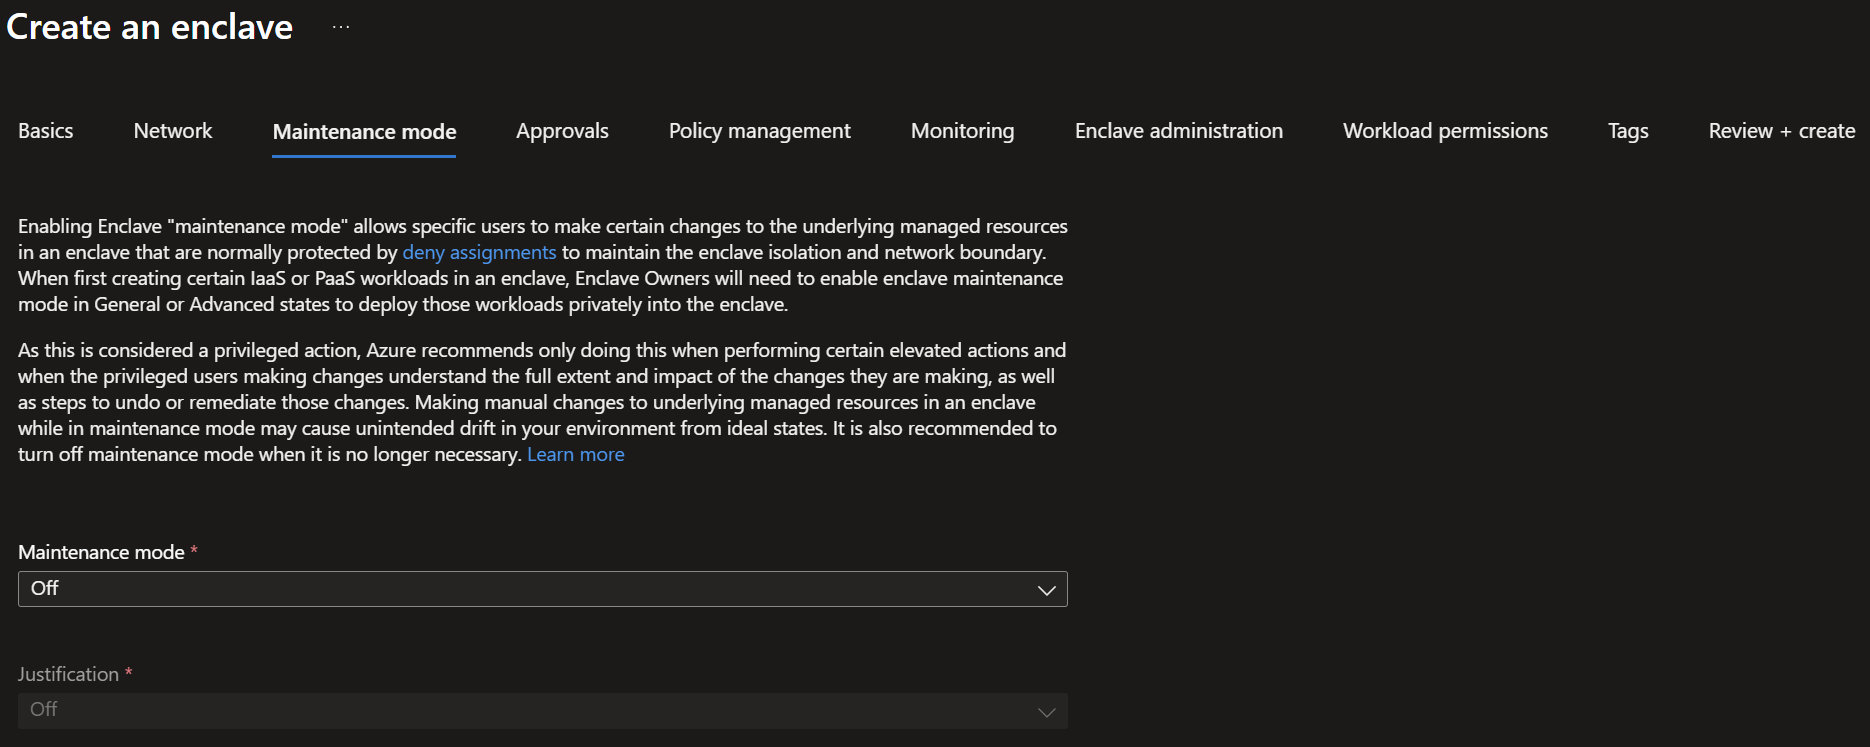
Select
Nextand on theApprovalstab, decide which approval settings to apply to your enclave.
Select
Nextand on thePolicy managementtab and customize your settings as needed.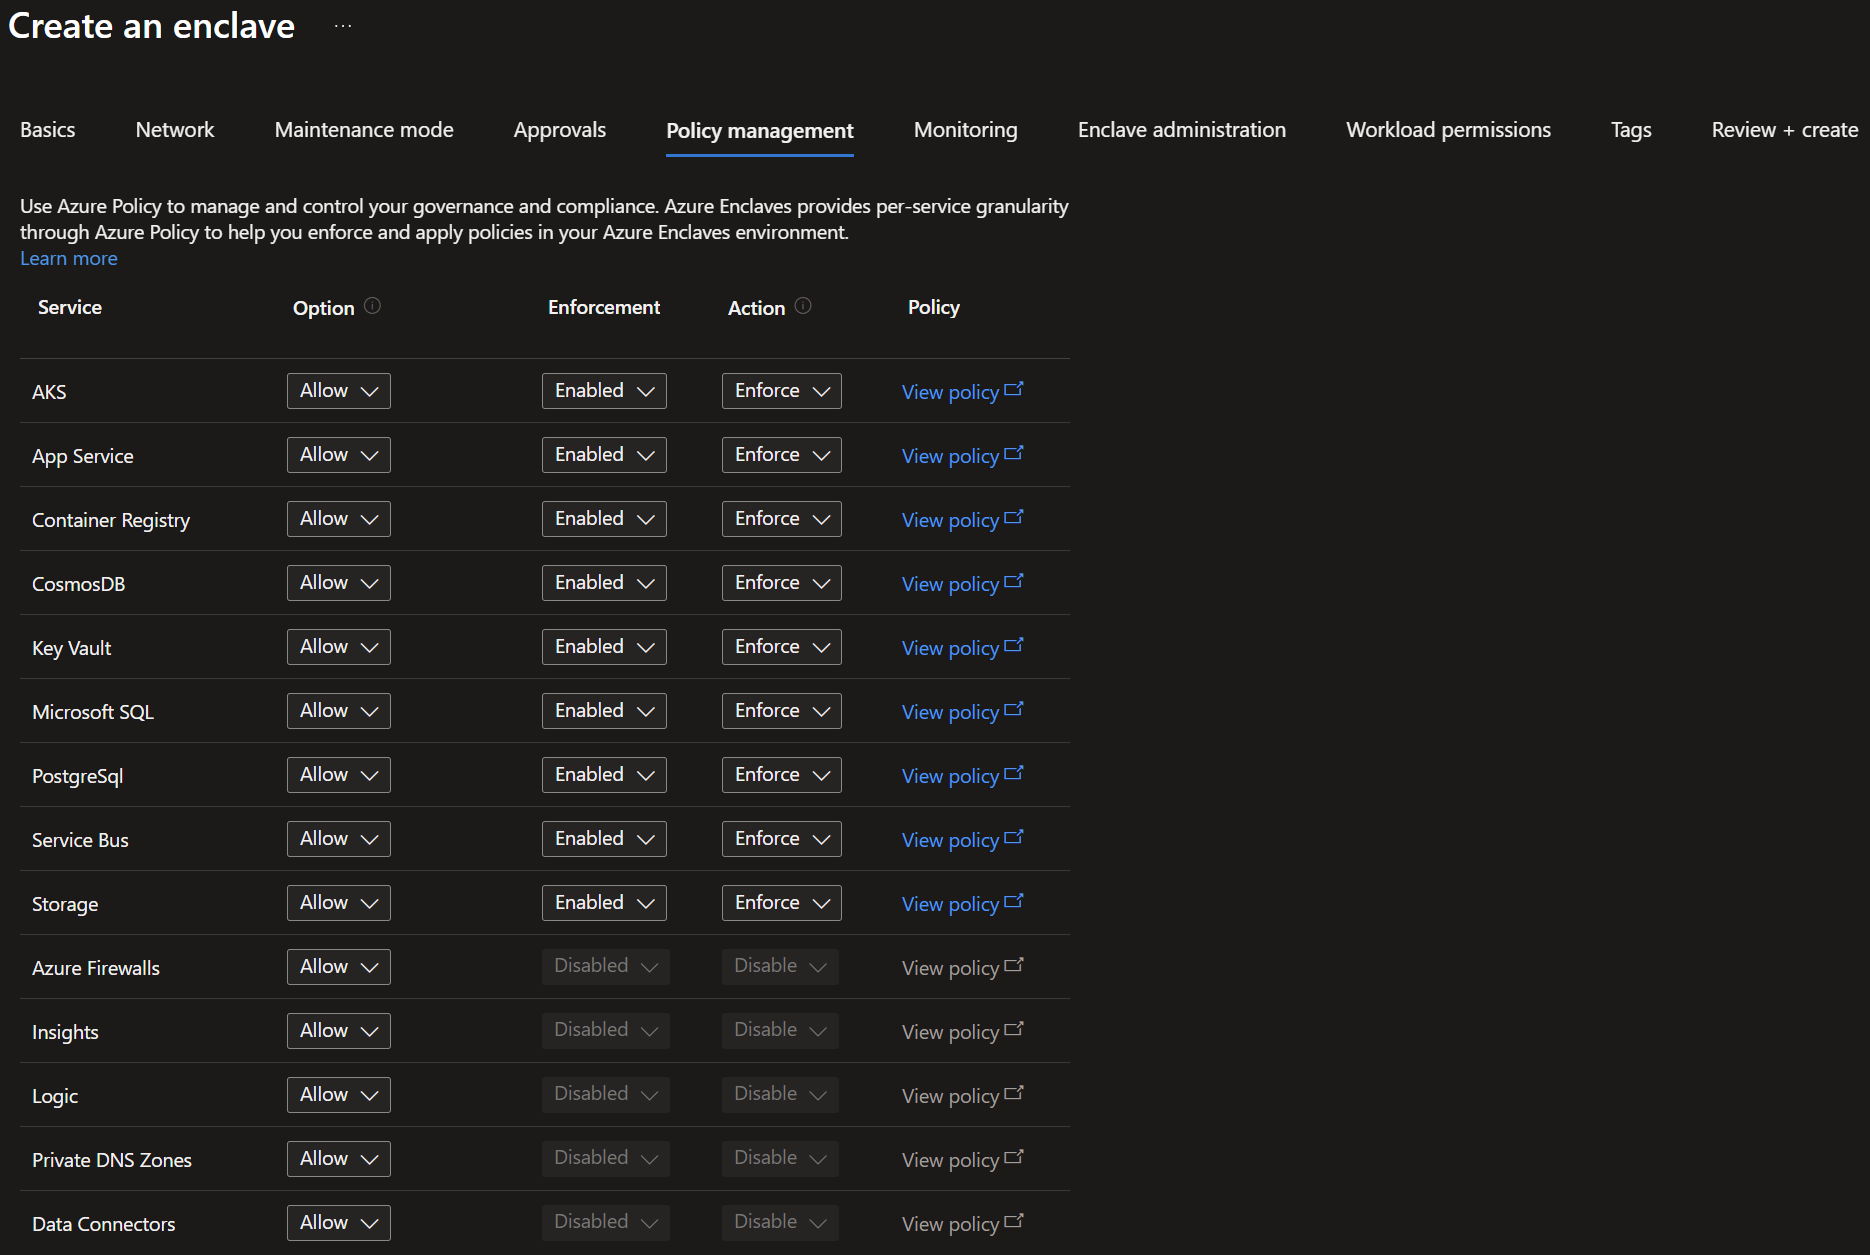
Select
Next. On theMonitoringtab, select where enclave logs are stored.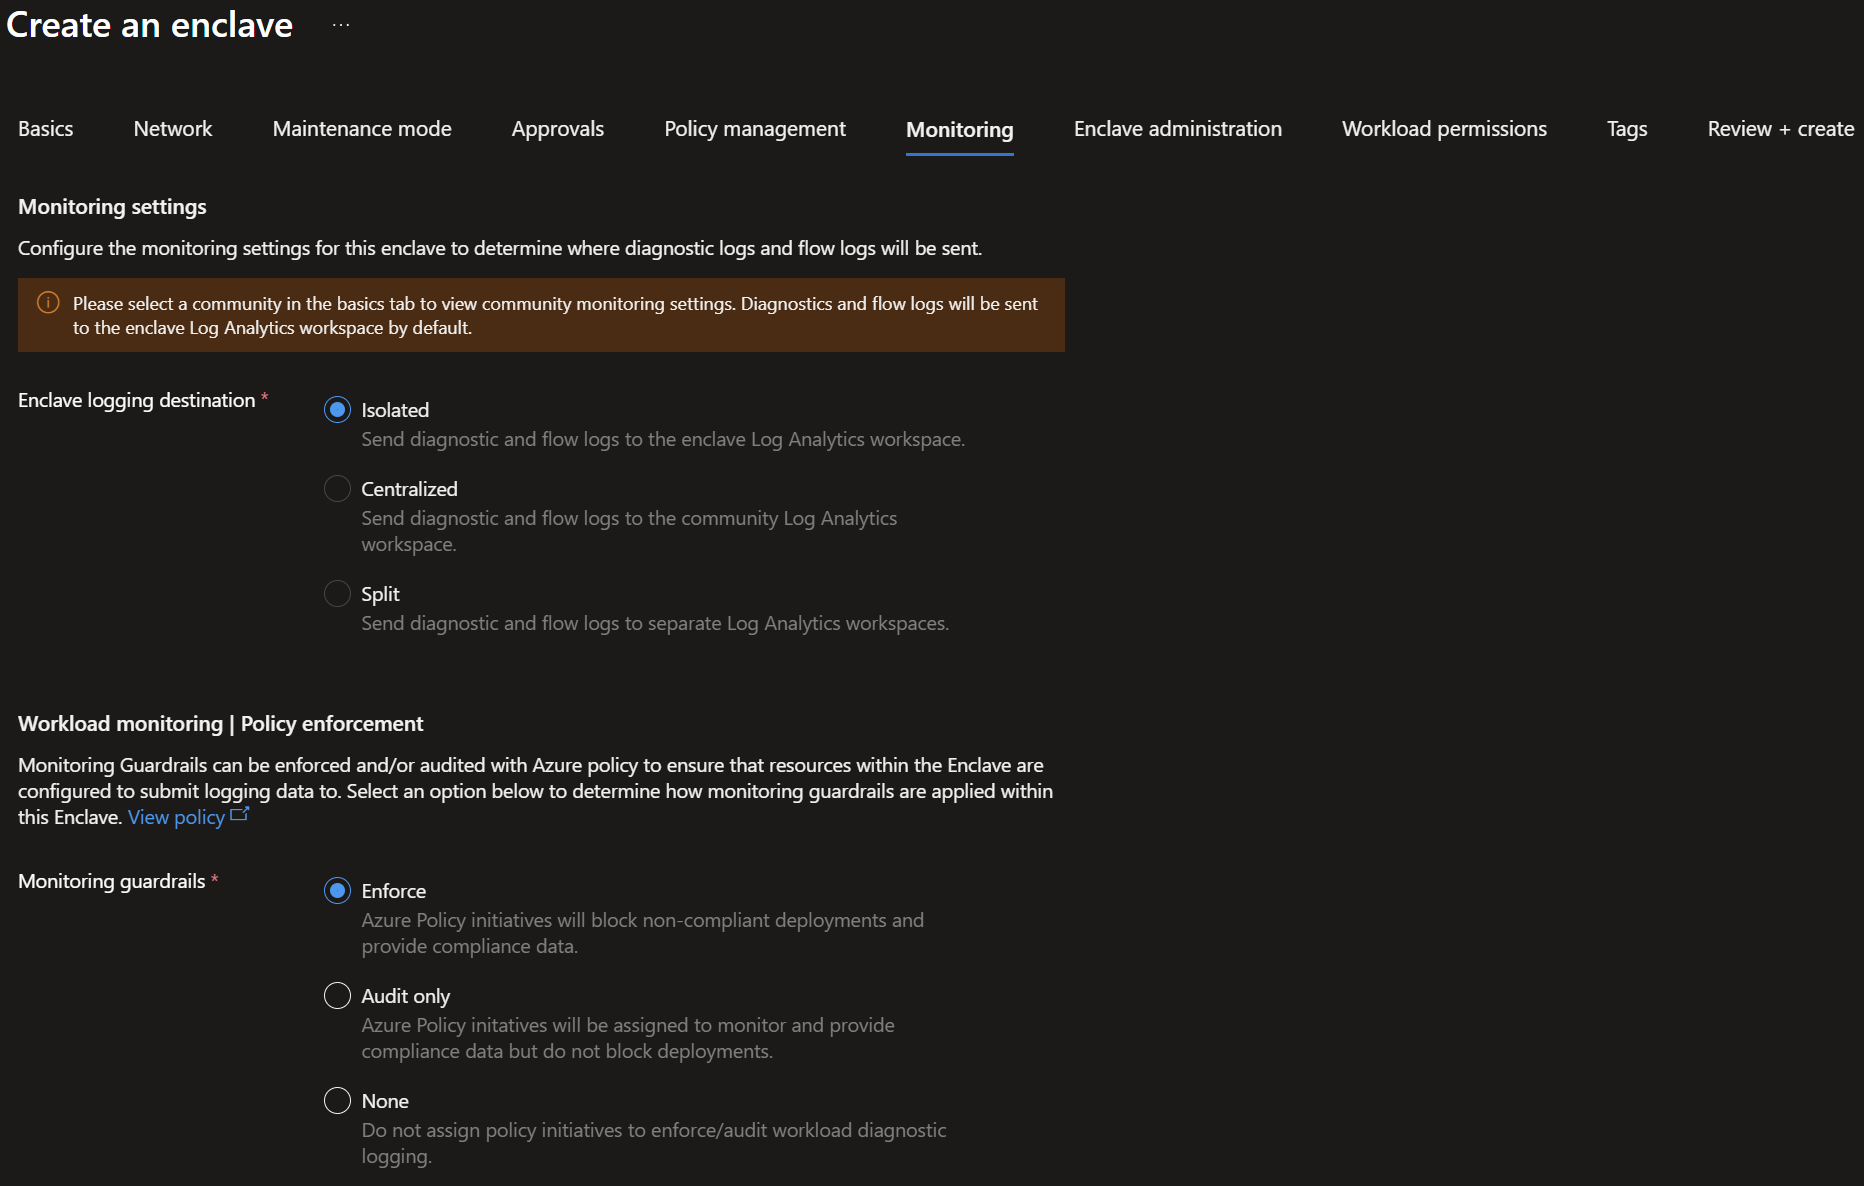
Select
Next. On theEnclave administrationtab, select the users and groups that should have privileged access to the managed resource group for the enclave.
Select
Next. On theWorkload permissionstab, select the users and groups that should have privileged access to workload resource groups that you create for their resources.RBAC Inheritance- Enabled: Standard Azure RBAC inheritance is enabled for Workload resources.
- Disabled: Only permissions defined under workload admin settings apply to workload resources.
Reader Access- Allowed: Standard RBAC inheritance is enabled for read permissions only over workload resources.
- Denied: Read access is denied unless explicitly defined under workload admin settings.
Workload Access Controls: Define role assignments and deny assignment exclusions over workload resource group(s).

Select
Next, and then create any tags for your enclave.Select
Next, and then selectReview + create, validate that the details for your enclave are correct, and then selectCreate.