Note
Access to this page requires authorization. You can try signing in or changing directories.
Access to this page requires authorization. You can try changing directories.
In this tutorial step, you add node types to your graph model. Node types represent entities in your data, such as customers, products, or orders. Later, you connect these node types with edge types to define relationships between them.
Adventure Works node mappings
In the Adventure Works data model, create a node type for each entity. The following table shows the node mappings. Use this information as the basis for node types in your graph:
| Node label | Source table | Key for mapping column |
|---|---|---|
Customer |
adventureworks_customers | CustomerID_K |
Employee |
adventureworks_employees | EmployeeID_K |
Order |
adventureworks_orders | SalesOrderDetailID_K |
ProductCategory |
adventureworks_productcategories | CategoryID_K |
Product |
adventureworks_products | ProductID_K |
ProductSubcategory |
adventureworks_productsubcategories | SubcategoryID_K |
VendorProduct |
adventureworks_vendorproduct | ProductID_FK |
Vendor |
adventureworks_vendors | VendorID_K |
Add node types to the graph
To add node types to your graph, follow these steps:
In your graph model, select Add node in the top ribbon to add a new node type to your graph.
In Create a node, enter a Node label name and select the appropriate Source table and Key for the mapping column.
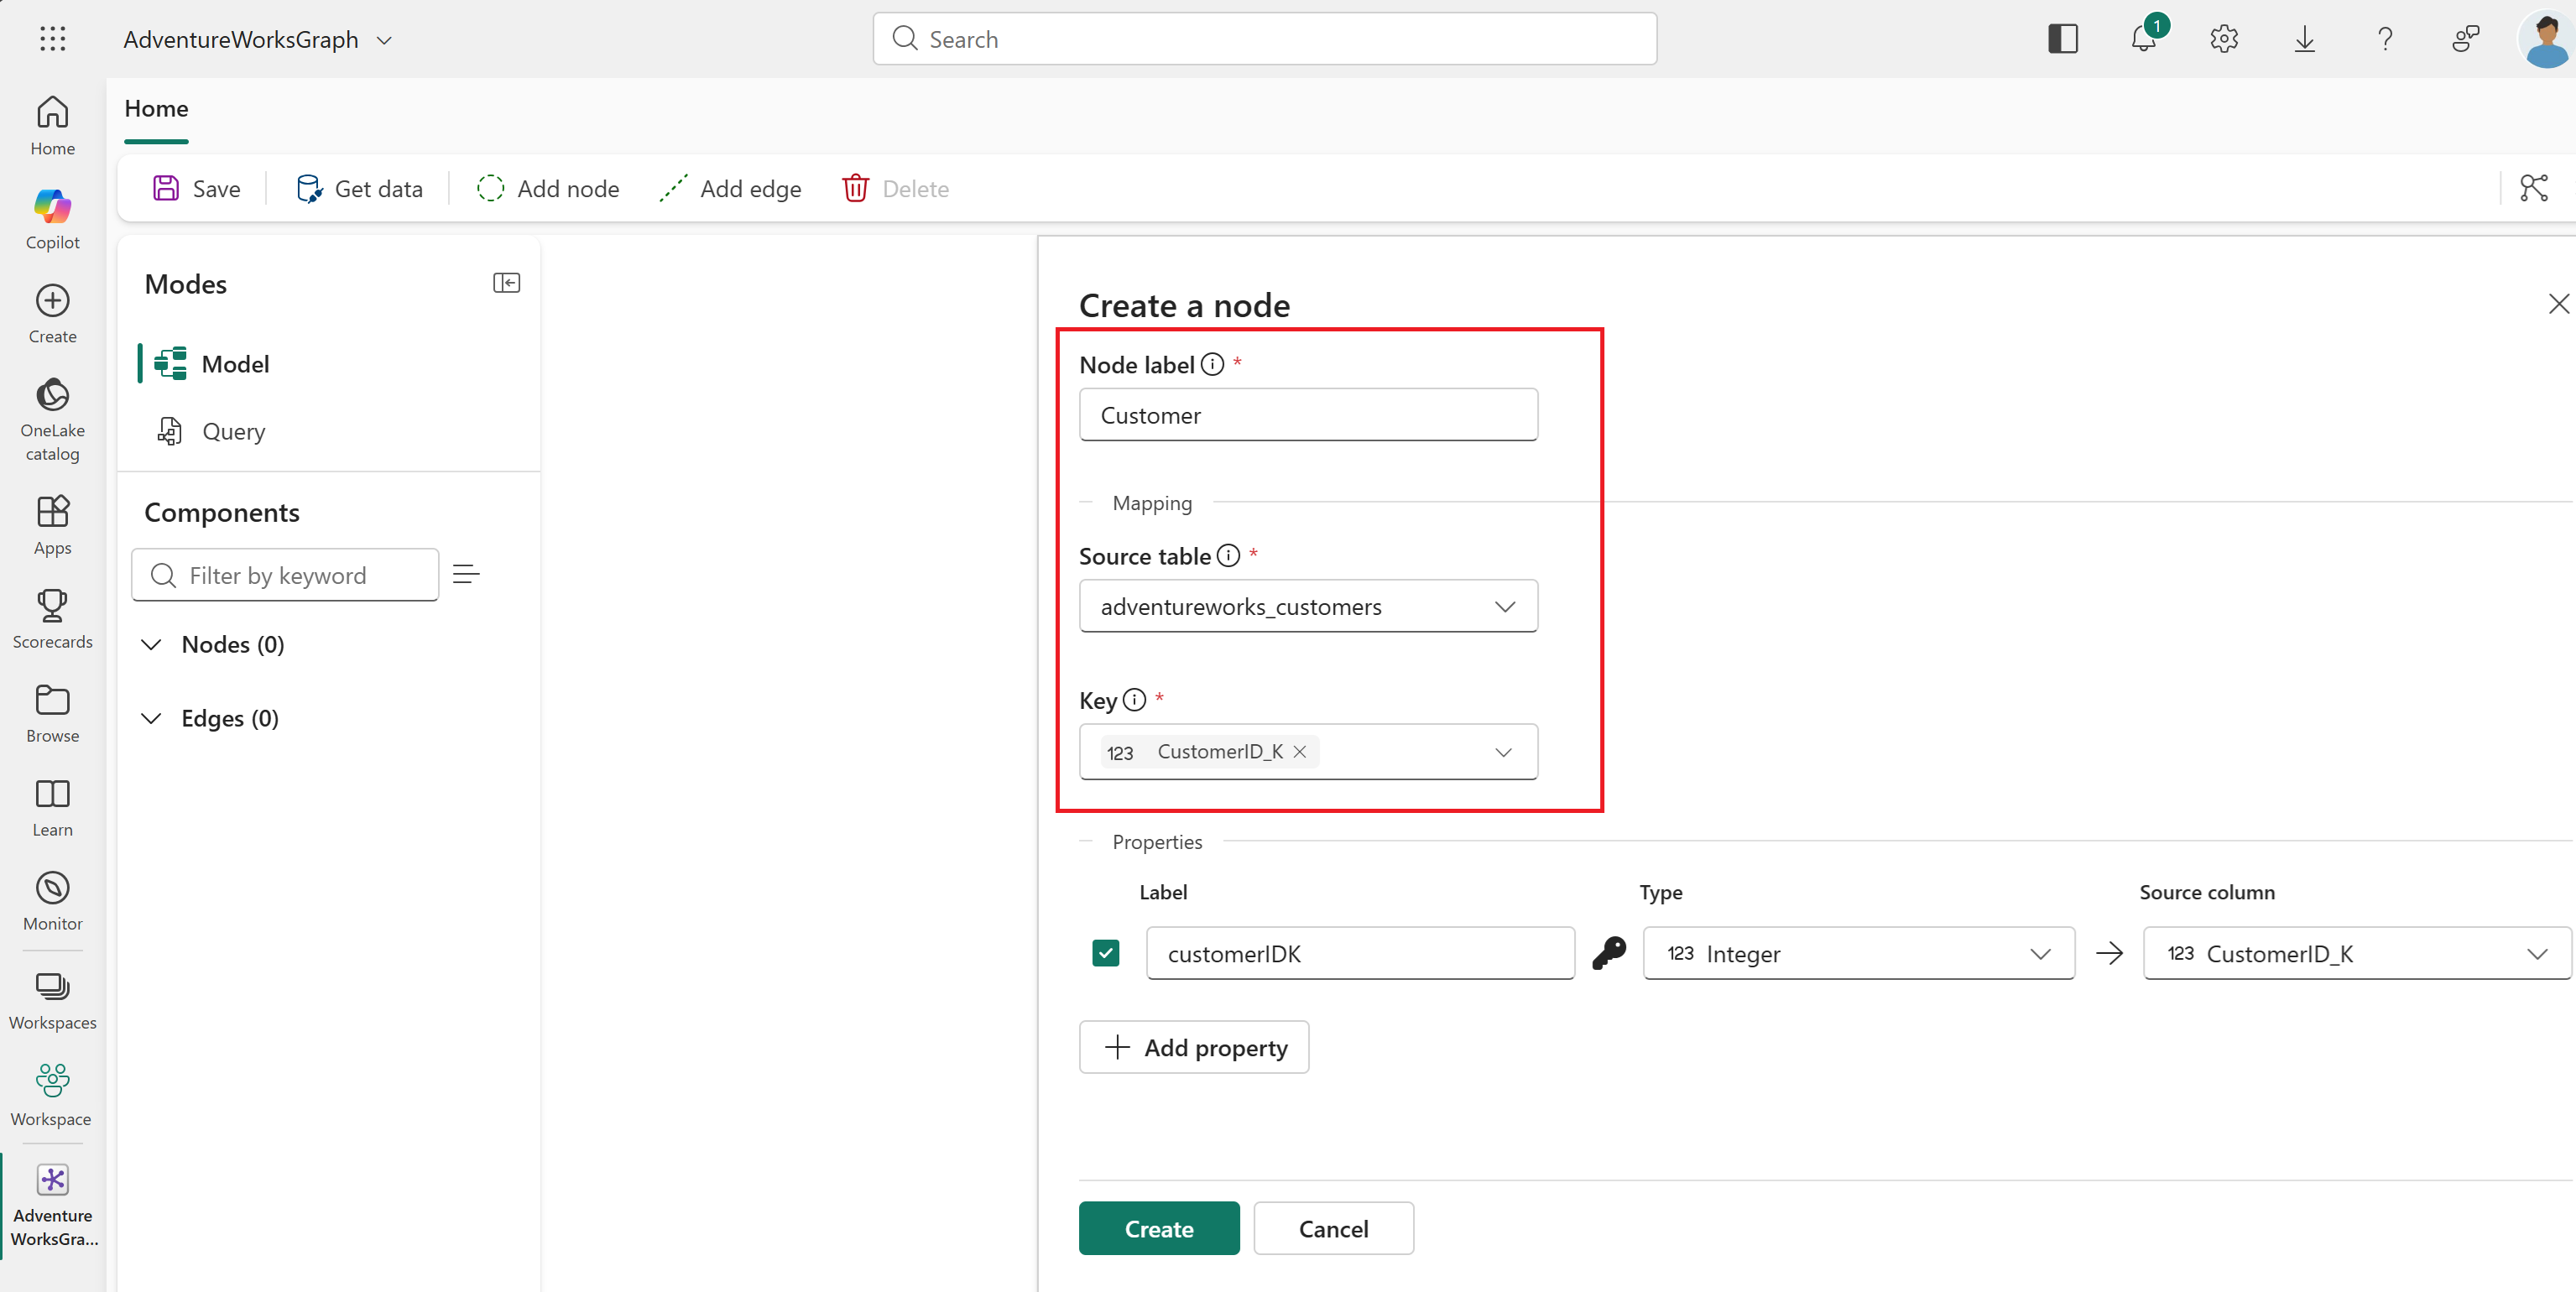
For example, for the first node, use these values:
- Node label:
Customer - Source table: adventureworks_customers
- Key of the mapping column:
CustomerID_K
Tip
You can set compound keys (IDs consisting of multiple columns). After you select a source table, choose the first key value from the Key dropdown menu. Then, use the dropdown menu again to add another key.
- Node label:
Select + Add property, Add all columns, and Apply. This step makes all columns in this source table available as properties for the node.
Select Create to add the node type to your graph.
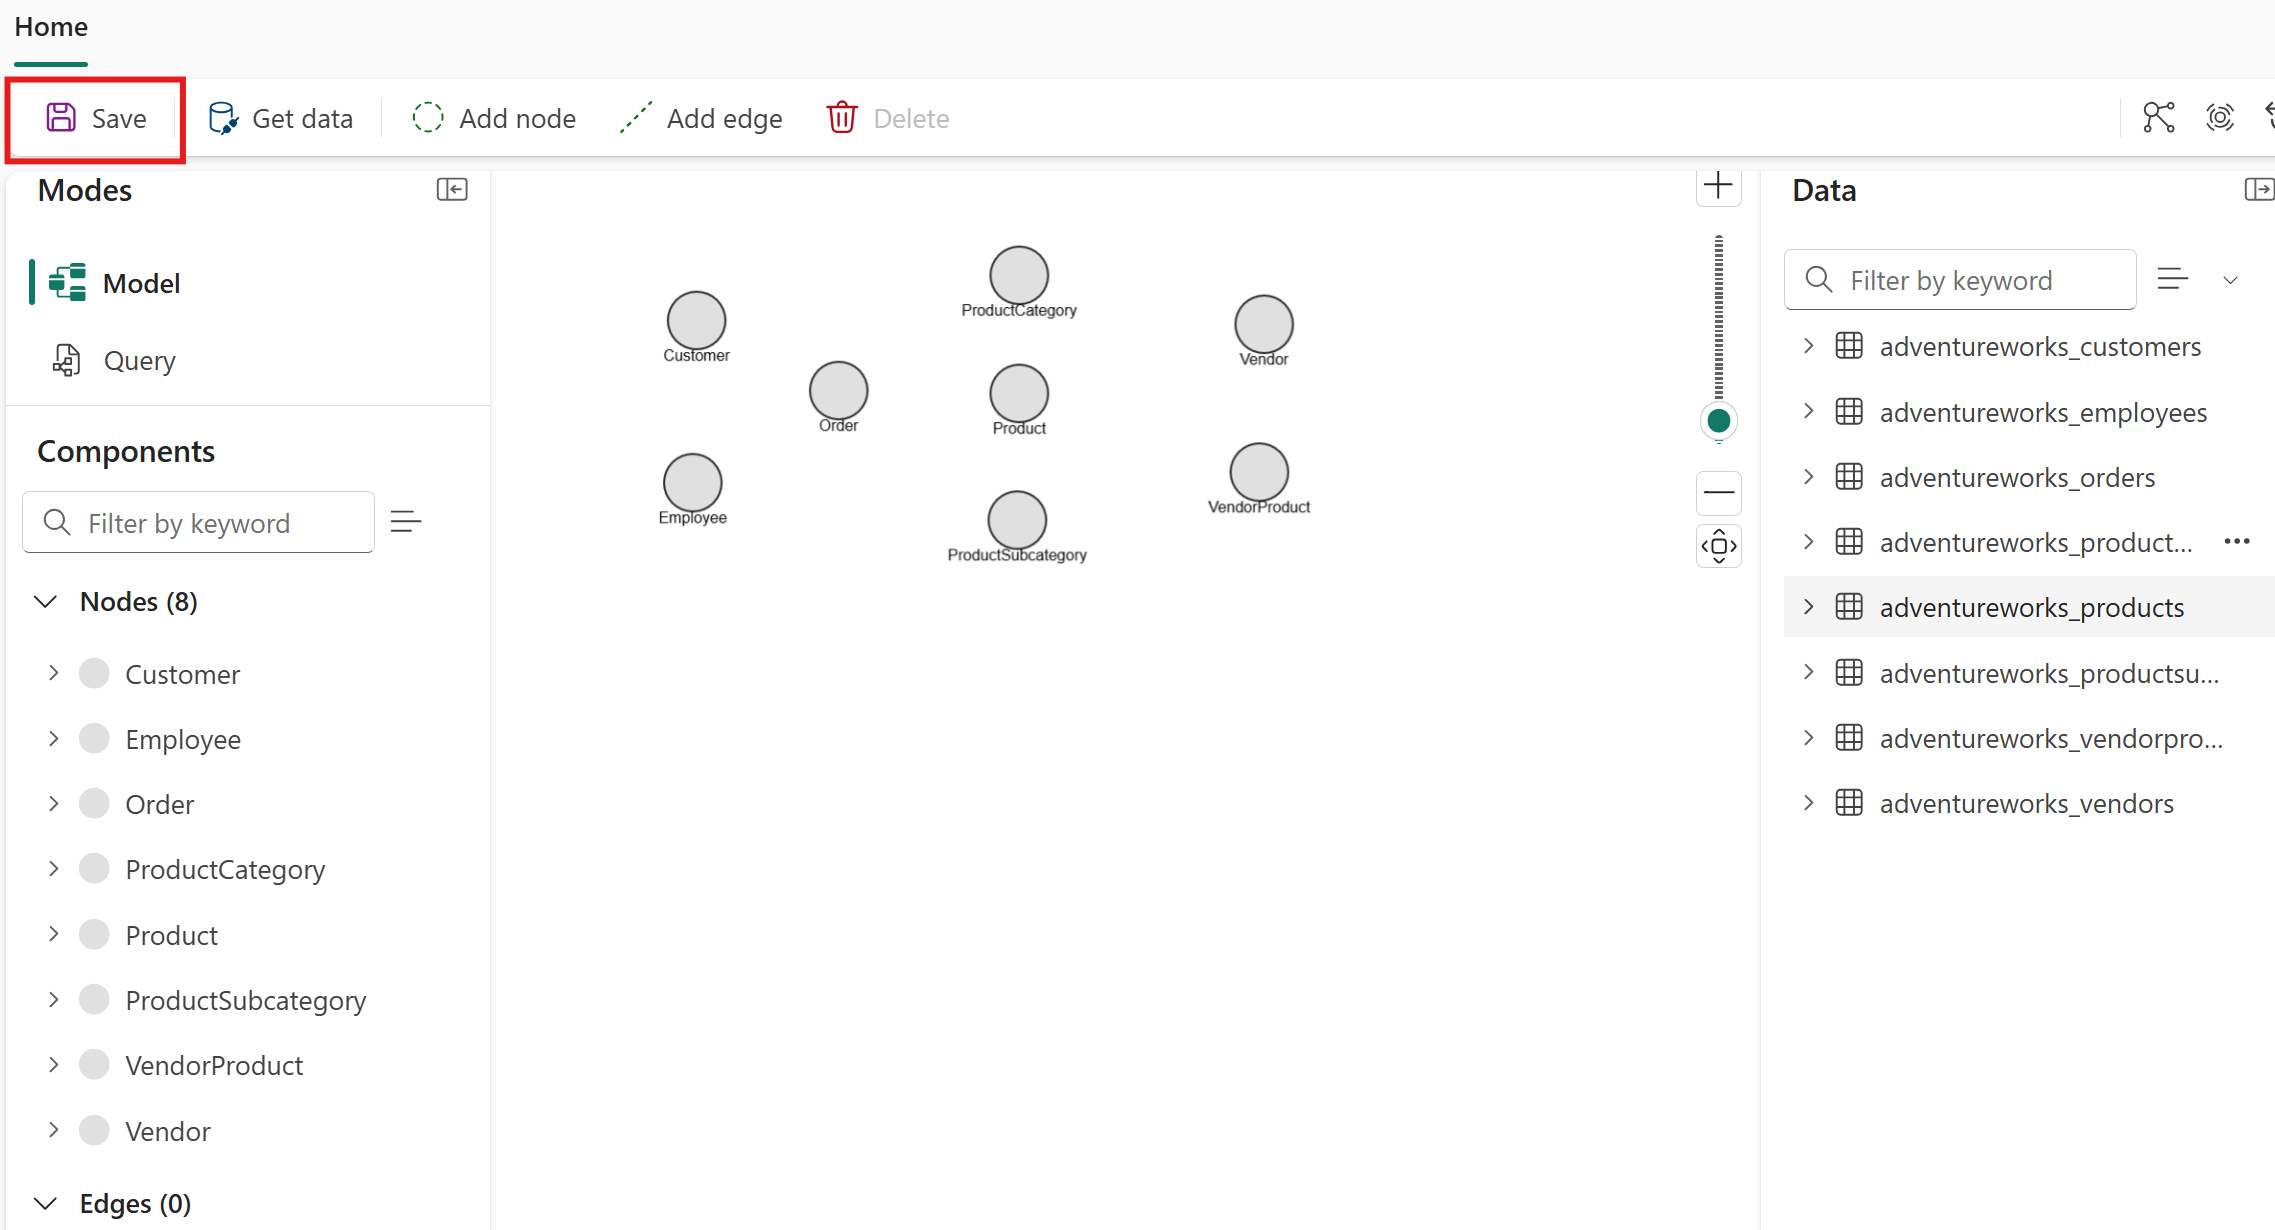
Repeat the steps in this section for all remaining node types listed in the Adventure Works node mappings table.
You see all eight node types represented in your graph. Select Save to save your progress.


Understand node properties
When you add a node type, determine what columns from the source table should be added as properties on that node type to make them available for queries, especially properties for which OneLake Security access rules have been applied to the underlying source table. Properties are added manually during node creation. In this tutorial, you added all properties on every node type. For general guidance on choosing which properties to keep or ignore, see Add node properties.
To view or edit the properties for a node type, double-click it in the graph model editor to open the node details. Later in the tutorial, you edit a node to remove a redundant property.

Important
Graph currently doesn't support schema evolution. After you create a graph model and load its data, any structural changes, such as adding or removing node types, edge types, and properties, require you to reload all data before querying the updated structure. To reload the data, select Save in the top ribbon. This data reload process takes time and consumes capacity, so plan your schema thoroughly before you start modeling.
After you add node types to your graph, add edge types to define the relationships between them.